Categories
Linux

Adding USB boot support on the Utilite nettop

More than a year or so, I have been the proud owner of a first generation Utilite ARM appliance. But the harsh Cyprus summer, hit it hard and the microSD circuit stop working. I could no longer boot alternative systems on microSD cards. All I was left with, was the stock system with an aging Ubuntu 12.04 ARM port.

Enter the U-Boot

Das U-Boot is a boot loader that targets mostly embedded systems. Many ARM appliances, including the Utilite, are using U-Boot to boot their OS.

I entered the U-Boot environment to do some checks about the mmc issue. To do that just press the ‘any‘ key when you see the following message:

Hit any key to stop autoboot:

Then type the following command in your U-boot terminal:

CM-FX6 # mmc info
Card did not respond to voltage select!

That message does not look very healthy! When I tried to insert a microSD card, I got this message repeatedly, in the U-Boot terminal:

EHCI timed out on TD - token=0x80008c80

The keyboard stopped responding and I had no other option than to force restart. I think now we have enough evidence to say that the microSD circuitry went FUBAR. At this point you should probably contact CompuLab for a replacement.

But this is not what I did. The appliance has 3 USB ports available, so why not use them? This will have the added benefit of USB devices being more accessible, than the hard to access microSD slot.

Well, the original U-Boot image that the Utilite was shipped with, did not had USB boot support. This has long changed and the nice folks at CompuLab have built a newer version that supports booting from USB storage devices.

Upgrading U-Boot

First download the most recent U-Boot updater on your Utilite appliance:

$ wget http://utilite-computer.com/download/utilite/u-boot/utilite-updater.tar.bz2

Check the MD5 sum:

$ echo a79e492f3eb626c770c5185cda0edfec ; md5sum utilite-updater.tar.bz2 
a79e492f3eb626c770c5185cda0edfec
a79e492f3eb626c770c5185cda0edfec  utilite-updater.tar.bz2

Extract the archive:

$ tar xvjf utilite-updater.tar.bz2

Run the updater:

$ sudo ./utilite-bootloader-update.sh 

CompuLab CM-FX6 (Utilite) boot loader update utility 2.2 (Feb 8 2015)

>> Checking for utilities... 
>> ...Done 
>> Checking that board is CM-FX6 (Utilite)... 
>> ...Done 
Please input firmware file path (or press ENTER to use "cm-fx6-firmware"): 

Just press ‘Enter’ after the above prompt. Then answer ‘Yes’ (y) to the following questions:

>> Looking for boot loader image file: cm-fx6-firmware 
>> ...Found 
>> Looking for SPI flash: mtd0 
>> ...Found 
>> Current U-Boot version in SPI flash: U-Boot 2014.10-cm-fx6-2.1 (Jan 19 2015 - 11:28:10) 
>> New U-Boot version in file:      U-Boot 2014.10-cm-fx6-2.1 (Jan 19 2015 - 11:28:10) (500K) 
>> Proceed with the update? 
1) Yes
2) No
#? <strong>y</strong>  
** Do not power off or reset your computer!!! 
>> Erasing SPI flash... 
Erasing 4 Kibyte @ bf000 -- 100 % complete 
>> ...Done 
>> Writing boot loader to the SPI flash... 
.........................
>> ...Done 
>> Checking boot loader in the SPI flash... 
.
>> ...Done 
>> Boot loader update succeeded!

** Resetting U-Boot environment will override any changes made to the environment! 
>> Reset U-Boot environment (recommended)? 
1) Yes
2) No
#? y
>> U-boot environment will be reset on restart. 
>> Done!

Then reboot the appliance:

$ sudo reboot

It is a good idea to keep a backup of the original U-Boot configuration for future reference:

$ sudo fw_printenv > utilite.uboot.orig

Enhancing the USB boot setup

If you study the above U-Boot setup you will find that the USB config works only if you have an option boot.scr script under the first partition of your USB. This excludes USB drives with only the uImage file. That means that you cannot even boot the Utilite SSD installer if you burn it on USB, since it does not have a boot.scr script.

I’ve been playing around with the U-Boot environment and I came out to this configuration:

setenv bootcmd run setupmmcboot;mmc dev ${storagedev};if mmc rescan; then run trybootsrz;fi;run setupusbboot;if usb start; then if run loadscript; then run bootscript;else run usbbootargs;if run loadkernel; then run doboot;else setenv bootargs;fi;fi;fi; run setupsataboot;if sata init; then run trybootsmz;fi;run setupnandboot;run nandboot;
setenv usbroot /dev/sdb2
setenv usbrootdelay=1
setenv usbbootargs=setenv bootargs root=${usbroot} rootdelay=${usbrootdelay}

If you don’t want to configure the above commands manually, you can download my custom U-boot environment updater and the patch I prepared:

Download the U-Boot environment update shell script:

$ wget https://raw.githubusercontent.com/theodotos/arena/master/u-boot/u-boot-update-env.sh
$ chmox +x u-boot-update-env.sh

Download the U-boot custom configuration:

$ wget https://raw.githubusercontent.com/theodotos/arena/master/u-boot/setup-usb-boot-utilite.uboot

Now load the custom configuration into the U-Boot environment:

$ sudo ./u-boot-update-env.sh setup-usb-boot-utilite.uboot

If something goes wrong you can restore your original configuration using the original configuration we saved earlier:

$ sudo ./u-boot-update-env.sh utilite.uboot.orig

The U-Boot environment updater will also create a backup file, with the current U-Boot environment configuration, just before the update:

$ ls *.bak
u-boot_env-3366.bak

Test with the Utilite SSD installer

Now it is time to test our new configuration.

First download the SSD installer:

$ wget http://utilite-computer.com/download/utilite/installer/cl-installer_utilite-2_kernel-6.3_2014-12-17.img.xz

Check the MD5 sum:

$ echo 82eeb54c4d5245c60fd82c3e983d10e9 ; md5sum cl-installer_utilite-2_kernel-6.3_2014-12-17.img.xz
82eeb54c4d5245c60fd82c3e983d10e9
82eeb54c4d5245c60fd82c3e983d10e9  cl-installer_utilite-2_kernel-6.3_2014-12-17.img.xz

Extract it:

$ unxz cl-installer_utilite-2_kernel-6.3_2014-12-17.img.xz

This will extract a cl-installer_utilite-2_kernel-6.3_2014-12-17.img image file in the working directory.

Now comes the tricky part. We will load the image in a USB device. Make sure you choose the correct device! The dd tool we are using below, is a heartless beast that will chew the data out of every device you select in its of= flag. If by mistake you give your internal disk instead of the USB, you will lose your partitions and data! You have been warned!

So after you select a USB (one that does not have any data you need) insert it in your Linux workstation. Then try the following check to find out the device name of the USB drive:

$ dmesg | tail -n20
[61425.197050] mce: [Hardware Error]: Machine check events logged
[71124.693498] compiz[1853]: segfault at 80000000 ip 0000000080000000 sp 00007ffc438c50a8 error 14
[73897.971544] usb 1-2: new high-speed USB device number 10 using xhci_hcd
[73898.105247] usb 1-2: New USB device found, idVendor=0951, idProduct=1665
[73898.105254] usb 1-2: New USB device strings: Mfr=1, Product=2, SerialNumber=3
[73898.105257] usb 1-2: Product: DataTraveler 2.0
[73898.105260] usb 1-2: Manufacturer: Kingston
[73898.105262] usb 1-2: SerialNumber: 50E54951351BBE70A9455C5B
[73898.106083] usb-storage 1-2:1.0: USB Mass Storage device detected
[73898.106370] scsi host8: usb-storage 1-2:1.0
[73899.187591] scsi 8:0:0:0: Direct-Access     Kingston DataTraveler 2.0 PMAP PQ: 0 ANSI: 6
[73899.187848] sd 8:0:0:0: Attached scsi generic sg2 type 0
[73900.521857] sd 8:0:0:0: [sdb] 15335424 512-byte logical blocks: (7.85 GB/7.31 GiB)
[73900.522528] sd 8:0:0:0: [sdb] Write Protect is off
[73900.522531] sd 8:0:0:0: [sdb] Mode Sense: 23 00 00 00
[73900.523124] sd 8:0:0:0: [sdb] No Caching mode page found
[73900.523126] sd 8:0:0:0: [sdb] Assuming drive cache: write through
[73900.562834]  sdb: sdb1 sdb2
[73900.565248] sd 8:0:0:0: [sdb] Attached SCSI removable disk
[73903.203134] EXT4-fs (sdb2): mounted filesystem with ordered data mode. Opts: (null)

So the device name is sdb and it has two partitions: sda1 and sda2. Check if these partitions have been mounted automatically:

$ mount | grep sdb
/dev/sdb2 on /media/theodotos/rootfs type ext4 (rw,nosuid,nodev,relatime,data=ordered,uhelper=udisks2)
/dev/sdb1 on /media/theodotos/boot type vfat (rw,nosuid,nodev,relatime,uid=1000,gid=1000,fmask=0022,dmask=0022,codepage=437,iocharset=iso8859-1,shortname=mixed,showexec,utf8,flush,errors=remount-ro,uhelper=udisks2)

They are mounted. We need to unmount them before dumping the image on the device:

$ sudo umount /dev/sdb1 /dev/sdb2

Now we are ready to run dd (device dump) against the USB drive:

$ sudo dd if=~/Downloads/cl-installer_utilite-2_kernel-6.3_2014-12-17.img of=/dev/sdb bs=1M

You are not going to see any progress bar during the device dump. Just be patient and let the utility take its time.

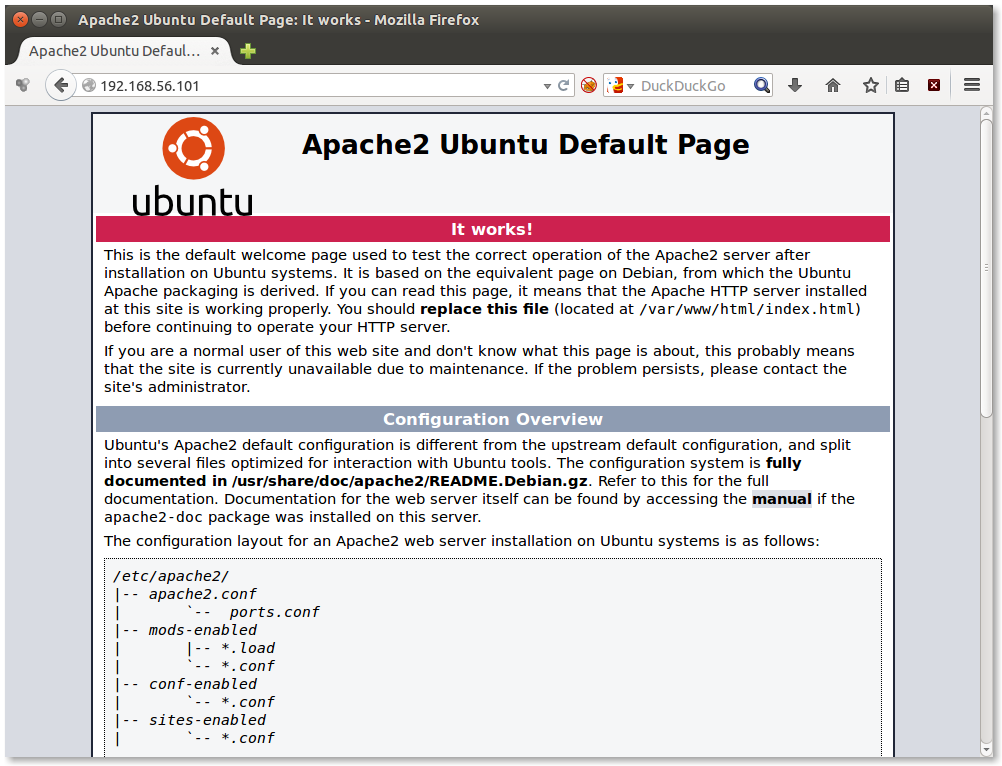
After dd finishes and returns back to the shell, safely remove the USB drive and try it on Utilite. If you reboot the appliance you should see the LXDE desktop of the Utilite installer. Unplug it and you are back to your Ubuntu, on the internal drive.

References

  • http://www.compulab.co.il/utilite-computer/web/utilite-overview
  • http://www.compulab.co.il/utilite-computer/wiki/index.php/Utilite_U-Boot
Categories
Linux

How to Join An Ubuntu Desktop Into An Active Directory Domain

As a Free Software activist I wish I didn’t had to use, touch, see, hear, smell or taste Microsoft technologies. But until that happens, I need to know how to join a Linux machine in an Active Directory Domain.

This is an article I recently submitted to the excellent Unixmen.com website:

How to Join An Ubuntu Desktop Into An Active Directory Domain

Categories
Linux

Introduction to the KVM Hypervisor (for Ubuntu)

The KVM hypervisor is a virtualization system included with the Linux kernel. Along with XEN is one of the most attractive virtualization platforms based on Linux.

KVM offers several advantages over the more user-friendly, VirtualBox. Since it is integrated into the mainstream Linux kernel, it boasts significant performance benefits [1]. Furthermore it is better suited as a virtualization platform solution while VirtualBox is better suited for short-term tests and casual, user owned, VMs. KVM supports many guest operating systems so you can use Linux, Unix, Windows or something more exotic.

Install KVM on your system

  1. Make sure your system supports KVM.

    KVM is only supported on systems with Hardware-Assisted Virtualization. If your system does not support HAV you can revert to QEMU, a system which KVM is based on.

  • First install CPU checker:

    $ sudo apt-get -y install cpu-checker
    

  • Check if KVM is supported:
    $ kvm-ok
    INFO: /dev/kvm exists
    KVM acceleration can be used
    

    Looks OK. Still you may need to check your BIOS/EFI whether this feature is enabled.

  1. Install KVM:

    $ sudo apt-get -y install qemu-kvm
    

KVM Basic Usage

You can use KVM directly. This method is suitable for testing or troubleshooting but not appropriate for production VMs.

  1. Create a disk image:
    $ qemu-img create -f qcow2 testvm.qcow2 20G
    Formatting 'testvm.qcow2', fmt=qcow2 size=21474836480 encryption=off cluster_size=65536 lazy_refcounts=off
    

    The qcow2 format grows dynamically so it does not really occupy 20GB:

    $ ls -lh testvm.qcow2 
    -rw-r--r-- 1 theo theo   193K Μάι  14 18:43 testvm.qcow2
    
  2. Start a VM instance, to setup your system:
    $ kvm -m 1024 -hda testvm.qcow2 -cdrom ~/Downloads/ubuntu-15.04-desktop-amd64.iso -boot d -smp 2
    

    The options are explained below:

    • -m: memory in MB
    • -hda: first disk image to use
    • -cdrom: you can use an .iso file (ubuntu-15.04-desktop-amd64.iso) or a physical CD-ROM (/dev/sr0).
    • -boot: choose where to boot from. A parameter of d tells KVM to use the cdrom for booting.
    • -smp: Stands for Symmetric Multiprocessing. 2 is the number of CPUs available to the VM.

    After you run the command above you will get a window with your VM running in it:

    KVM VM

    This window will capture your mouse and keyboard when you work in it. If you want to return to your host OS just press Ctrl-Alt together and they will both be released.

  3. Run your VM.

    After the installation is finished you can run your VM from the disk image.

    • First let’s check the size of your disk:
      $ ls -lh testvm.qcow2
      -rw-r--r-- 1 theodotos theodotos 5,9G Μάι  14 19:33 testvm.qcow2
      

    So after the installation of Ubuntu Desktop 15.04 (Vivid Vervet) the disk image has grown to 5.9GB.

    • Run the VM from the disk image:
      $ kvm -m 1024 -hda testvm.qcow2 -smp 2
      

    A new window will pop up with the freshly installed OS.

Running KVM under libvirt

The libvirt system, is a platform for running VMs under many different hypervisors using a common API and toolset. It supports KVM, XEN, QEMU, VirtualBox and many others. This is the preferred method of using KVM because the VMs are globally available to privileged (local and remote) users, it facilitates VM management and you can configure autostart and many other features.

  1. Setting up libvirt:
    $ sudo apt-get -y install libvirt-bin
    
  2. Give appropriate permissions to the users expected to manage your VMs:
    $ sudo usermod -a -G libvirtd theo
    

    The theo user will be added as a member in the libvirtd group. After that you will need to log-out, for the permission to be activated.

Creating a libvirt ready VM

There are many tools to create VMs for libvirt. In this section we are going to examine two of them: virt-install and uvtool.

  1. Using virt-install.

    The advantage of virt-install is being distro agnostic. That means you can use it to install Debian, Ubuntu, RHEL, CentOS, Fedora, SUSE and many other distros as well.

    • Install virt-install:
      $ sudo apt-get -y install virtinst
      
    • Create a machine:
      $ sudo virt-install -n testvm -r 512 --disk path=/var/lib/libvirt/images/testvm.img,bus=virtio,size=4 -c ~/Downloads/ubuntu-14.04.2-server-amd64.iso --network network=default,model=virtio --graphics vnc,listen=127.0.0.1 --noautoconsole -v
      
      Starting install...
      Allocating 'testvm.img'                     | 4.0 GB     00:00     
      Creating domain...                          |    0 B     00:01     
      Domain installation still in progress.  You can reconnect to 
      the console to complete the installation process.
      
      • -n: VM name
      • -r: RAM in MB
      • –disk: Path for the virtual disk.
      • -c: defive the .iso file or CDROM device to use for the OS installation.
      • –network: Select your preferred networking mode.
      • –graphics: Select the graphics protocol. We are using VNC here that allows connections only from localhost. You can use the 0.0.0.0 (any) instead if 127.0.0.1 IP to allow connections from elsewhere.
      • –noautoconsole: do not run the guest console.
  • Connect to the VM and setup the guest OS:
    $ xtightvncviewer 127.0.0.1
    

    The VNC client will connect to the default VNC port which is 5900. You can append ::<port> to the hostname or IP address if you want to use a different port, e.g. xtightvncviewer 127.0.0.1::5901

    NOTE: If xtightvncviewer is not installed you can install it with sudo apt-get install xtightvncviewer. You can also use a graphical VNC client like Remmina.

  • Verify that the machine is created:

     $ virsh list --all
      Id    Name                           State
       ----------------------------------------------------
       -     testvm                         shut off
    

    The machine will appear as shut off after the OS setup finishes.

  • Start the VM:

    $ virsh start testvm
      Domain testvm started
    

  • Verify that the VM is started:
    $ virsh list
    Id    Name                         State
    ----------------------------------------
    3     testvm                     running
    
    1. Install a VM using uvtool:

      The uvtool is a tool to create minimal VMs. Unlike virt-install you can create only Ubuntu VMs but the overall setup is taken care by uvtool.

      • Install uvtool:
        $ sudo apt-get -y install uvtool uvtool-libvirt
        
      • Create a local repository of ubuntu-cloud images:
        $ uvt-simplestreams-libvirt sync release=trusty arch=amd64
        

      This command will download the trusty (14.04) release locally.

      • Query for local repository
        $ uvt-simplestreams-libvirt query
        release=trusty arch=amd64 label=release (20150506)
        
      • Generate an ssh key pair (unless you already have one):
        $ ssh-keygen -b 4096
        
      • Create a uvt based VM:
        $ uvt-kvm create --cpu 2 --memory=1024 --disk=10 testuvt
        

      This will create a trusty VM with 2 CPUs, 1GB RAM and 10 GB disk.

    • Verify the machine creation:

      $ virsh list
       Id    Name                           State
        ----------------------------------------------------
         5     testuvt                        running
      

    • Connect to your VM:

      $ uvt-kvm ssh testuvt --insecure

      You can get root access, on the VM, with sudo -i.

    Managing libvirt using the graphical Virtual Machine Manager

    Virtual Machine Manager is a front-end to libvirt. It help system administrators managing their VMs using a convenient graphical interface.

    1. Installing Virtual Machine Manager:
      $ sudo apt-get -y install virt-manager
      
    2. Running Virtual Machine Manager:
    • You can find it in the application menu or run virt-manager from the command line.
      virt-manager-1.png

      As you can see the two VMs we created earlier, are already there.

    1. Creating a new machine.

      • Press the Create a new machine icon:
        virt-manager-2.png
    2. New VM options.
    • Select one of the following option to continue:
      virt-manager-3.png
      Each option provides different steps. You may need to read the documentation for all the details. The first option is the most straight forward.

    Managing your VMs with virsh

    1. Listing machines.
    • List only running machines:

      $ virsh list
       Id    Name                           State
        ----------------------------------------------------
         5     testuvt                        running
      

    • List all machines:
      $ virsh list --all
       Id    Name                           State
        ----------------------------------------------------
         5     testuvt                        running
         -     testvm                         shut off
      
    1. Starting machines:
      $ virsh start testvm
      Domain testvm started
      
    2. Shutdown machines:
      $ virsh shutdown testvm
      Domain testvm is being shutdown
      
    3. Restart machines:
      $ virsh reboot testuvt
      Domain testuvt is being rebooted
      
    4. Set machines to autostart:
      • Enable autostart:
        $ virsh autostart testuvt
        Domain testuvt marked as autostarted
        
      • Disable autostart
        $ virsh autostart --disable testuvt
        Domain testuvt unmarked as autostarted
        
    5. Other useful virsh commands:
      • console: get console access to a VM.
      • destroy: destroy (delete) a machine.
      • dominfo: get the machine details.
      • migrate: migrate a machine to another libvirt host.
      • save: save the machine state.
      • snapshot-create: create a snapshot of the machine.

      To see all the supported commands you can run virsh --help.

    Learning to use libvirt is of great value to a Linux sysadmin because the same commands apply for KVM, XEN, VirtualBox, even container systems like OpenVZ and LXC.

    References

    • [1] http://www.phoronix.com/scan.php?page=article&item=ubuntu_1404_kvmbox&num=5
    • [2] https://help.ubuntu.com/14.04/serverguide/virtualization.html
    • [3] https://help.ubuntu.com/community/KVM</port>
    Categories
    Linux

    Installing Cisco Packet Tracer on Ubuntu

    Cisco Packet Tracer is network simulation program for students in the Cisco Networking Academy. There is an Ubuntu version for it and we are going to show you how to install it and configure it.

    This is tested on Ubuntu 15.10 (Vivid Vervet) but it should work on earlier versions. A requirement for this guide is to have root access on the target machine or sudo admin rights.

    Download Cisco Packet Tracer

    If you have an account on the Cisco Networking Academy you can download Packet Tracer from Student Resources. Ask your instructor if you can’t find it.

    After you download it, it should be in your Downloads folder:

    $ ls -l ~/Downloads/
    total 183928
    -rw-r-----  1 theo theo 188328996 Jan  31 03:34 Cisco Packet Tracer 6.2 for Linux - Ubuntu installation - Instructor version.tar.gz
    

    Students can download the student version instead.

    Unpack the package

    1. Change into the Downloads directory:
      $ cd ~/Downloads/
      
    2. Unpack the downloaded file:
      $ tar xvzf Cisco\ Packet\ Tracer\ 6.2\ for\ Linux\ -\ Ubuntu\ installation\ -\ Instructor\ version.tar.gz
      
    3. Verify the unpacked files:
      $ ls -l
      total 183932
      -rw-r-----  1 theo theo 188328996 Ιαν  31 03:34 Cisco Packet Tracer 6.2 for Linux - Ubuntu installation - Instructor version.tar.gz
      drwxr-xr-x 12 theo theo      4096 Ιαν  30 01:00 <strong>PacketTracer62</strong>
      

      The installation files are under the PacketTracer62 directory.

    Install Packet Tracer

    1. Change into the PacketTracer62 directory:

      $ cd PacketTracer62
      

    2. Run the installer:
      $ sudo ./install
      
      • Press the ‘Enter‘key to accept the EULA.
      • Press ‘Space‘ repeatedly to reach 100%.
      • Type ‘y‘ (yes) to accept the EULA.
      • Type the location where you want the package installed. If you just press ‘Enter‘ it will choose the default (/opt/pt).
      • When asked to create a symbolic link "packettracer" in /usr/local/bin type y (yes).
    3. Setup the Packet Tracer Desktop Link:

      While you are in the PacketTraser62 directory, copy the PT Desktop link to your Desktop and assign executable permissions on it:

      $ cp bin/Cisco-PacketTracer.desktop ~/Desktop/
      $ chmod +x ~/Desktop/Cisco-PacketTracer.desktop
      

      Unfortunately the links to the program and its icon are wrong. Edit the Exec and Icon directives in the Cisco-PacketTracer.desktop file as follows:

      # Exec=/usr/local/PacketTracer6/packettracer
      # Icon=/usr/local/PacketTracer6/art/app.png
      Exec=/opt/pt/bin/PacketTracer6
      Icon=/opt/pt/art/app.png
      

      Alternatively you can just type the packetracer command from your terminal.

    Although Packet Tracer is based on several Free Software libraries, it is not Free Software itself. I hope its Cisco developers see the light and release this great learning tool as Free Software. Only good things can come from such decision.

    Categories
    Linux

    Adding a new disk in an existing Volume Group (LVM)

    This is a guide about adding a new disk to an existing [LVM](http://en.wikipedia.org/wiki/Logical_Volume_Manager_%28Linux%29 "Logical Volume Manager") VG

    Check current setup

    1. First let’s check and document the current setup.
    • Checking the /proc filesystem:
      # cat /proc/partitions 
       major minor  #blocks  name
          8        0    7880544 sda
          8        1     248832 sda1
          8        2          1 sda2
          8        5    7628800 sda5
        252        0    6574080 dm-0
        252        1    1036288 dm-1
      
    • Using lsblk:
      # lsblk
      NAME                   MAJ:MIN RM  SIZE RO TYPE MOUNTPOINT
      sda                      8:0    0  7,5G  0 disk 
      ├─sda1                   8:1    0  243M  0 part /boot
      ├─sda2                   8:2    0    1K  0 part 
      └─sda5                   8:5    0  7,3G  0 part 
        ├─ubuntu--vg-root   252:0    0  6,3G  0 lvm  /
        └─ubuntu--vg-swap_1 252:1    0 1012M  0 lvm  [SWAP]
      
    1. Check and document the LVM layout.
    • Volume Group info:
      # vgs
        VG         #PV #LV #SN Attr   VSize VFree 
        ubuntu-vg    1   2   0 wz--n- 7,27g 16,00m
      
    • Physical Volume info:
      # pvs
        PV         VG         Fmt  Attr PSize PFree 
        /dev/sda5  ubuntu-vg  lvm2 a--  7,27g 16,00m
      
    • Logical Volume info:
      # lvs
        LV     VG         Attr       LSize    Pool Origin Data%  Meta%  Move Log Cpy%Sync Convert
        root   ubuntu-vg  -wi-ao----    6,27g
        swap_1 ubuntu-vg  -wi-ao---- 1012,00m
      

    Add a new physical or virtual disk

    Now add the new disk on your server. On VMs it is possible to add a new disk without powering off. On physical servers this can be possible too if the server comes with hot-swap functionality. Check your server specs first!

    1. Check if the new disk is detected.
    • You can use this command if you want your system to detect the new disk without rebooting:
      # for SCSI_HOST in /sys/class/scsi_host/* ; do echo "- - -" > $SCSI_HOST/scan ; done
      

      The above command simply loops through the SCSI hosts under the /sys/class/scsi_host directory and sends the "– – –" string to them. This forces the SCSI hosts to detect the new disk that has been attached.

    • Using the /proc filesystem:

      # cat /proc/partitions
      major minor  #blocks  name<br />
         8        0    7880544 sda
         8        1     248832 sda1
         8        2          1 sda2
         8        5    7628800 sda5
         8       16   31522680 sdb
       252        0    6574080 dm-0
       252        1    1036288 dm-1
      

      The size of the disk in GB, is 30GB:

      # echo '31522680/1024/1024' | bc -l
      30.06237030029296875000
      

    • Using lsblk:
      # lsblk
      NAME                   MAJ:MIN RM  SIZE RO TYPE MOUNTPOINT
      sda                      8:0    0  7,5G  0 disk 
      ├─sda1                   8:1    0  243M  0 part /boot
      ├─sda2                   8:2    0    1K  0 part 
      └─sda5                   8:5    0  7,3G  0 part 
         ├─ubuntu--vg-root   252:0    0  6,3G  0 lvm  /
         └─ubuntu--vg-swap_1 252:1    0 1012M  0 lvm  [SWAP]
      sdb                      8:16   0 30,1G  0 disk
      

    Add the new disk to LVM Volume Group

    1. Create a new partition on the new disk:
      # fdisk /dev/sdb
      
      Welcome to fdisk (util-linux 2.25.2).
      Changes will remain in memory only, until you decide to write them.
      Be careful before using the write command.
      
      Device does not contain a recognized partition table.
      Created a new DOS disklabel with disk identifier 0xaea3ab78.
      
      Command (m for help): n
      Partition type
        p   primary (0 primary, 0 extended, 4 free)
        e   extended (container for logical partitions)
      Select (default p):< Using default response p.
      Partition number (1-4, default 1): 
      First sector (2048-63045359, default 2048): 
      Last sector, +sectors or +size{K,M,G,T,P} (2048-63045359, default 63045359):
      
      Created a new partition 1 of type 'Linux' and of size 30,1 GiB.
      
      Command (m for help): t
      Selected partition 1
      Hex code (type L to list all codes): <strong>8e
      Changed type of partition 'Linux' to 'Linux LVM'.
      
      Command (m for help): <strong>w</strong>
      The partition table has been altered.
      Calling ioctl() to re-read partition table.
      Syncing disks.
      
    2. Verify the creation of a new partition:
      # fdisk -l /dev/sdb
      
      Disk /dev/sdb: 30,1 GiB, 32279224320 bytes, 63045360 sectors
      Units: sectors of 1 * 512 = 512 bytes
      Sector size (logical/physical): 512 bytes / 512 bytes
      I/O size (minimum/optimal): 512 bytes / 512 bytes
      Disklabel type: dos
      Disk identifier: 0xaea3ab78
      
      Device     Boot Start      End  Sectors  Size Id Type
      /dev/sdb1        2048 63045359 63043312 30,1G 8e Linux LVM
      

    Add the new partition to the Volume Group

    1. Extend the Volume Group by adding a new disk:
      # vgextend ubuntu-vg /dev/sdb1
       Physical volume "/dev/sdb1" successfully created
       Volume group "ubuntu-vg" successfully extended
      
    2. Check the current free space of the Volume Group:
      # vgs
       VG        #PV #LV #SN Attr   VSize  VFree 
       ubuntu-vg   2   2   0 wz--n- 37,33g 30,07g
      
    3. Verify the new Physical Volume:
      # pvs
       PV         VG        Fmt  Attr PSize  PFree 
       /dev/sda5  ubuntu-vg lvm2 a--   7,27g 16,00m
       /dev/sdb1  ubuntu-vg lvm2 a--  30,06g 30,06g
      
    4. Check the state of the Logical Volumes:
      # lvs
       LV     VG        Attr       LSize    Pool Origin Data%  Meta%  Move Log Cpy%Sync Convert
       root   ubuntu-vg -wi-ao---- 6,27g     
       swap_1 ubuntu-vg -wi-ao---- 1012,00m
      

      Nothing changed yet, of course.

    Resize the logical volume

    1. Use the lvresize command to resize the root volume:

      # lvresize -L 30,07g /dev/ubuntu-vg/root
       Rounding size to boundary between physical extents: 30,07 GiB
       Size of logical volume ubuntu-vg/root changed from 6,27 GiB (1605 extents) to 30,07 GiB (7698 extents).
       Logical volume root successfully resized
      

    2. Verify the volume resize:
      # lvs
       LV     VG        Attr       LSize    Pool Origin Data%  Meta%  Move Log Cpy%Sync Convert
       root   ubuntu-vg -wi-ao----   30,07g
       swap_1 ubuntu-vg -wi-ao---- 1012,00m
      

      The root volume is now at 30,07GB. Good.

    Resize the filesystem

    1. Check the current filesystem size:

      # df -hT
      Filesystem                   Type      Size  Used Avail Use% Mounted on
      udev                         devtmpfs  485M     0  485M   0% /dev
      tmpfs                        tmpfs     100M  5,1M   95M   6% /run
      /dev/mapper/ubuntu--vg-root  ext4      <strong>6,1G</strong>  2,4G  3,4G  41% /
      tmpfs                        tmpfs     496M     0  496M   0% /dev/shm
      tmpfs                        tmpfs     5,0M  4,0K  5,0M   1% /run/lock
      tmpfs                        tmpfs     496M     0  496M   0% /sys/fs/cgroup
      /dev/sda1                    ext2      236M   40M  184M  18% /boot
      tmpfs                        tmpfs     100M   16K  100M   1% /run/user/1000
      

      Still using the old size, as expected.

    2. Resize the root filesystem:

      # resize2fs /dev/mapper/ubuntu--vg-root
      resize2fs 1.42.12 (29-Aug-2014)
      Filesystem at /dev/mapper/ubuntu--vg-root is mounted on /; on-line resizing required
      old_desc_blocks = 1, new_desc_blocks = 2
      The filesystem on /dev/mapper/ubuntu--vg-root is now 7882752 (4k) blocks long.
      

    3. Verify the new size of the root filesystem:
      # df -hT
      Filesystem                   Type      Size  Used Avail Use% Mounted on
      udev                         devtmpfs  485M     0  485M   0% /dev
      tmpfs                        tmpfs     100M  5,1M   95M   6% /run
      /dev/mapper/ubuntu--vg-root  ext4       30G  2,4G   26G   9% /
      tmpfs                        tmpfs     496M     0  496M   0% /dev/shm
      tmpfs                        tmpfs     5,0M  4,0K  5,0M   1% /run/lock
      tmpfs                        tmpfs     496M     0  496M   0% /sys/fs/cgroup
      /dev/sda1                    ext2      236M   40M  184M  18% /boot
      tmpfs                        tmpfs     100M   16K  100M   1% /run/user/1000
      

    So now we have a logical root volume that expands across multiple physical disks. Notice, however, that this is not a very solid setup, since the loss of one of the physical volumes can bring down the whole system along with your data. Thus make sure that you have a solid and tested backup procedure in place. The restore procedure should also be documented in every detail in your disaster recovery practices.

    References

    • http://tldp.org/HOWTO/LVM-HOWTO/index.html
    • http://wingloon.com/2013/05/07/how-to-detect-a-new-hard-disk-without-rebooting-vmware-linux-guest/
    Categories
    Linux

    Increasing the disk size of a Linux VM

    In this guide we examine how to increase the disk size of a linux VM, when the need arises.

    Note
    Make sure you backup everything you have on your system, before trying this guide. This is an advanced HOWTO and it can break your system, irrecoverably, if you make a critical mistake!

    This guide assumes that you are using the Linux Logical Volume Manager (LVM) to manage your storage. If you are new to the concept of LVM you can study the excellent LVM HOWTO from The Linux Documentation Project website.

    Even though it may be possible to resize a Linux system without using LVM, an LVM setup is highly recommended. No matter if you are working on a physical or virtual machine, LVM is the preferred method of storage management in Linux, since it simplifies tasks related to storage, including volume resizing.

    Another assumption is that the disk is using the legacy MBR partition table format. But the guide can easily be adapted to disks using a GPT format.

    Increasing the size of the virtual disk

    In this guide we are using VMware but this section can be easily adapted to different virtualization systems.

    1. Before increasing the disk size, it is a good idea to consolidate the snapshots of your VM. Right click and go to: <br />Snapshots -> Consolidate:

      Consolidate Snapshots

    • Press ‘OK’ when asked to do so. When the confirmation dialog appears, press ‘Yes’:

      Confirm Consolidate
      When the operation is completed (Check the ‘Recent Tasks’ pane) move to the next step.

    1. Right click on the VM again and go to Edit Settings. From here, choose the disk you wish to enlarge:

      Enlarge Disk
      Change the size to your desired size and press OK. In my case I will change a 10G size hard disk to 65G. Press ‘OK’ when done.

    Now we should move to our linux system.

    Force Linux to detect the changes in the disk size

    1. Check the detected disk size:
      # cat /proc/partitions
      major minor  #blocks  name
      
        8        0   10485760 sda
        8        1     248832 sda1
        8        2          1 sda2
        8        5   10233856 sda5
       11        0    1048575 sr0
      254        0    9760768 dm-0
      254        1     471040 dm-1
      

      As you can see the primary disk (sda) has a size of 10485760KB, which translates to 10GB:

      # echo '10485760/1024/1024' | bc -l
      10.00000000000000000000
      
    2. Find the SCSI subsystem buses:
      # ls /sys/class/scsi_device/
      0:0:0:0  2:0:0:0
      

      0:0:0:0 is the primary bus.

  • Rescan for disk changes:

    # echo 1 > /sys/class/scsi_device/0\:0\:0\:0/device/rescan
    

  • Check the new size:
    # cat /proc/partitions
    major minor  #blocks  name
    
      8        0   68157440 sda
      8        1     248832 sda1
      8        2          1 sda2
      8        5   10233856 sda5
     11        0    1048575 sr0
    254        0    9760768 dm-0
    254        1     471040 dm-1
    

    The size is now 65G:

    # echo '68157440/1024/1024' | bc -l
    65.00000000000000000000
    
  • Resize the partition used by the LVM Physical Volume (PV)

    1. Check which partition is used by the PV:
      # pvs
       PV         VG         Fmt  Attr PSize PFree
       /dev/sda5  myvgroup   lvm2 a--  9,76g    0
      

      So only the /dev/sda5 partition is used by LVM.

    2. Backup the partition table:

      # sfdisk -d /dev/sda > sda-part.mbr
      

      Now you need to save that file elsewhere because when if partition table goes down the drain, you will have no way to access the partition table backup file. You could use scp to transfer the file on another system:

      # scp sda-part.mbr user@another-server:
      

      If you need to restore the partition table you can use a recovery/live cd or usb like this:

      # scp user@another-server:sda-part.mbr
      # sfdisk /dev/sda < sda-part.mbr
      

      Note
      You can use sgdisk for disks with GPT tables.
      Backup:
      sgfdisk -b sda-part.gpt /dev/sda.
      Restore: sgfdisk -l sda-part.gpt /dev/sda

    3. Resize the partition used by the PV.
    • Check the size of the partition:

      # sfdisk -d /dev/sda
      Warning: extended partition does not start at a cylinder boundary.
      DOS and Linux will interpret the contents differently.
      # partition table of /dev/sda
      unit: sectors
      
      /dev/sda1 : start=     2048, size=   497664, Id=83, bootable
      /dev/sda2 : start=   501758, size= 20467714, Id= 5
      /dev/sda3 : start=        0, size=        0, Id= 0
      /dev/sda4 : start=        0, size=        0, Id= 0
      /dev/sda5 : start=   501760, size= 20467712, Id=8e
      

    • Mark down the details of the sda2 and sda5 partitions in the following table:
      Partition Start Sector size in KB size in Sectors
      sda2 501758 10233857 20467714
      sda5 501760 10233856 20467712

      Note
      Each Sector is 512 bytes. So the number of Sectors is double the number of KBytes (1024 Bytes). The logical sda5 partition is 1KB (or 2 Sectors) smaller than the extended sda2 partition.*

    • Calculate the sizes of the new partitions:

      The total size of the sda disk is 68157440KB which translates to 136314880 Sectors. So the new size (in Sectors) of sda2 would be:

      # echo 136314880-501758 | bc -l
      135813122
      

      The size, in sectors, of sda5 would be:

      # echo 136314880-501760 | bc -l
      135813120
      

      According to the calculations above, the new table with the partition details would be:

      Partition Start Sector size in KB size in Sectors
      sda2 501758 67906561 135813122
      sda5 501760 67906560 135813120
    • Resize the sda2 (extended) and sda5 partitions.

      Copy the sda-part.mbr file to sda-part-new.mbr and make the following changes to sda-part-new.mbr:

      # partition table of /dev/sda
      unit: sectors
      /dev/sda1 : start=     2048, size=    497664, Id=83, bootable
      /dev/sda2 : start=   501758, size= 135813122, Id= 5
      /dev/sda3 : start=        0, size=         0, Id= 0
      /dev/sda4 : start=        0, size=         0, Id= 0
      /dev/sda5 : start=   501760, size= 135813120, Id=8e
      

      Now apply these changes to the MBR using sfdisk:

      # sfdisk --no-reread /dev/sda < sda-part-new.mbr
      

      Ignore any warnings for now.

    • Verify the new partition table:

      # sfdisk -d /dev/sda
      Warning: extended partition does not start at a cylinder boundary.
      DOS and Linux will interpret the contents differently.
      # partition table of /dev/sda
      unit: sectors
      
      /dev/sda1 : start=     2048, size=   497664, Id=83, bootable
      /dev/sda2 : start=   501758, size=135813122, Id= 5
      /dev/sda3 : start=        0, size=        0, Id= 0
      /dev/sda4 : start=        0, size=        0, Id= 0
      /dev/sda5 : start=   501760, size=135813120, Id=8e
      

      It looks correct.

    • Verify that the linux kernel has been notified of the changes:

      # cat /proc/partitions 
      major minor  #blocks  name
      
         8        0   68157440 sda
         8        1     248832 sda1
         8        2          1 sda2
         8        5   10233856 sda5
        11        0    1048575 sr0
       254        0    9760768 dm-0
       254        1     471040 dm-1
      

      It looks like the system still sees the old partition size. You could use a utility like partprobre, kpartx or even sfdisk to force the kernel to re-read the new partition table:

      # sfdisk -R /dev/sda
      BLKRRPART: Device or resource busy
      This disk is currently in use.
      

      Alas if the partition is in use, the kernel will refuse to re-read the partition size. In that case just schedule a reboot and try again.

      After the system reboot:

      # cat /proc/partitions
      major minor  #blocks  name
      
         8        0   68157440 sda
         8        1     248832 sda1
         8        2          1 sda2
         8        5   67906560 sda5
        11        0    1048575 sr0
       254        0    9760768 dm-0
       254        1     471040 dm-1
      

      So the new size of the sda5 partition is 64,76GB:

      # echo '67906560/1024/1024' | bc -l
      64.76074218750000000000
      

      If the partition size has increased, we can move on to the next step.

    Resize the Physical Volume (PV).

    1. Check the size of the Physical Volume:

      # pvs
       PV         VG        Fmt  Attr PSize PFree
       /dev/sda5  ubuntu-vg lvm2 a--  9,76g    0 
      

      So the size of the PV is still 9,76GB.

    2. Resize the PV:

      # pvresize /dev/sda5
       Physical volume "/dev/sda5" changed
       1 physical volume(s) resized / 0 physical volume(s) not resized
      

    3. Verify that the size is resized:
      # pvs
       PV         VG        Fmt  Attr PSize  PFree 
       /dev/sda5  ubuntu-vg lvm2 a--  64,76g 55,00g
      

      So the new size of the PV is 64,8GB.

    Resize the logical volume.

    1. Check the current size of the logical volume (used for the root filesystem):

      # lvs
       LV     VG        Attr     LSize   Pool Origin Data%  Move Log Copy%  Convert
       root   ubuntu-vg -wi-ao--   9,31g
       swap_1 ubuntu-vg -wi-ao-- 460,00m
      

      The root volume is still at 9,3GB.

    2. Check the free space:

      # vgs
       VG        #PV #LV #SN Attr   VSize  VFree 
       ubuntu-vg   1   2   0 wz--n- 64,76g 55,00g
      

    3. Resize the root logical volume:
      # lvresize -L +55,00g /dev/mapper/ubuntu-vg-root
       Extending logical volume root to 64,31 GiB
       Logical volume root successfully resized
      
    4. Verify LV resize:
      # lvs
      LV     VG        Attr     LSize   Pool Origin Data%  Move Log Copy%  Convert
      root   ubuntu-vg -wi-ao--  64,31g
      swap_1 ubuntu-vg -wi-ao-- 460,00m
      

      The root logical volume size is now at 65,3GB

    Resize the root filesystem.

    1. Check the current size of the root filesystem:

      # df -hT
      Filesystem                  Type      Size  Used Avail Use% Mounted on
      rootfs                      rootfs    9,2G  2,2G  6,6G  25% /
      udev                        devtmpfs   10M     0   10M   0% /dev
      tmpfs                       tmpfs     101M  204K  101M   1% /run
      /dev/mapper/ubuntu-vg-root  ext4      9,2G  2,2G  6,6G  25% /
      tmpfs                       tmpfs     5,0M     0  5,0M   0% /run/lock
      tmpfs                       tmpfs     201M     0  201M   0% /run/shm
      /dev/sda1                   ext2      228M   18M  199M   9% /boot
      

      So the root filesystem is still at 9,2GB.

    2. Resize the file system:

      # resize2fs /dev/mapper/ubuntu-vg-root
      resize2fs 1.42.5 (29-Jul-2012)
      Filesystem at /dev/mapper/ubuntu-vg-root is mounted on /; on-line resizing required
      old_desc_blocks = 1, new_desc_blocks = 5
      Performing an on-line resize of /dev/mapper/ubuntu-vg-root to 16858112 (4k) blocks.
      The filesystem on /dev/mapper/ubuntu-vg-root is now 16858112 blocks long.
      

    3. Verify that the filesystem has been resized:
      # df -hT
      Filesystem                  Type      Size  Used Avail Use% Mounted on
      rootfs                      rootfs     64G  2,2G   58G   4% /
      udev                        devtmpfs   10M     0   10M   0% /dev
      tmpfs                       tmpfs     101M  204K  101M   1% /run
      /dev/mapper/ubuntu-vg-root  ext4       64G  2,2G   58G   4% /
      tmpfs                       tmpfs     5,0M     0  5,0M   0% /run/lock
      tmpfs                       tmpfs     201M     0  201M   0% /run/shm
      /dev/sda1                   ext2      228M   18M  199M   9% /boot
      

    So now you have 55GB of additional storage on your root partition, to satisfy your increasing storage needs.

    References

    • https://ma.ttias.be/increase-a-vmware-disk-size-vmdk-formatted-as-linux-lvm-without-rebooting/
    • http://gumptravels.blogspot.com/2009/05/using-sfdisk-to-backup-and-restore.html
    • http://askubuntu.com/questions/57908/how-can-i-quickly-copy-a-gpt-partition-scheme-from-one-hard-drive-to-another
    Categories
    Linux

    Defending against Internet attacks for your Ubuntu Server (14.04 LTS)

    The Ubuntu Server Edition LTS is a highly reliable server system and comes with reasonable security defaults. Still there are additional steps to take if we want to enhance its security.

    Note
    These steps will only help make your server more secure but they will not make it bulletproof! Security is an evergoing process and you should always be alert for new security issues.

    Prerequisites

    1. Install a fresh Ubuntu Server 14.04 (Preferable 64 bit).
    2. Use the following command to install SSH, if not already installed:

      $ sudo apt-get -y install openssh-server
      

    3. Make sure you have a sudo enabled user:
      $ id | grep sudo
      uid=1000(theoadm) gid=1000(theoadm) groups=1000(theoadm),4(adm),24(cdrom),27(<strong>sudo</strong>),30(dip),46(plugdev),116(lpadmin),117(sambashare),1006(gitusers)
      

      If the above is not true, you will have to login as root with su – and execute all the commands as the root user.

    Secure SSH

    1. Block remote logins as root. Set the value of the PermitRootLogin keyword, in /etc/ssh/sshd_config, to without-password or no. This will disable password based authentication for the user root and only allow Public Key Authentication.
    • First check what is the value of the PermitRootLogin keyword:

      $  grep PermitRootLogin /etc/ssh/sshd_config
      PermitRootLogin without-password
      

    • If the value is yes, it is considered a very bad practice, especially on a public server. Use your favorite editor or the following command to change it:
      $ sudo sed -i 's/^\(PermitRootLogin\s\)[yY][eE][sS]/\1without-password/' /etc/ssh/sshd_config
      
    • Don’t forget to restart SSH:
      $ sudo service ssh restart
      
    1. Change the SSH listening port from 22 to something else. This is not the ultimate security measure but, since most ssh attack bots target the default port, it will largely minimize the attacks.
    • First select a port not used by a well known service. Let’s assume that we decided to use port 4547:
      $  grep 4547 /etc/services ; echo $?
        1
      

      A return value of 1 indicates that no well known service is using that port.

    • Then change the value of the Port keyword to 4547. Use your favorite editor or the following sed command to do so:

        $  sudo sed -i 's/^\(Port\s\)22/\14547/' /etc/ssh/sshd_config
      

    • Restart your SSH server:
      $ sudo service ssh restart
      
    • Verify that the port has been changed:
      $ sudo netstat -lnpt | grep ssh
        tcp     0    0 0.0.0.0:4547   0.0.0.0:*   LISTEN   11979/sshd
        tcp6    0    0 :::<strong>4547</strong>        :::*        LISTEN   11979/sshd
      

    Enable Filtering

    1. Enable the firewall functionality. We will be using the pre-installed Uncomplicated Firewall (ufw) which is just a front-end to the, more complicated, iptables.
    • First allow port 4547. Make sure you type the correct port or you will be locked out of your server! Use the following command to allow traffic to our chosen port:
      $ sudo ufw allow 4547/tcp
      
    • Then enable the firewall:
      $ sudo ufw enable
      
    • Verify that is working:
      $ sudo ufw status
      Status: active
      
      To                         Action      From
      --                         ------      ----
      4547/tcp                   ALLOW       Anywhere
      4547/tcp (v6)              ALLOW       Anywhere (v6)
      
    1. Setup the Fail2ban intrusion prevention software. [Fail2ban](http://www.fail2ban.org/wiki/index.php/Main_Page "Fail2ban") is an excellent tool to block attacks against SSH and many other services.
    • Install fail2ban:
      $ sudo apt-get -y install fail2ban
      
    • SSH protection is enabled by default but we need to reconfigure the ssh port to 4547. In the file /etc/fail2ban/jail.conf change the port = ssh value to 4547:
      [ssh]
      
      enabled  = true
      port     = <strong>4547</strong>
      filter   = sshd
      logpath  = /var/log/auth.log
      maxretry = 6
      
    • Enable protections against distributed attacks. Edit the [ssh-ddos] section in /etc/fail2ban/jail.conf:
      [ssh-ddos]
      
      enabled  = yes
      port     = 4547
      filter   = sshd-ddos
      logpath  = /var/log/auth.log
      maxretry = 6
      

    Unattended upgrades

    Enabling unattended upgrades may not be a very good idea on mission critical servers. On such scenarios you may want to test the upgrades on a test server before you apply them on the production. Nevertheless it may be a good practice to enable this functionality on machines that are expected to run unattended for long periods of time. This will help to automatically patch vulnerabilities of your machine. Note, however, that patches do not automatically apply on the Linux kernel or the glibc library, because a restart is needed in these cases. So even on mostly unattended scenarios, you still need to check occasionally whether your machine needs a restart.

    1. Make sure that the unattended-upgrades package is installed. It is usually pre-installed but if not, you can use the following command to install it:
      $ sudo apt-get -y install unattended-upgrades
      
    2. Then we must configure automatic upgrades. Answer Yes when asked in the following command:
      $ sudo dpkg-reconfigure updates unattended-upgrades
      

      Alternatively you can edit the /etc/apt/apt.conf.d/20auto-upgrades configuration file as follows:

      APT::Periodic::Update-Package-Lists "1";
      APT::Periodic::Unattended-Upgrade "1";
      

    Further Reading

    As we said earlier, security is an ongoing process. Some further info to make your site more secure:

    • Hardening Ubuntu:
      http://hardenubuntu.com/
    • Applied Crypto Hardening: Don’t forget to read the OpenSSH section of the [Better Crypto](https://bettercrypto.org/ "bettercrypto.org") draft paper: https://bettercrypto.org/static/applied-crypto-hardening.pdf
    • Block port scanning: The article below explains how to use Fail2ban to block port scanning.
      http://www.irrexpr.com/2013/06/using-iptables-logging-and-fail2ban-to.html
    • [4] Port knocking: Port knocking is another interesting technique where you can open your SSH ports, or ports for other services, on demand. Strictly for paranoids!
    Categories
    Linux

    How to set up your own LAMP server on Ubuntu 14.04 (aka Trusty Tahr)

    You sail with no lights in the midnight dark.

    Afraid of betrayal by lights from the land,

    alone and thoughtful, you walk the deck,

    clutching Aladdin’s lamp in your hand.

    ~ Nikos Kavvadias ~

    In this guide we are setting up an Ubuntu/Linux based webserver with a database backend and using the PHP scripting language. The term LAMP is not related to lighting, nor Middle Eastern tales but refers to the combination of Linux, Apache, MySQL MariaDB and PHP.

    Traditionally we have been using MySQL for this task but since Ubuntu 14.04, MariaDB is available from the stock Ubuntu repos. It is recommended to  use MariaDB over the beloved MySQL, because the future of the latter is not so promising after the purchase from Oracle.

    We will also be using VirtualBox to install Ubuntu Server on a virtual machine but you can follow this guide on an actual computer or on your cloud/hosting provider.

    To complete this guide you will need to download a copy of the latest Ubuntu Server ISO image (current version 14.04.2)

    Setting up the Virtual Machine

    1. Install VirtualBox:
      Make sure you have VirtualBox installed. If not, you can download it from your package manager or from command line (works for Ubuntu and Debian based systems):

      $ sudo apt-get -y install virtualbox

      If you are using a Windows PC you will need to go to the
      VirtualBox website and download it.

    2. Start VirtualBox:VBox-1
      Click on the New icon to create a new virtual machine.
    3. Setup the VM name:
      VBox-2
      Type Ubuntu-server in the Name and click ‘Next’.
    4. Setup the memory size.
      VBox-3
      The default 512 MB is enough but you may use 1024 if you have memory to spare.
    5. Setup the Virtual Hard Drive:
      • Create the Virtual Hard Drive:
        VBox-4
      • Select the format of the Hard Drive:
        VBox-5
        VDI is the default for VirtualBox.
      • Select the type of the Hard Drive:
        VBox-6
        Fixed size is supposedly better for performance but it will occupy space equal to its size on your disk. For testing purposes choose Dynamically allocated.
      • Select the size of your disk:
        VBox-7
        If you have chosen Dynamically allocated before, then your Hard Drive can be as large as 2,00 TB without actually occupying that much space on the physical  disk. 40,00 GB is more than enough.
    6. Setup Networking:
      The default network mode for newly created VirtualBox machines is NAT.  This mode is not very convinient if you want to access your VM from the physical host so we are changing that to Bridged Adapter.
      Warning: in some enterprise environments this could trigger the security defences of your network and lock you out! Please consult with you network administrator before enabling this at work!

      You can find more information about the VirtualBox networking modes here:
      VirtualBox Networking Modes

      • To setup Bridged Networking press the Settings icon:VBox-Net-1
      • The default mode in the Attached to: field is NAT:
        VBox-Net-2
      • Change NAT to Bridged Adapter:
        VBox-Net-3
        If you have more than one ethernet interfaces you will need to choose the correct one in the Name field. Usually the correct value is eth0 but this is not always the case. Press OK and you are done with networking.
    7. Start your VM:
      • Press the Start icon:
        VBox-8
      • Boot the Ubuntu ISO:
        VBox-9
        Click on the little folder icon on the right side.
      • Select the Ubuntu ISO file you downloaded earlier:
        VBox-10
      • Press Start to begin the installation:
        VBox-11

    The above procedure is for those that do not have a spare computer for testing. Building a VM is the safest way to experiment with all kind of setups without breaking your working computer.

    Now if you do have a spare computer you can skip the steps above and go straight to the steps below. On a physical computer you will need to burn the ISO file on a CD/DVD or write it on a USB stick, using the usb-creator on Ubuntu or UNetbootin  for other systems. You will need to setup your BIOS/UEFI to boot from the CD or USB first. On Windows 8 systems you may need to disable the abomination called Secure Boot.

    Setting up Ubuntu Server 14.04 (Trusty Tahr)

    Now prepare your pain-killers as this will take some time.

    1. Select the Language for the setup process:
      Ubuntu-Server-1
      This is the language during the installation. Choose English or whatever language you feel comfortable with. If you haven’t figured it out already, the mouse will not work here. Use the arrow keys to select the language and press ‘Enter’ to go to the next step. In case Virtualbox captures your mouse you can press the right Ctrl button to release it.
    2. Start the installation:
      Ubuntu-Server-2

      Select Install Ubuntu Server and press ‘Enter’.
    3. Select the system Language:
      Ubuntu-Server-3 Again select whatever language you need. This is the language for the system, after the installation is finished.
    4. Select your location:
      Ubuntu-Server-4
      If your location is not listed here choose Other and press ‘Enter’.
    5. Select your location now:
      Ubuntu-Server-5
    6. Select your country:
      Ubuntu-Server-6
    7. Select your Locale:
      Ubuntu-Server-7
      If you selected English before you will get a list of English speaking countries to choose from.
    8. Detect keyboard layout:
      Ubuntu-Server-8
      Select Yes if you are unsure of your keyboard layout. No is usually safe unless you have a weird keyboard.
    9. Choose the basic keyboard layout:
      Ubuntu-Server-9
    10. Select specific keyboard layout:
      Ubuntu-Server-10
      Select the first if you are unsure.

      • Wait for the setup to load all necessary components for the installation. If you are not connected to a DHCP enabled network, you will be prompted to give your network settings. Ask your network administrator for assistance.
    11. Select the hostname of your server:
      Ubuntu-Server-11
      Press ‘Tab’, select Continue and then ‘Enter’.
    12. Enter your name:
      Ubuntu-Server-12
      Nobody forces you to enter your actual name :).
    13. Enter your username:
      Ubuntu-Server-13
    14. Select your password:
      Ubuntu-Server-14
      This is a privileged account (using the sudo command) so you better choose a hard to guess password.
    15. Verify your password again:
      Ubuntu-Server-15
    16. Encrypt your home directory:
      Ubuntu-Server-16
      This will protect your personal files if you are paranoid. For testing it’s OK to choose No.
    17. Confirm your timezone:
      Ubuntu-Server-17
      If the time zone is correct select Yes otherwise No.
    18. Select the partitioning method:
      Ubuntu-Server-18The first option is simpler and probably OK for testing. But on a production server you may need to resize the partitions, create new ones and add more disks, so the LVM method is the recommended.
    19. Select the hard drive for the installation:
      Ubuntu-Server-19
    20. Confirm if you want to write to this hard drive:
      Ubuntu-Server-20
      Select Yes and press ‘Enter’. Make sure you don’t have any data you need on this drive!
    21. Select Disk Size for the system:
      Ubuntu-Server-21
      It’s OK to give all available disk size on a test machine.
    22. Write changes to disk:
      Ubuntu-Server-22
      Select Yes and press ‘Enter’.

      • Wait for the Base system installation to complete
    23. Setup your proxy server:
      Ubuntu-Server-23
      If you do not use a proxy server leave this field blank.
    24. Method to manage upgrades:
      Ubuntu-Server-24
      This is a tricky dilemma. If you choose No automatic updates you may forgot to apply updates and render your system vulnerable to attacks. If you choose Install security features automatically your system could break after an update. Choose wisely!
    25. Choose additional software to install:
      Ubuntu-Server-25
      It is a good idea to enable the OpenSSH server so you can access your machine remotely. There is also a LAMP option here but this will install the MySQL server  instead of MariaDB and you may wish to avoid that.

      • Wait for the additional software to be installed.
    26. Install the boot loader:
      Ubuntu-Server-26
      Select Yes here.
    27. Restart your machine:
      Ubuntu-Server-27
      Press Continue to restart the system.
    28. Welcome to your newly created Ubuntu server:
      Ubuntu-Server-28
      Congratulations if you have reached so far! You have just installed a fresh Ubuntu server ready to rock!

    Installing the LAMP stack

    Installing a LAMP environment is easy.  We will need to install the Apache webserver, the MariaDB relational database, PHP and the Apache PHP module.

    1.  Before we proceed with the LAMP stack installation it is a good idea to update/upgrade our system.The command below will download the lists containing the most fresh version of available packages.
      $ sudo apt-get update
      

      The following command will download the packages to be upgraded, remove obsolete packages and download new ones:

      $ sudo apt-get -y dist-upgrade
      
    2. Installing necessary packages:
      $ sudo apt-get -y install apache2 libapache2-mod-php5 mariadb-server php5-mysql 
      
    3. Set the root password for MariaDB:
      MariaDB-1
    4. Verify root password:
      MariaDB-2
    5. Accept the warning:
      MariaDB-3

    After the packages installation is finished we should be ready to go!

    Testing your web server

    Before testing we need to determine the IP address of the server. Run this command on the terminal of your webserver:

    $ ip addr
    1: lo: <LOOPBACK,UP,LOWER_UP> mtu 65536 qdisc noqueue state UNKNOWN group default 
     link/loopback 00:00:00:00:00:00 brd 00:00:00:00:00:00
     inet 127.0.0.1/8 scope host lo
     valid_lft forever preferred_lft forever
     inet6 ::1/128 scope host 
     valid_lft forever preferred_lft forever
    2: eth0: <BROADCAST,MULTICAST,UP,LOWER_UP> mtu 1500 qdisc pfifo_fast state UP group default qlen 1000
     link/ether 08:00:27:5a:6e:a9 brd ff:ff:ff:ff:ff:ff
     inet 192.168.56.101/24 brd 192.168.56.255 scope global eth0
     valid_lft forever preferred_lft forever
     inet6 fe80::a00:27ff:fe5a:6ea9/64 scope link 
     valid_lft forever preferred_lft forever

    The IP of your server is 192.168.56.101

    1. Testing your ssh connection:
      First lets check if ssh works on your server. Type the following command from the terminal of your PC:

      me@PC:~$ ssh user@192.168.56.101
      The authenticity of host '192.168.56.101 (192.168.56.101)' can't be established.
      ECDSA key fingerprint is e4:e7:ac:6c:68:ea:71:90:29:03:bc:92:8e:23:f7:0e.
      Are you sure you want to continue connecting (yes/no)? yes
      Warning: Permanently added '192.168.56.101' (ECDSA) to the list of known hosts.
      user@192.168.56.101's password: 
      Welcome to Ubuntu 14.04.1 LTS (GNU/Linux 3.13.0-35-generic x86_64)
      
       * Documentation: https://help.ubuntu.com/
      
       System information as of Mon Sep 15 11:36:04 EEST 2014
      
       System load: 0.09 Processes: 84
       Usage of /: 4.5% of 38.02GB Users logged in: 0
       Memory usage: 13% IP address for eth0: 192.168.56.101
       Swap usage: 0%
      
       Graph this data and manage this system at:
       https://landscape.canonical.com/
      
      Last login: Mon Sep 15 11:36:04 2014
      user@webserver:~$

      The first time you connect to any ssh system you get the warning that The authenticity of host ‘<myhost(myip)>’ can’t be established. This happens only the first time and it is a safe-guard against MITM attacks. Type yes (not y!) here.

      Then it will ask for your password. You will see nothing as you type it! That’s normal.

      If you password is correct you will be greeted by the system information in the command prompt.

    2. Testing your Apache webserver:
      Fire up your browser and type this URL in the address bar:
      http://192.168.56.101
      Test-Apache
      If you can see the above page in your browser, it means that your Apache webserver is up and running.
    3. Testing PHP:
      You need to create the following file under the Apache
      DocumentRoot (/var/www/html):
      Type the following commands on your server terminal:

      $ sudo -i
      [sudo] password for user:
      # cat > /var/www/html/phpinfo.php << EOF
      > <?php phpinfo(); ?>
      > EOF
      # exit
      $

      The command sudo -i will give you access as the super-privileged root user. Notice how the prompt changes frpm $ to #.

      The command cat … will create a new file /var/www/html/phpinfo.php with the content <?php phpinfo(): ?>. This is a nice way to test your PHP setup and get some basic information about your LAMP setup.

      The command exit will take you back to your normal user account. It is not considered a good practice to be logged in as root for too long.

      Finally direct your browser to http://192.168.56.101/phpinfo.php and expect to see something like this:
      Test-php-1
      If you scroll further down you will see that mysql is enabled too:
      Test-php-2
      For security reasons it may be a good idea to delete the
      phpinfo.php file afterwards:

      $ sudo rm /var/www/html/phpinfo.php
    4. Install phpMyAdmin (optional):
      $ sudo apt-get -y install phpmyadmin
    5. Let the package management system handle phpMyAdmin configuration:
      phpMyAdmin-1
    6. Type the MariaDB root password:
      phpMyAdmin-2
    7. Set the phpMyAdmin database password:
      phpMyAdmin-3
    8. Verify the password:
      phpMyAdmin-4
    9. Choose the correct webserver (apache2):
      phpMyAdmin-5
    10. Visit the phpMyAdmin URL:
      (http://192.168.56.101/phpmyadmin):
      phpMyAdmin-6
      Use the username root and the MariaDB root password to login.
    11. Now you can manage MariaDB through phpMyAdmin:
      phpMyAdmin-7

    This was the final test that ensures everything works as expected. Now you can start developing your PHP website or install a PHP application like WordPress or ownCloud.

    Categories
    General

    Welcome

    Now that weblogs are not so popular, I decided to start my own personal blog. It’s been some time I’ve been thinking about it but I’ve been postponing it with lame excuses.

    This is a bilingual blog and you will find, in the next days, different guides regarding the administration of linux and free software systems, plus whatever else comes to my mind. It is based on WordPress and the multilingual tool, Polylang. In fact there will soon be a guide about how to build a multilingual website based on WordPress and Polylang.