You sail with no lights in the midnight dark.
Afraid of betrayal by lights from the land,
alone and thoughtful, you walk the deck,
clutching Aladdin’s lamp in your hand.
~ Nikos Kavvadias ~
In this guide we are setting up an Ubuntu/Linux based webserver with a database backend and using the PHP scripting language. The term LAMP is not related to lighting, nor Middle Eastern tales but refers to the combination of Linux, Apache, MySQL MariaDB and PHP.
Traditionally we have been using MySQL for this task but since Ubuntu 14.04, MariaDB is available from the stock Ubuntu repos. It is recommended to use MariaDB over the beloved MySQL, because the future of the latter is not so promising after the purchase from Oracle.
We will also be using VirtualBox to install Ubuntu Server on a virtual machine but you can follow this guide on an actual computer or on your cloud/hosting provider.
To complete this guide you will need to download a copy of the latest Ubuntu Server ISO image (current version 14.04.2)
Setting up the Virtual Machine
- Install VirtualBox:
Make sure you have VirtualBox installed. If not, you can download it from your package manager or from command line (works for Ubuntu and Debian based systems):$ sudo apt-get -y install virtualbox
If you are using a Windows PC you will need to go to the
VirtualBox website and download it. - Start VirtualBox:
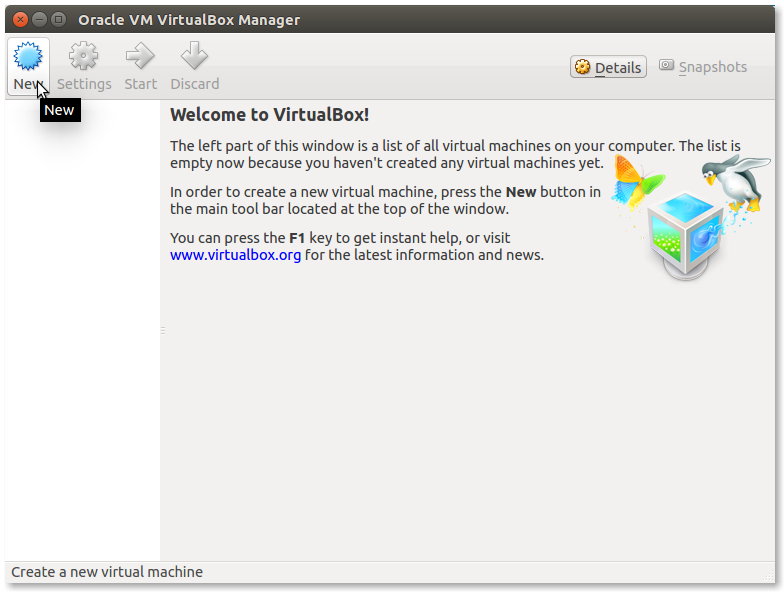
Click on the New icon to create a new virtual machine. - Setup the VM name:
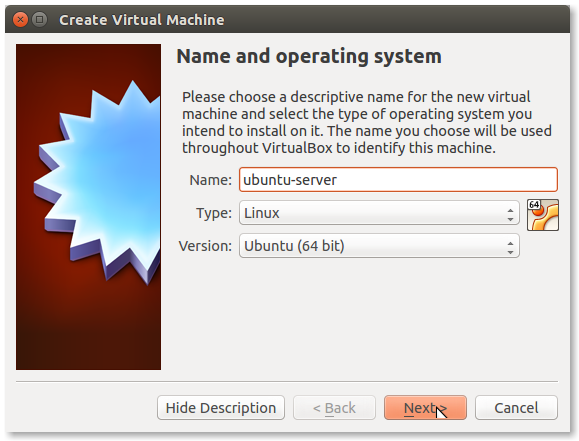
Type Ubuntu-server in the Name and click ‘Next’. - Setup the memory size.
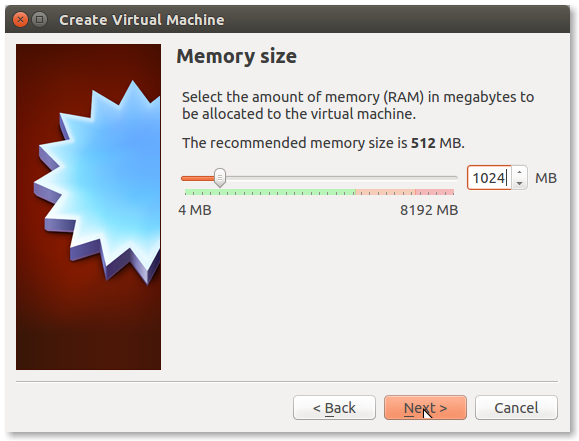
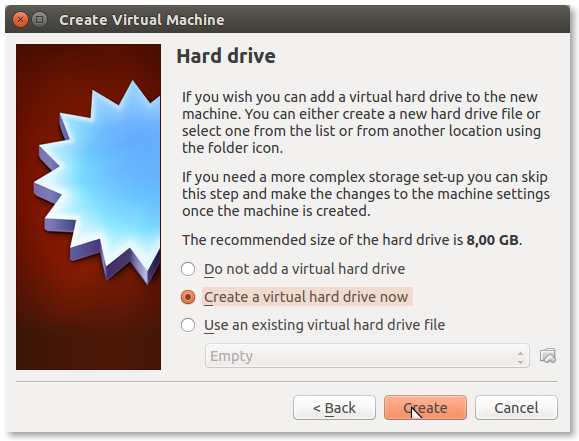
The default 512 MB is enough but you may use 1024 if you have memory to spare. - Setup the Virtual Hard Drive:
- Create the Virtual Hard Drive:
- Select the format of the Hard Drive:

VDI is the default for VirtualBox. - Select the type of the Hard Drive:
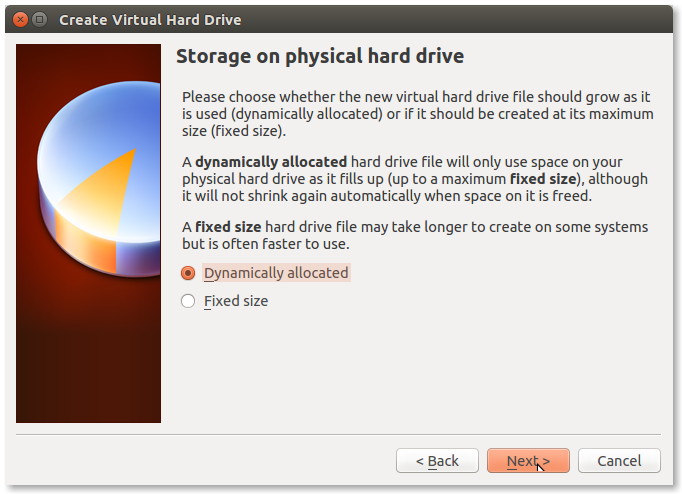
Fixed size is supposedly better for performance but it will occupy space equal to its size on your disk. For testing purposes choose Dynamically allocated. - Select the size of your disk:
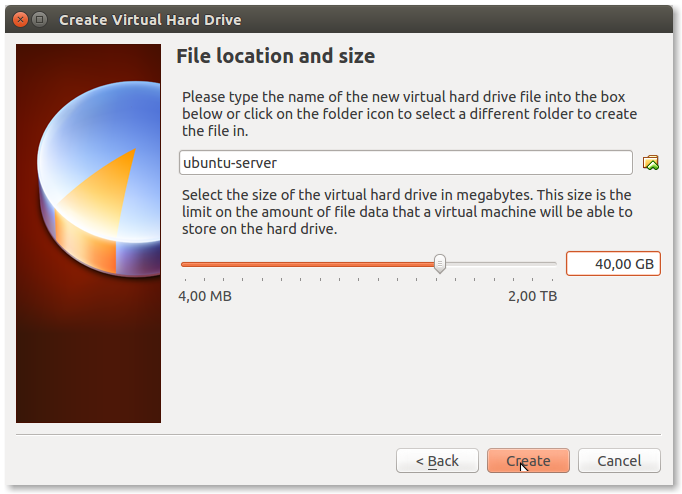
If you have chosen Dynamically allocated before, then your Hard Drive can be as large as 2,00 TB without actually occupying that much space on the physical disk. 40,00 GB is more than enough.
- Create the Virtual Hard Drive:
- Setup Networking:
The default network mode for newly created VirtualBox machines is NAT. This mode is not very convinient if you want to access your VM from the physical host so we are changing that to Bridged Adapter.
Warning: in some enterprise environments this could trigger the security defences of your network and lock you out! Please consult with you network administrator before enabling this at work!You can find more information about the VirtualBox networking modes here:
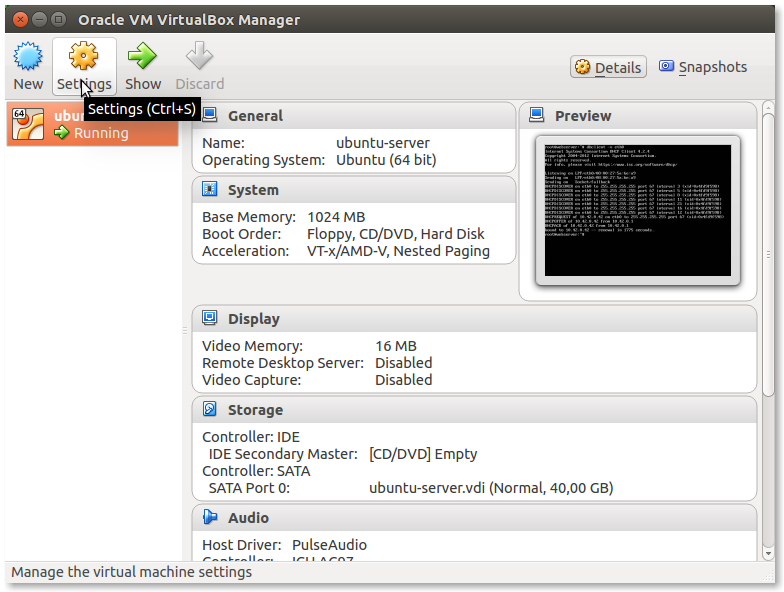
VirtualBox Networking Modes- To setup Bridged Networking press the Settings icon:
- The default mode in the Attached to: field is NAT:
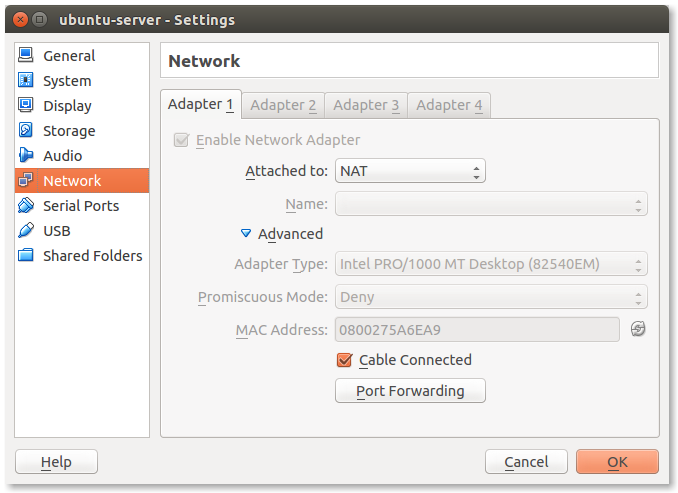
- Change NAT to Bridged Adapter:
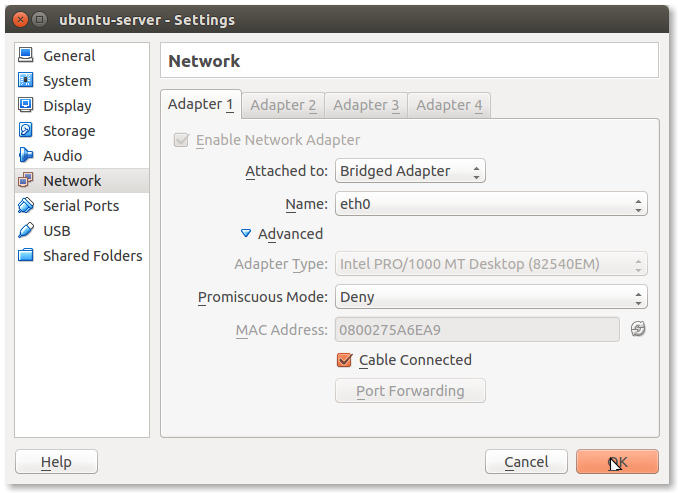
If you have more than one ethernet interfaces you will need to choose the correct one in the Name field. Usually the correct value is eth0 but this is not always the case. Press OK and you are done with networking.
- To setup Bridged Networking press the Settings icon:
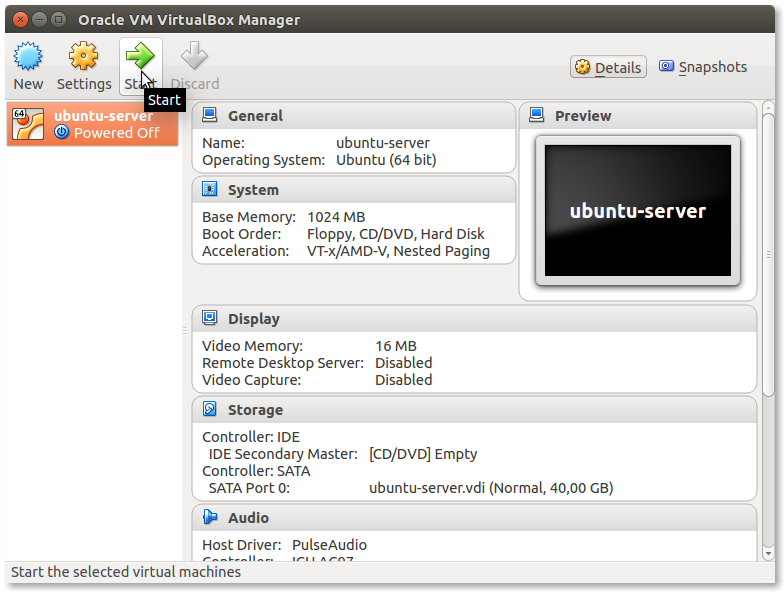
- Start your VM:
- Press the Start icon:
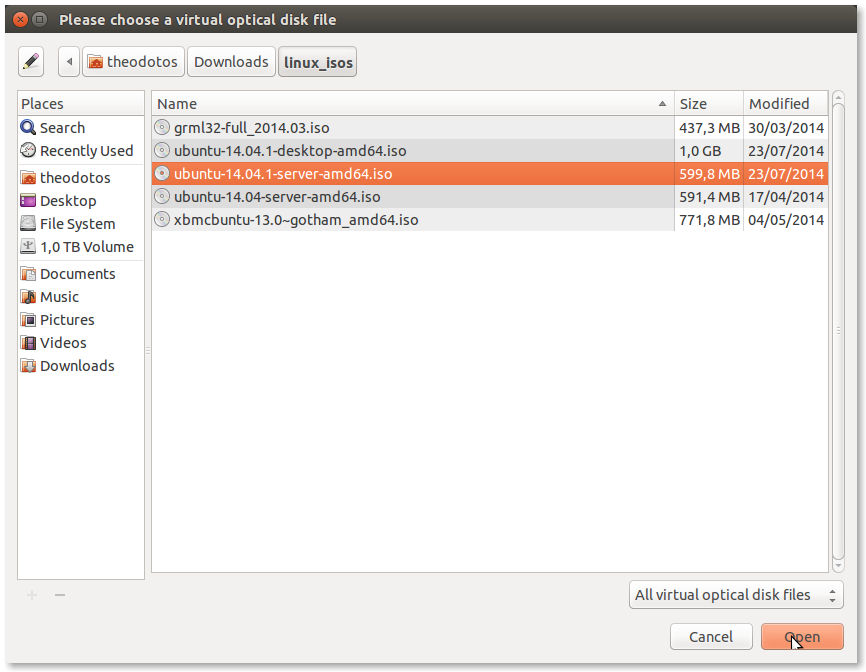
- Boot the Ubuntu ISO:

Click on the little folder icon on the right side. - Select the Ubuntu ISO file you downloaded earlier:
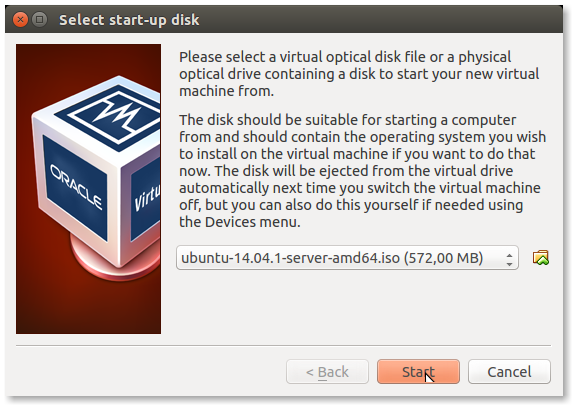
- Press Start to begin the installation:
- Press the Start icon:
The above procedure is for those that do not have a spare computer for testing. Building a VM is the safest way to experiment with all kind of setups without breaking your working computer.
Now if you do have a spare computer you can skip the steps above and go straight to the steps below. On a physical computer you will need to burn the ISO file on a CD/DVD or write it on a USB stick, using the usb-creator on Ubuntu or UNetbootin for other systems. You will need to setup your BIOS/UEFI to boot from the CD or USB first. On Windows 8 systems you may need to disable the abomination called Secure Boot.
Setting up Ubuntu Server 14.04 (Trusty Tahr)
Now prepare your pain-killers as this will take some time.
- Select the Language for the setup process:

This is the language during the installation. Choose English or whatever language you feel comfortable with. If you haven’t figured it out already, the mouse will not work here. Use the arrow keys to select the language and press ‘Enter’ to go to the next step. In case Virtualbox captures your mouse you can press the right Ctrl button to release it. - Start the installation:
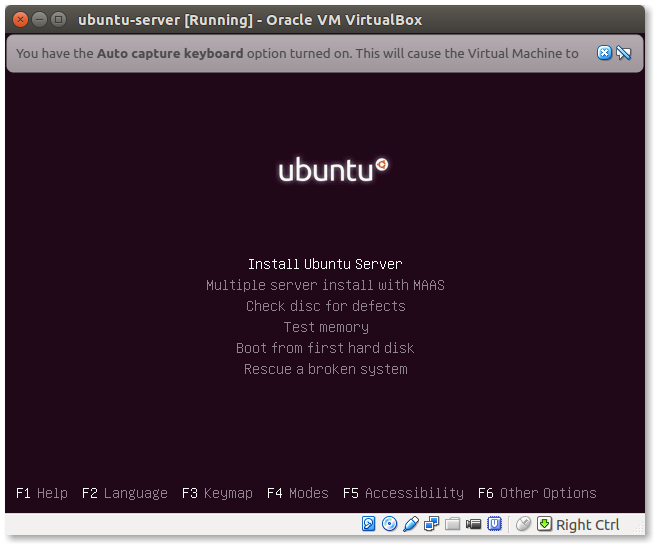
Select Install Ubuntu Server and press ‘Enter’. - Select the system Language:
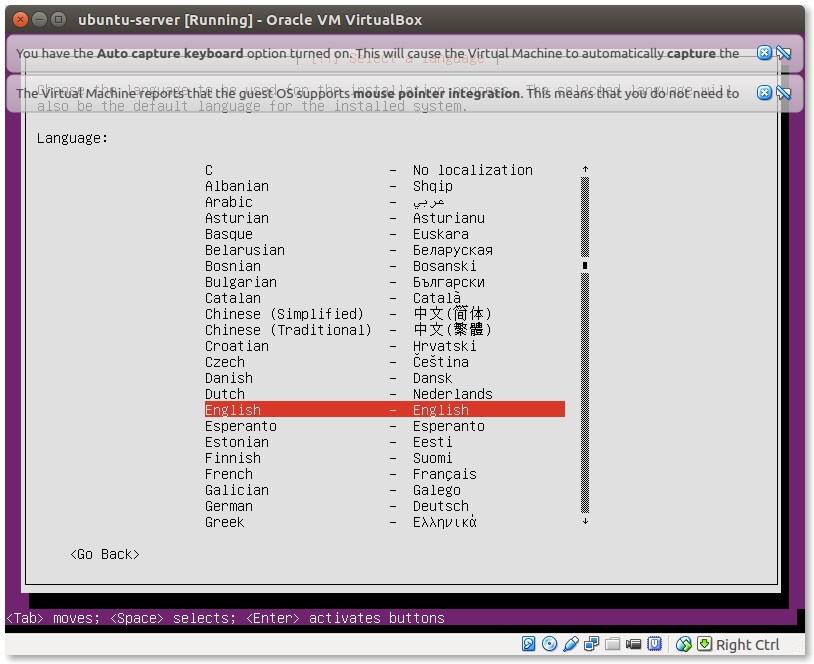 Again select whatever language you need. This is the language for the system, after the installation is finished.
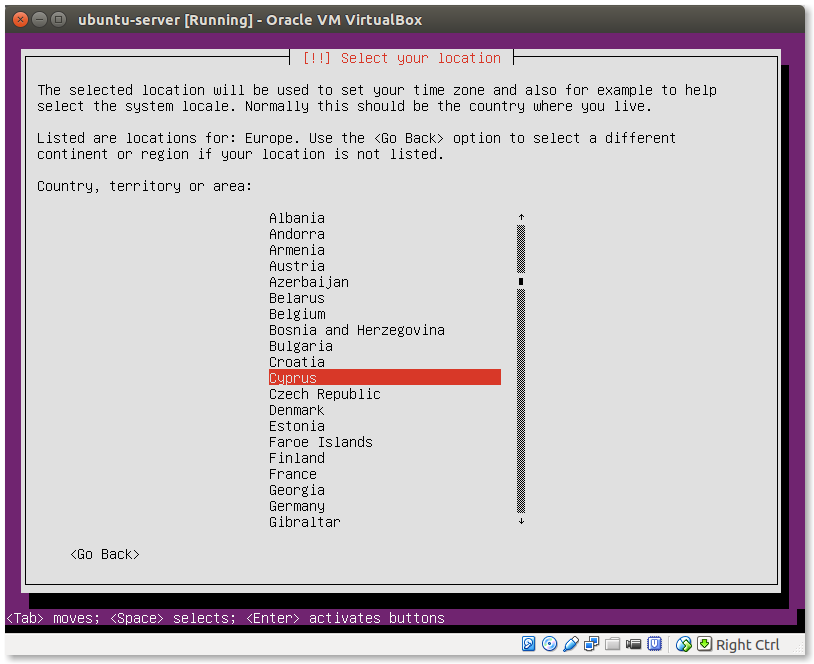
 - Select your location:
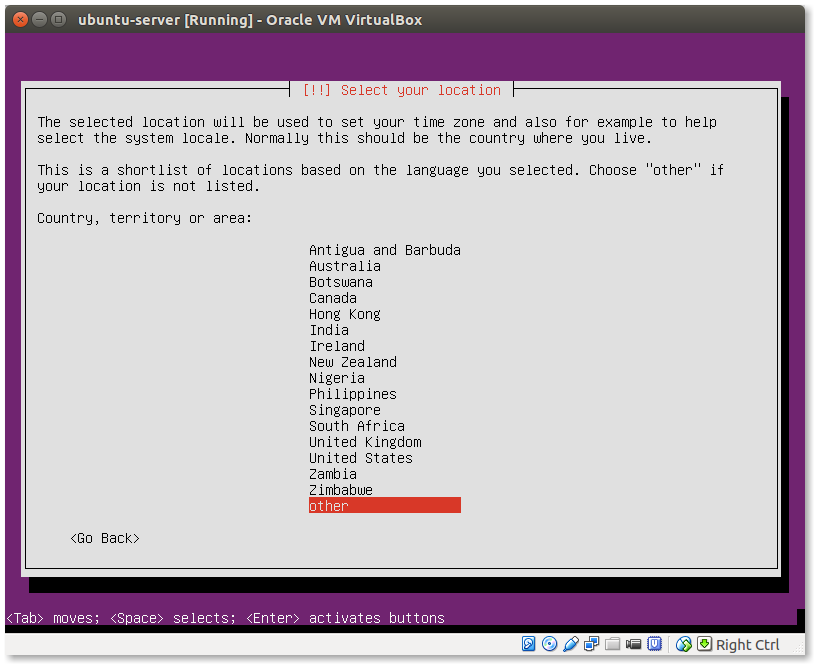
If your location is not listed here choose Other and press ‘Enter’. - Select your location now:
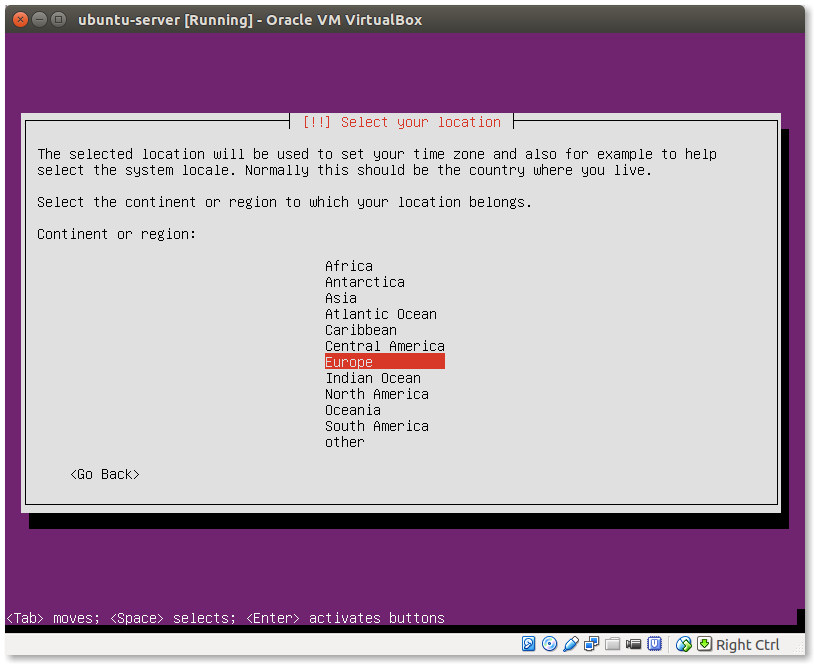
- Select your country:
- Select your Locale:
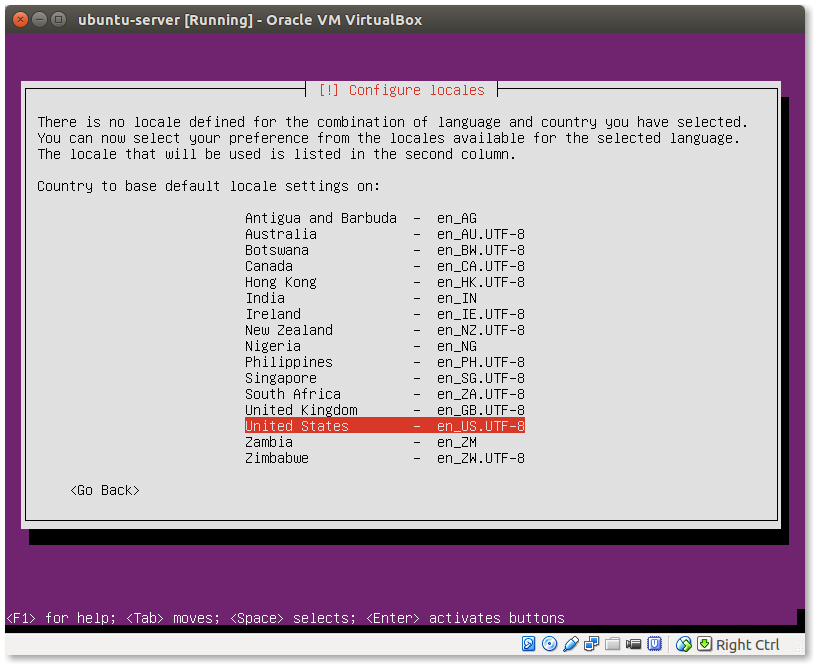
If you selected English before you will get a list of English speaking countries to choose from. - Detect keyboard layout:
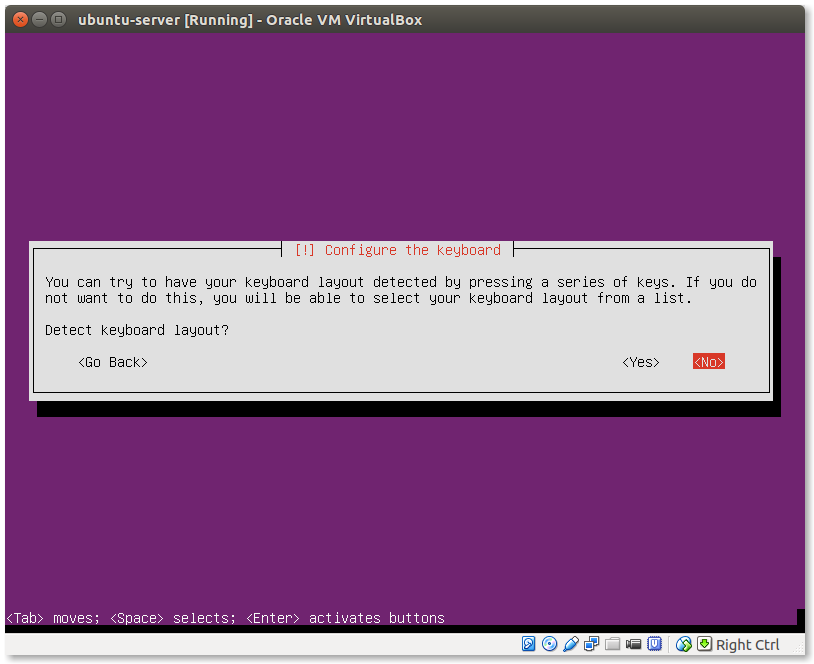
Select Yes if you are unsure of your keyboard layout. No is usually safe unless you have a weird keyboard. - Choose the basic keyboard layout:
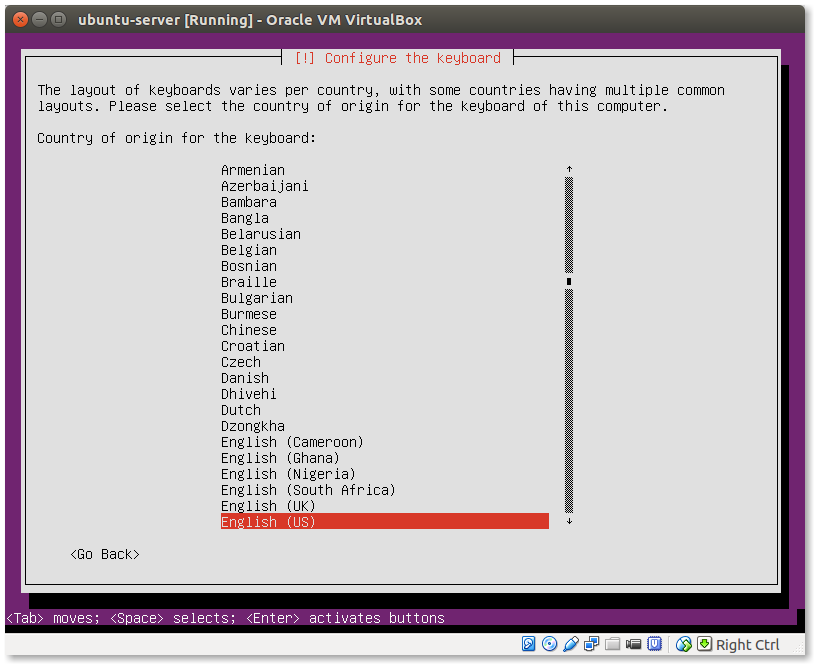
- Select specific keyboard layout:
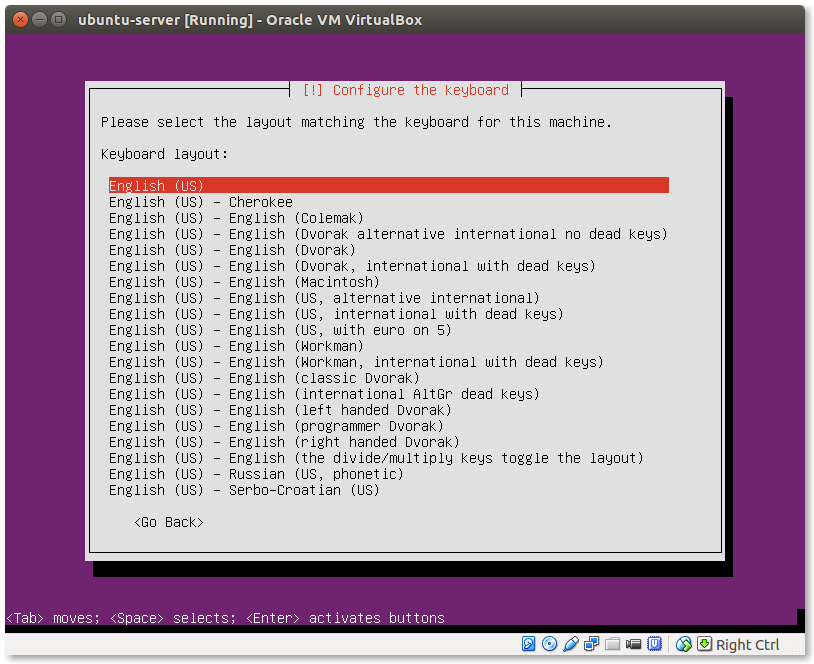
Select the first if you are unsure.- Wait for the setup to load all necessary components for the installation. If you are not connected to a DHCP enabled network, you will be prompted to give your network settings. Ask your network administrator for assistance.
- Select the hostname of your server:
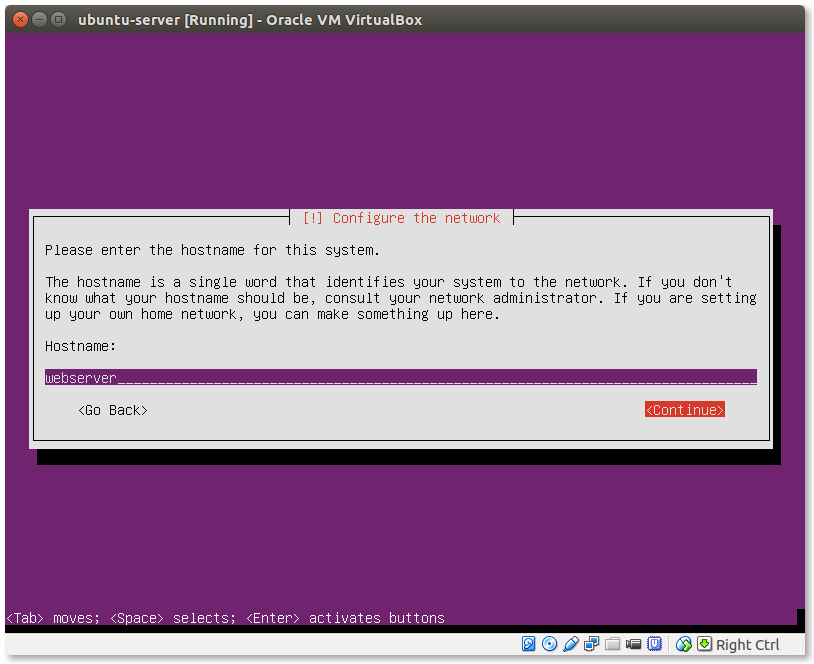
Press ‘Tab’, select Continue and then ‘Enter’. - Enter your name:
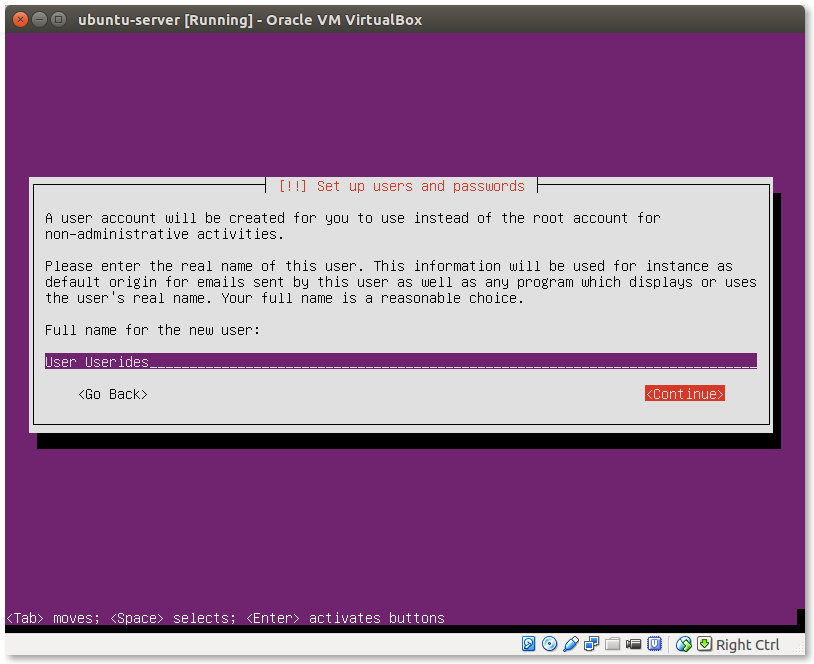
Nobody forces you to enter your actual name :). - Enter your username:
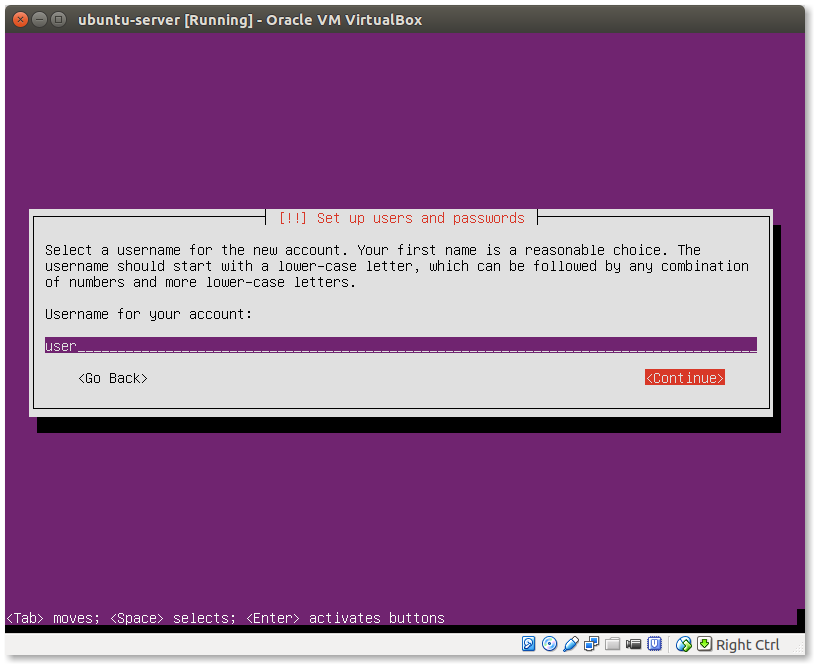
- Select your password:
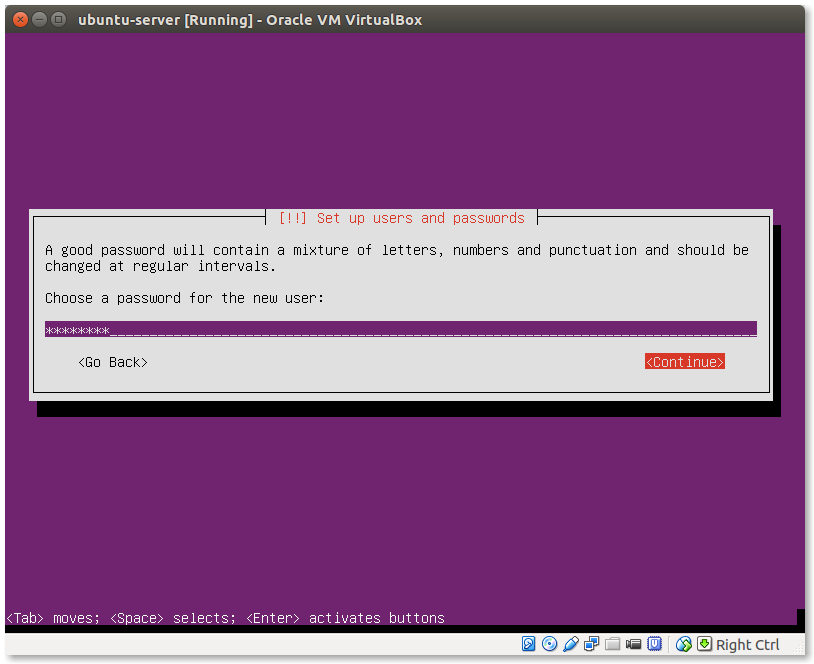
This is a privileged account (using the sudo command) so you better choose a hard to guess password. - Verify your password again:
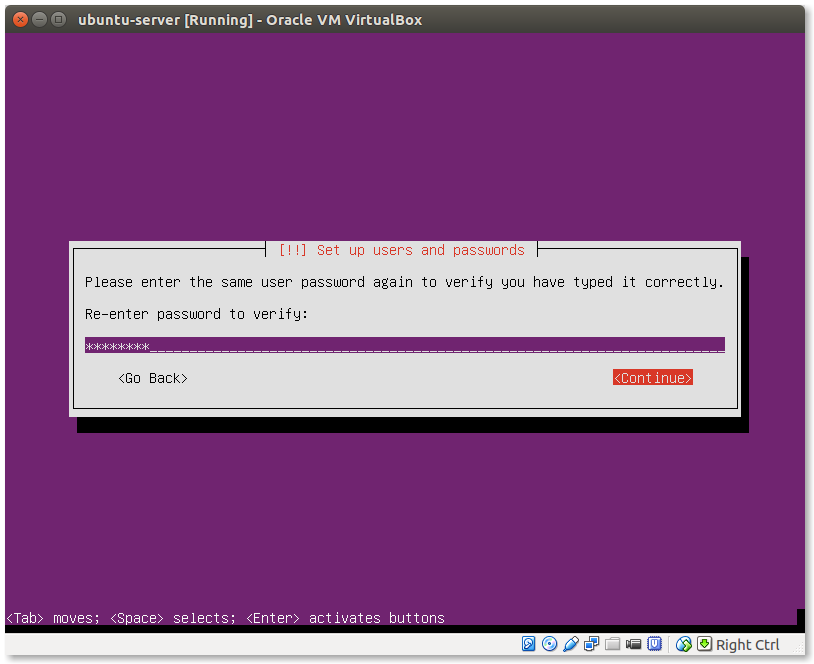
- Encrypt your home directory:
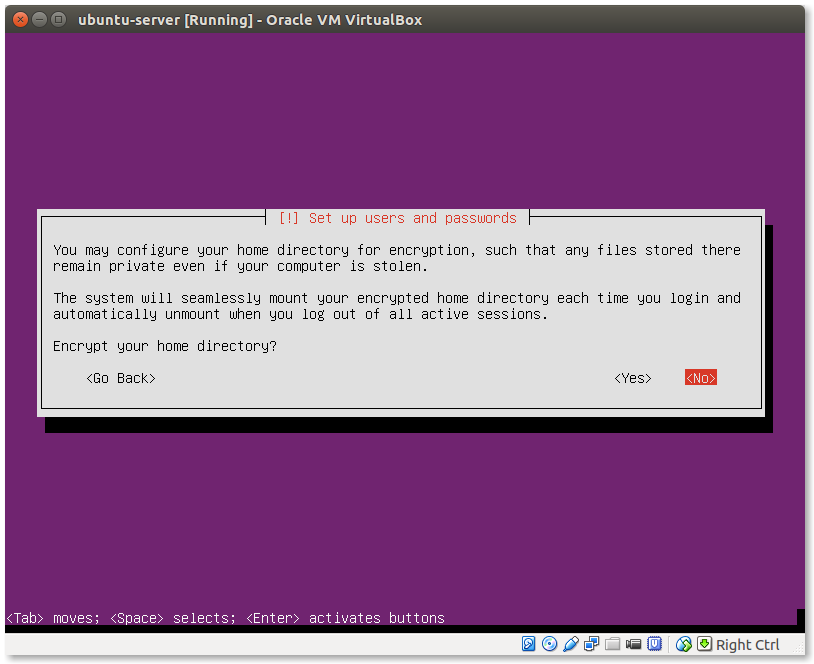
This will protect your personal files if you are paranoid. For testing it’s OK to choose No. - Confirm your timezone:
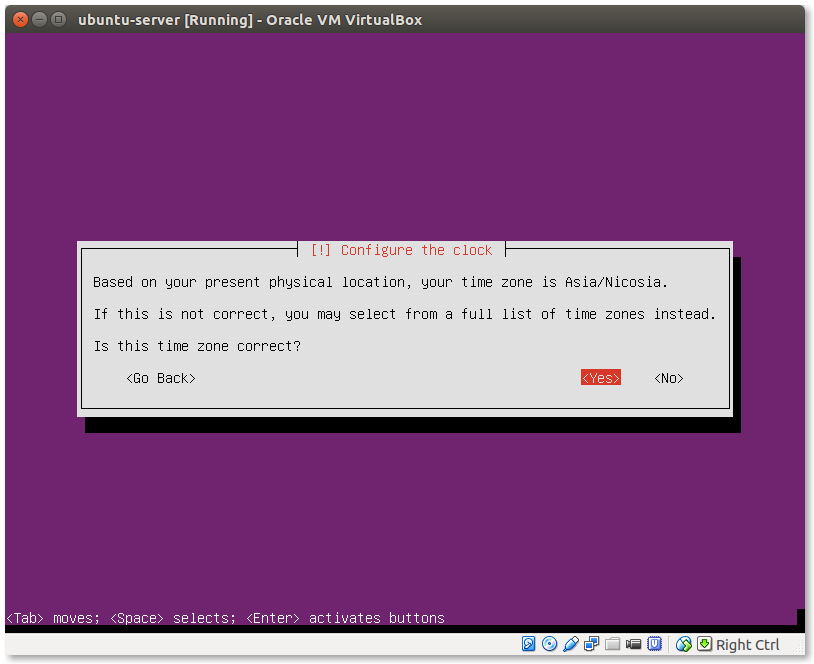
If the time zone is correct select Yes otherwise No. - Select the partitioning method:
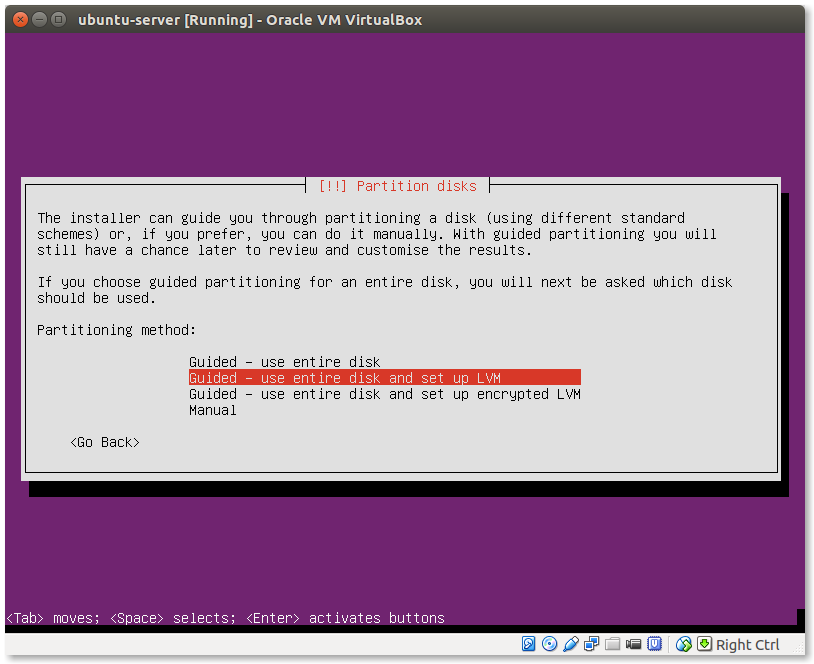 The first option is simpler and probably OK for testing. But on a production server you may need to resize the partitions, create new ones and add more disks, so the LVM method is the recommended.
 - Select the hard drive for the installation:
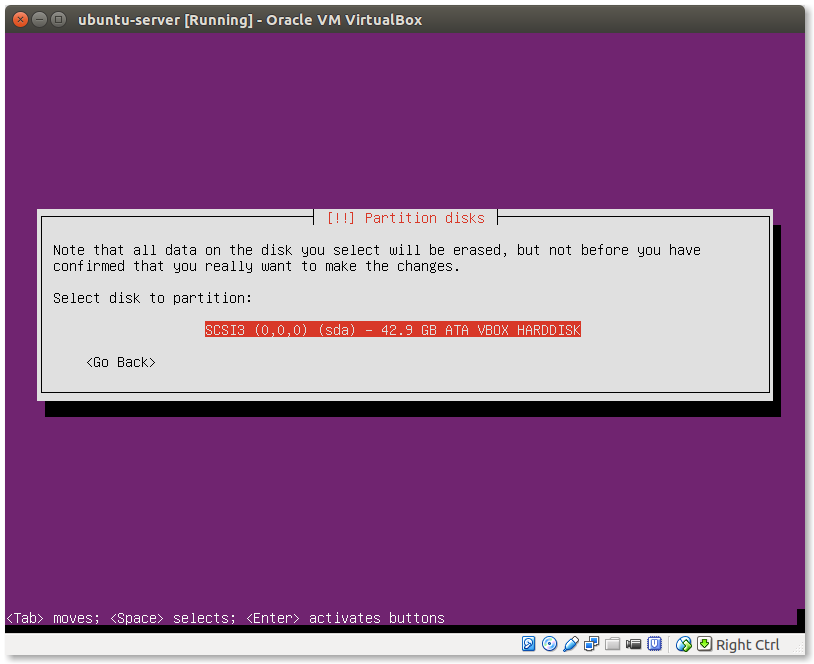
- Confirm if you want to write to this hard drive:
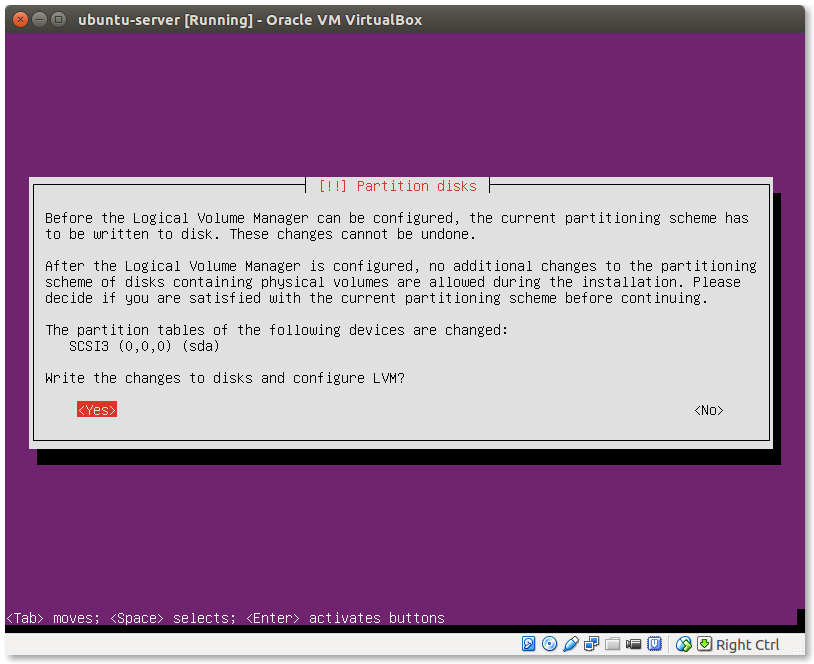
Select Yes and press ‘Enter’. Make sure you don’t have any data you need on this drive! - Select Disk Size for the system:

It’s OK to give all available disk size on a test machine. - Write changes to disk:
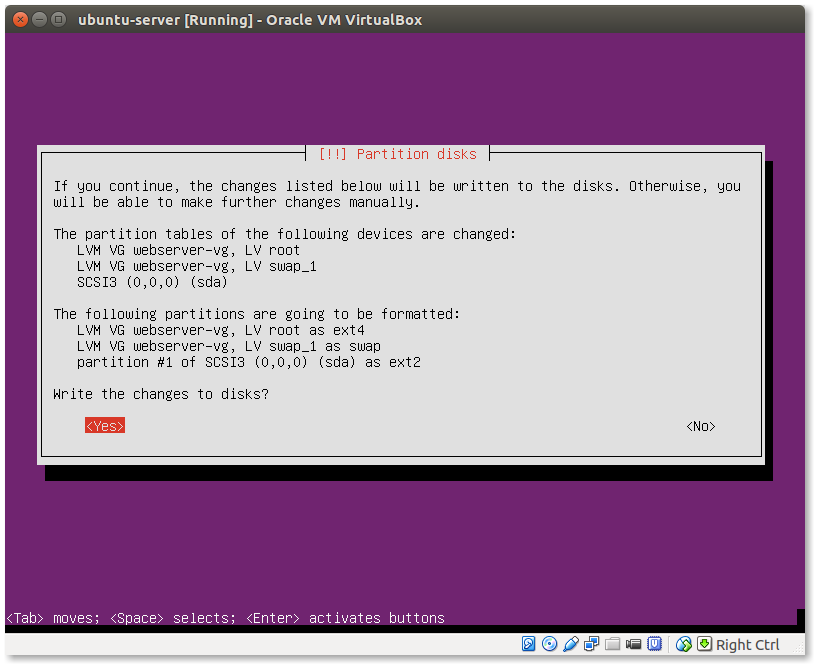
Select Yes and press ‘Enter’.- Wait for the Base system installation to complete
- Setup your proxy server:
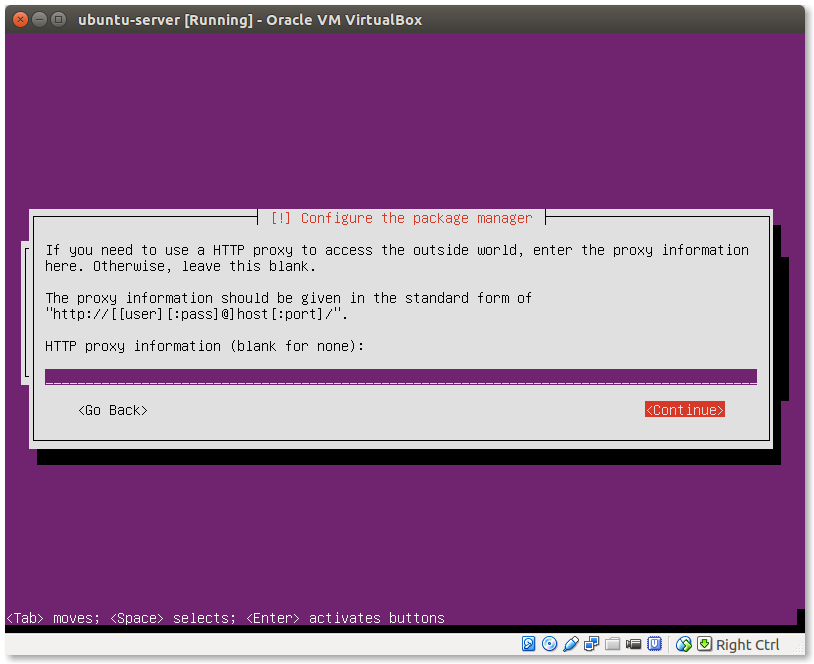
If you do not use a proxy server leave this field blank. - Method to manage upgrades:
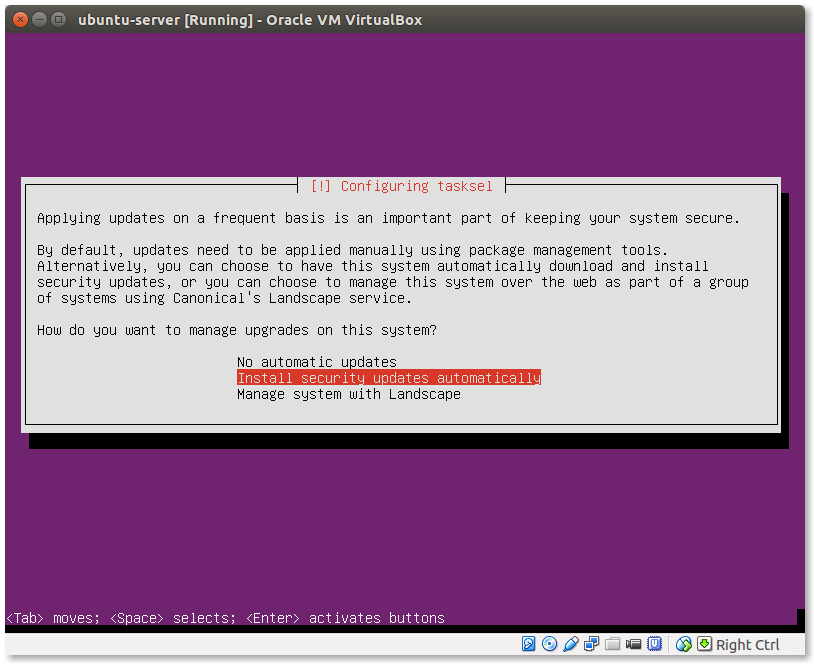
This is a tricky dilemma. If you choose No automatic updates you may forgot to apply updates and render your system vulnerable to attacks. If you choose Install security features automatically your system could break after an update. Choose wisely! - Choose additional software to install:
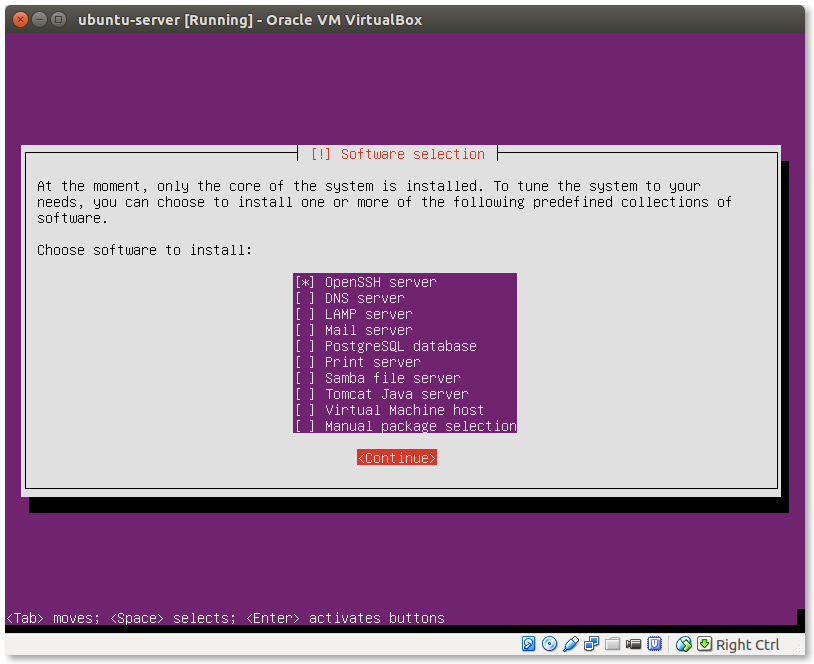
It is a good idea to enable the OpenSSH server so you can access your machine remotely. There is also a LAMP option here but this will install the MySQL server instead of MariaDB and you may wish to avoid that.- Wait for the additional software to be installed.
- Install the boot loader:
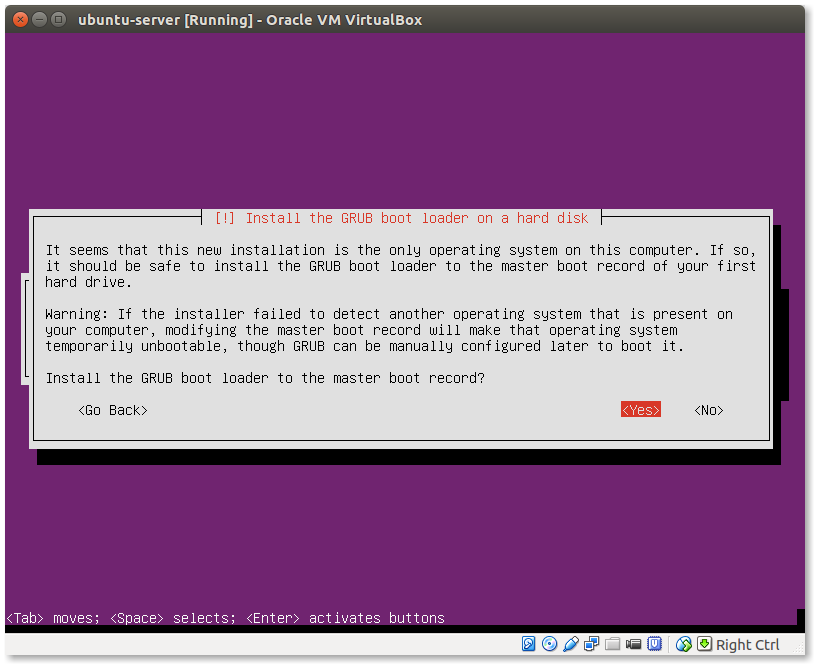
Select Yes here. - Restart your machine:
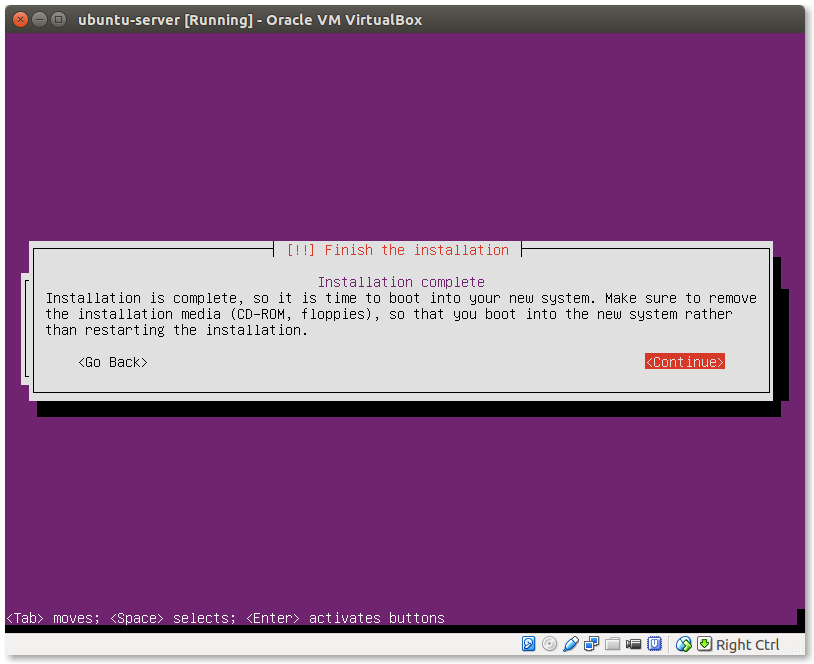
Press Continue to restart the system. - Welcome to your newly created Ubuntu server:
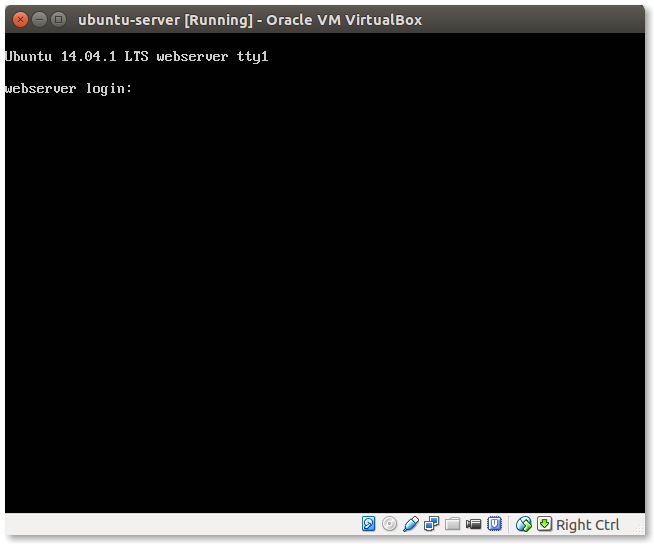
Congratulations if you have reached so far! You have just installed a fresh Ubuntu server ready to rock!
Installing the LAMP stack
Installing a LAMP environment is easy. We will need to install the Apache webserver, the MariaDB relational database, PHP and the Apache PHP module.
- Before we proceed with the LAMP stack installation it is a good idea to update/upgrade our system.The command below will download the lists containing the most fresh version of available packages.
$ sudo apt-get update
The following command will download the packages to be upgraded, remove obsolete packages and download new ones:
$ sudo apt-get -y dist-upgrade
- Installing necessary packages:
$ sudo apt-get -y install apache2 libapache2-mod-php5 mariadb-server php5-mysql
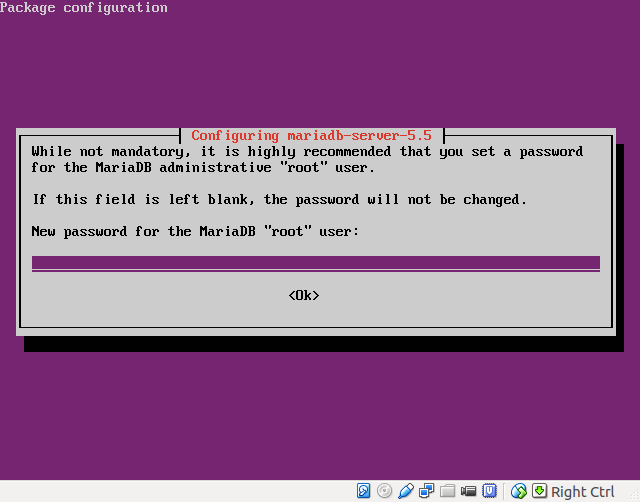
- Set the root password for MariaDB:
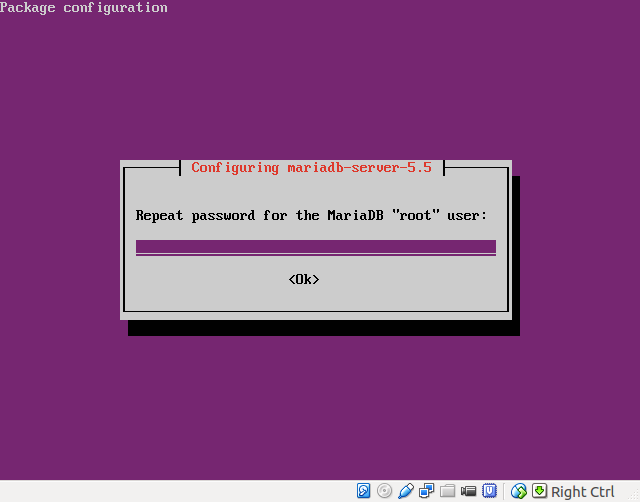
- Verify root password:
- Accept the warning:
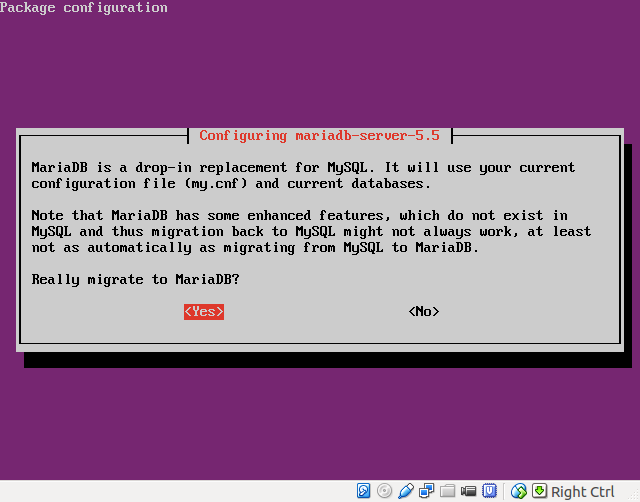
After the packages installation is finished we should be ready to go!
Testing your web server
Before testing we need to determine the IP address of the server. Run this command on the terminal of your webserver:
$ ip addr
1: lo: <LOOPBACK,UP,LOWER_UP> mtu 65536 qdisc noqueue state UNKNOWN group default
 link/loopback 00:00:00:00:00:00 brd 00:00:00:00:00:00
 inet 127.0.0.1/8 scope host lo
 valid_lft forever preferred_lft forever
 inet6 ::1/128 scope host
 valid_lft forever preferred_lft forever
2: eth0: <BROADCAST,MULTICAST,UP,LOWER_UP> mtu 1500 qdisc pfifo_fast state UP group default qlen 1000
 link/ether 08:00:27:5a:6e:a9 brd ff:ff:ff:ff:ff:ff
 inet 192.168.56.101/24 brd 192.168.56.255 scope global eth0
 valid_lft forever preferred_lft forever
 inet6 fe80::a00:27ff:fe5a:6ea9/64 scope link
 valid_lft forever preferred_lft forever
The IP of your server is 192.168.56.101
- Testing your ssh connection:
First lets check if ssh works on your server. Type the following command from the terminal of your PC:me@PC:~$ ssh user@192.168.56.101 The authenticity of host '192.168.56.101 (192.168.56.101)' can't be established. ECDSA key fingerprint is e4:e7:ac:6c:68:ea:71:90:29:03:bc:92:8e:23:f7:0e. Are you sure you want to continue connecting (yes/no)? yes Warning: Permanently added '192.168.56.101' (ECDSA) to the list of known hosts. user@192.168.56.101's password: Welcome to Ubuntu 14.04.1 LTS (GNU/Linux 3.13.0-35-generic x86_64) * Documentation: https://help.ubuntu.com/ System information as of Mon Sep 15 11:36:04 EEST 2014 System load: 0.09 Processes: 84 Usage of /: 4.5% of 38.02GB Users logged in: 0 Memory usage: 13% IP address for eth0: 192.168.56.101 Swap usage: 0% Graph this data and manage this system at: https://landscape.canonical.com/ Last login: Mon Sep 15 11:36:04 2014 user@webserver:~$
The first time you connect to any ssh system you get the warning that The authenticity of host ‘<myhost(myip)>’ can’t be established. This happens only the first time and it is a safe-guard against MITM attacks. Type yes (not y!) here.
Then it will ask for your password. You will see nothing as you type it! That’s normal.
If you password is correct you will be greeted by the system information in the command prompt.
- Testing your Apache webserver:
Fire up your browser and type this URL in the address bar:
http://192.168.56.101
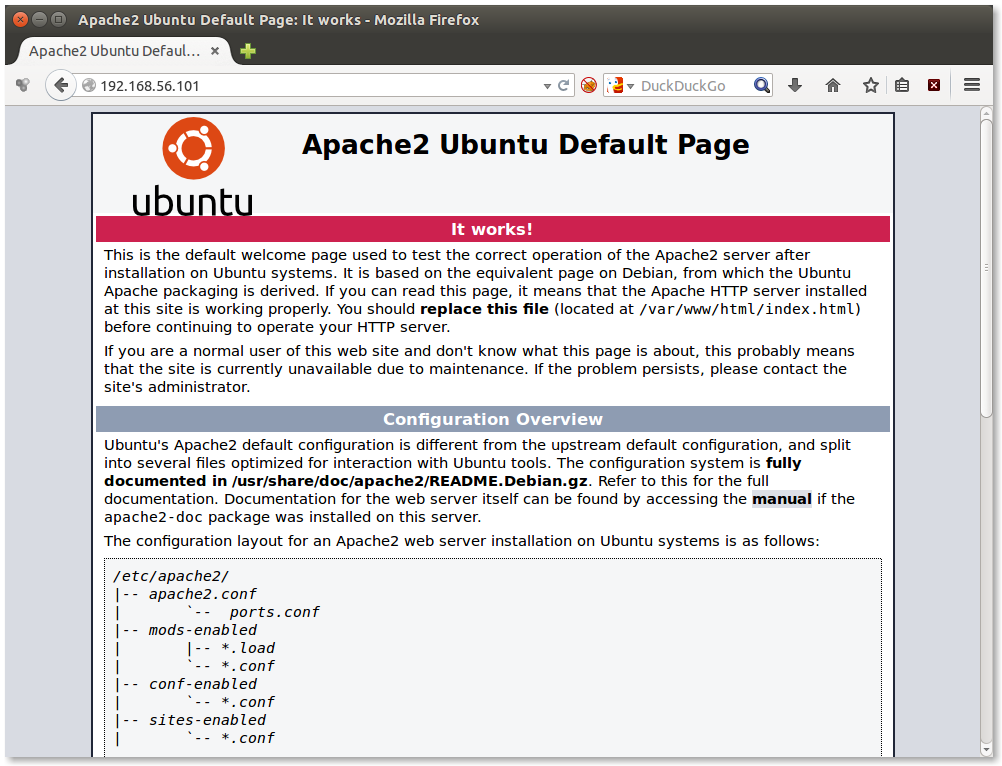
If you can see the above page in your browser, it means that your Apache webserver is up and running. - Testing PHP:
You need to create the following file under the Apache
DocumentRoot (/var/www/html):
Type the following commands on your server terminal:$ sudo -i [sudo] password for user: # cat > /var/www/html/phpinfo.php << EOF > <?php phpinfo(); ?> > EOF # exit $
The command sudo -i will give you access as the super-privileged root user. Notice how the prompt changes frpm $ to #.
The command cat … will create a new file /var/www/html/phpinfo.php with the content <?php phpinfo(): ?>. This is a nice way to test your PHP setup and get some basic information about your LAMP setup.
The command exit will take you back to your normal user account. It is not considered a good practice to be logged in as root for too long.
Finally direct your browser to http://192.168.56.101/phpinfo.php and expect to see something like this:
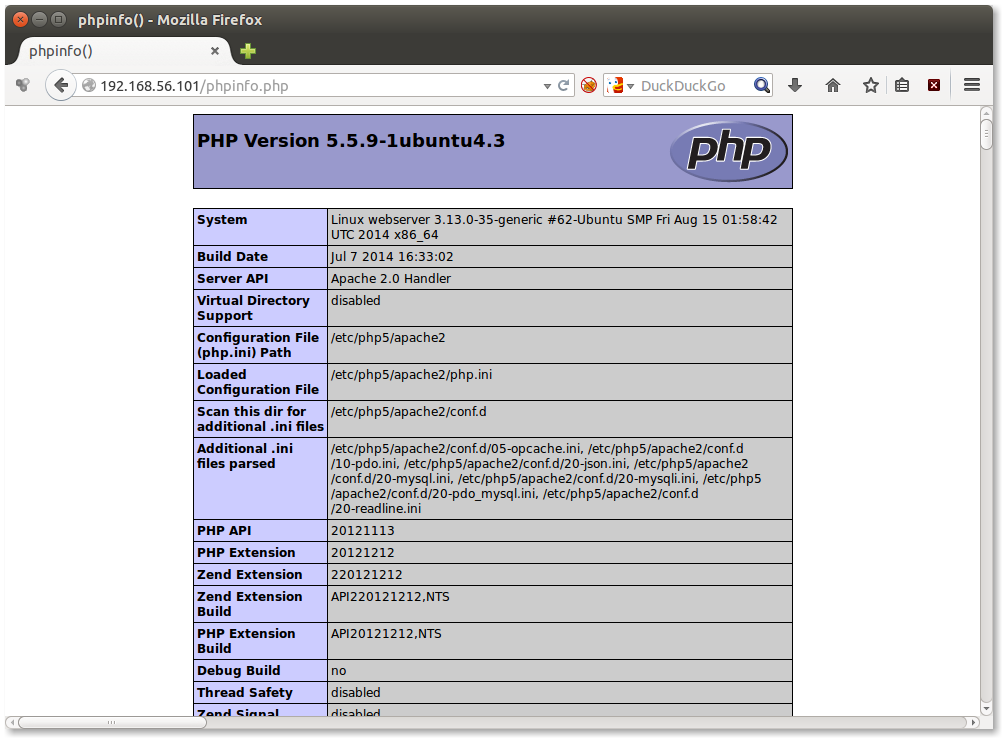
If you scroll further down you will see that mysql is enabled too:
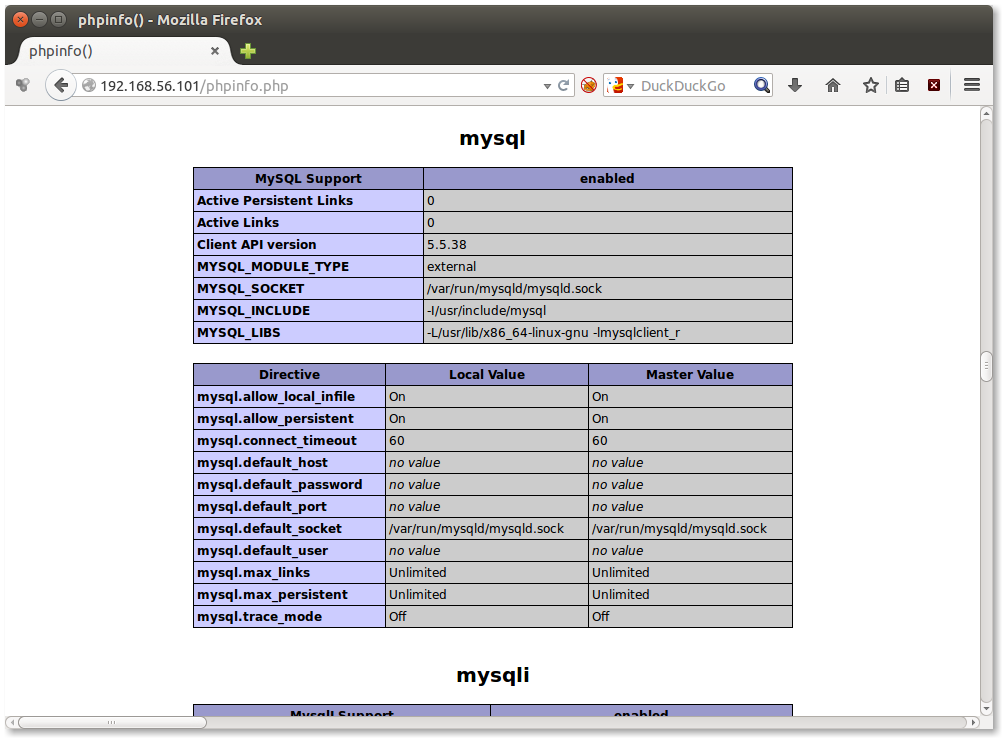
For security reasons it may be a good idea to delete the
phpinfo.php file afterwards:$ sudo rm /var/www/html/phpinfo.php
- Install phpMyAdmin (optional):
$ sudo apt-get -y install phpmyadmin
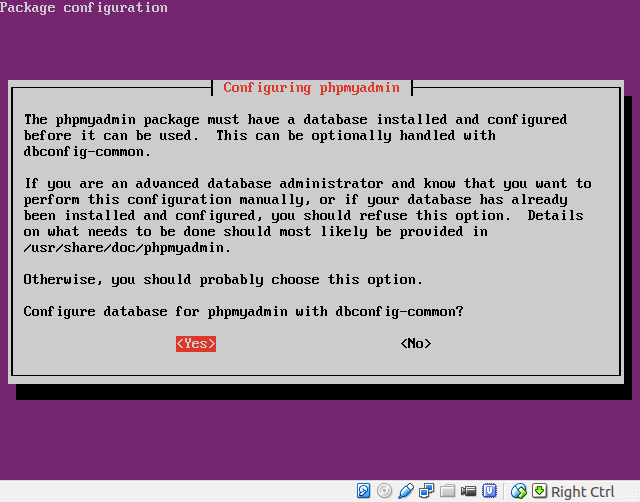
- Let the package management system handle phpMyAdmin configuration:
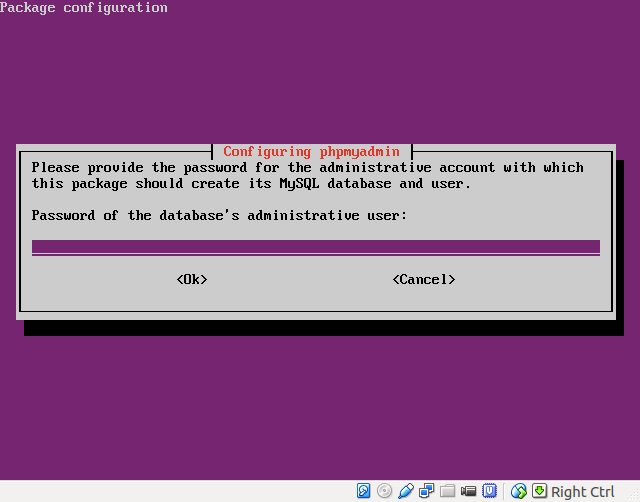
- Type the MariaDB root password:
- Set the phpMyAdmin database password:
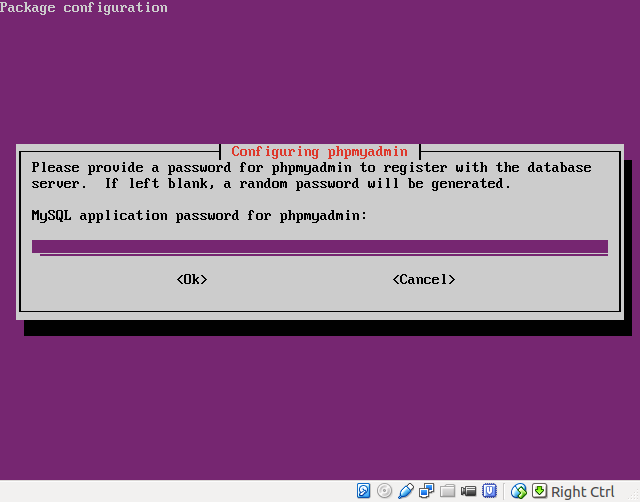
- Verify the password:

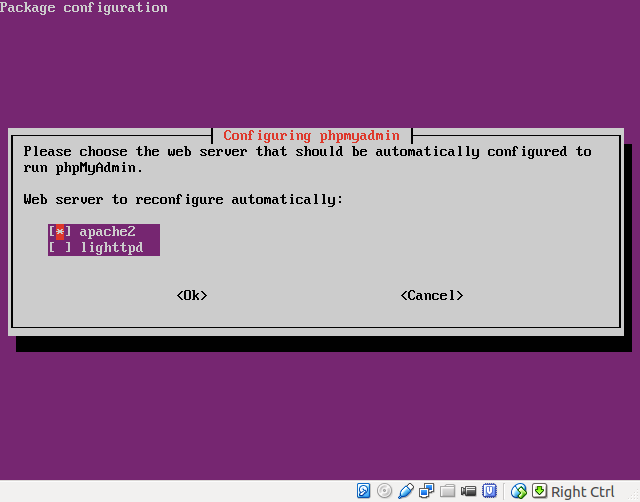
- Choose the correct webserver (apache2):
- Visit the phpMyAdmin URL:
(http://192.168.56.101/phpmyadmin):
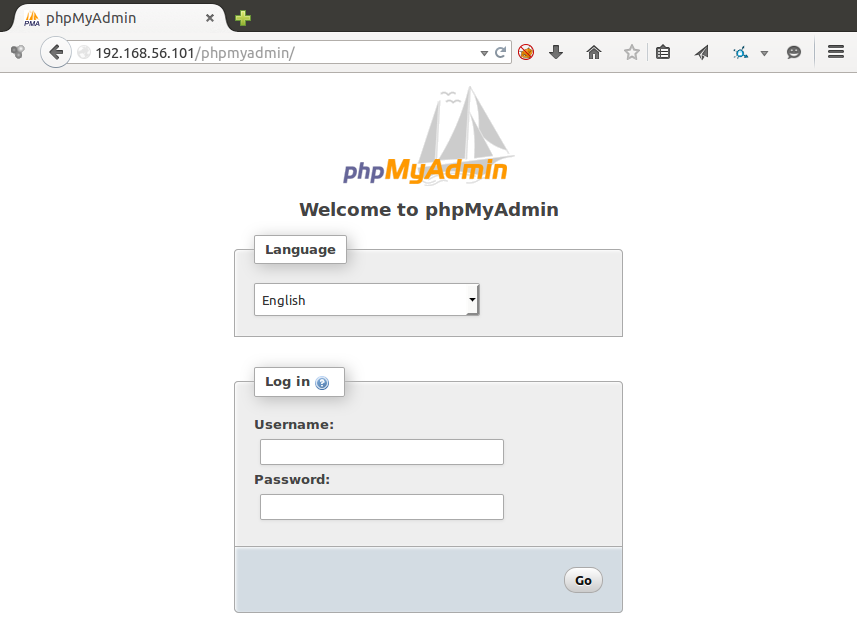
Use the username root and the MariaDB root password to login. - Now you can manage MariaDB through phpMyAdmin:
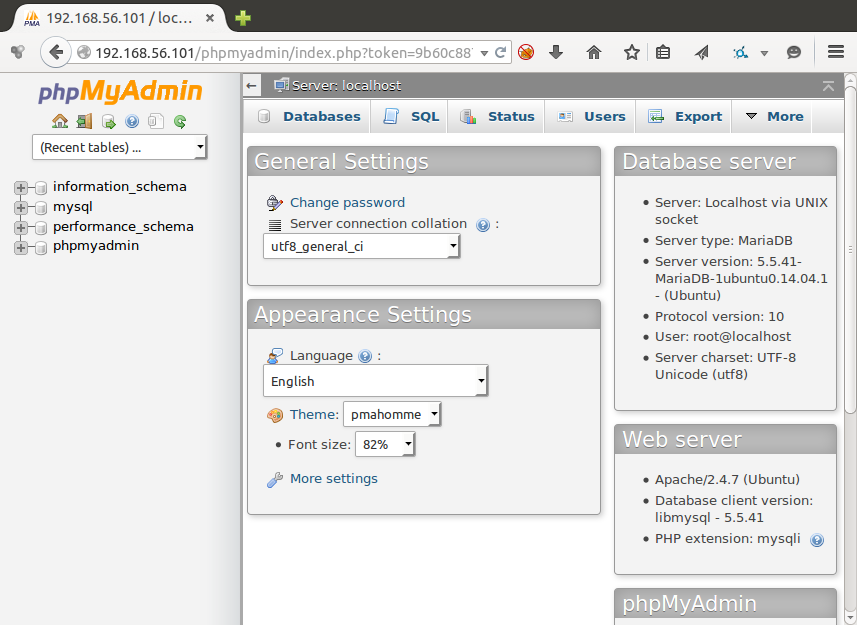
This was the final test that ensures everything works as expected. Now you can start developing your PHP website or install a PHP application like WordPress or ownCloud.