Categories
Linux

How to remotely decrypt a LUKS encrypted Debian/Ubuntu System

In this guide we will show how you can remotely decrypt a headless Debian or Ubuntu Linux system, that has been encrypted with LUKS.

Prerequisites

  • A LUKS encrypted Debian jessie or Ubuntu xenial system
  • Keyboard and monitor for the initial system setup
  • Allow SSH root access on the decrypted system using public key authentication
  • Use a different port for ssh (assuming port 4422) on the decrypted system

    NOTE: using a different port than the standard SSH port (22) serves a double purpose. For once, you will not received the scary WARNING: REMOTE HOST IDENTIFICATION HAS CHANGED! message every time you will try to remotely unlock the system and as an additional bonus you will get less SSH attacks on the active system.

Installing dropbear

Dropbear is a lightweight SSH server especially suitable for initial ramdisk (initrd) environments and other lightweight systems.

Install dropbear:

# apt -y install dropbear

Setup public key authentication for dropbear

Create the homedir for the root user and the SSH configuration directory:

# mkdir -p /etc/initramfs-tools/root/.ssh

Append your client SSH pubkey to authorized_keys:

# cat ~/.ssh/id_rsa.pub | ssh -p 4422 root@encrypted-system "cat >> /etc/initramfs-tools/root/.ssh/authorized_keys"

Setup a static IP for the unlock environment

This step is optional but highly recommended if you are setting up a static, permanent service. If you skip this step DHCP will kick in, provided you have a DHCP Server in your environment.

Run this command to update the /etc/initramfs-tools/initramfs.conf configuration file:

echo IP=10.0.0.67::10.0.0.1:255.255.255.0:encrypted-system:eth0:off >> /etc/initramfs-tools/initramfs.conf

Explanation of the different fields:
[host_ip]::[gateway_ip]:[netmask]:[hostname]:[device]:[autoconf]

NOTE: there are two successive colons (::) after the host_ip.

Setup the unlock script

Copy the following text in /etc/initramfs-tools/hooks/crypt_unlock.sh:

#!/bin/sh
#
# By Stinky Parkia
# https://stinkyparkia.wordpress.com/2014/10/14/remote-unlocking-luks-encrypted-lvm-using-dropbear-ssh-in-ubuntu-server-14-04-1-with-static-ipst/

PREREQ="dropbear"

prereqs() {
    echo "$PREREQ"
}

case "$1" in
    prereqs)
    prereqs
    exit 0
    ;;
esac

. "${CONFDIR}/initramfs.conf"
. /usr/share/initramfs-tools/hook-functions

if [ "${DROPBEAR}" != "n" ] && [ -r "/etc/crypttab" ] ; then
    cat > "${DESTDIR}/bin/unlock" < < EOF
#!/bin/sh
if PATH=/lib/unlock:/bin:/sbin /scripts/local-top/cryptroot; then
    kill \`ps | grep cryptroot | grep -v "grep" | awk '{print \$1}'\`
    # following line kill the remote shell right after the passphrase has
    # been entered.
    kill -9 \`ps | grep "\-sh" | grep -v "grep" | awk '{print \$1}'\`
    exit 0
fi
exit 1
EOF

    chmod 755 "${DESTDIR}/bin/unlock"

    mkdir -p "${DESTDIR}/lib/unlock"
    cat > "${DESTDIR}/lib/unlock/plymouth" < < EOF
#!/bin/sh
[ "\$1" == "--ping" ] && exit 1
/bin/plymouth "\$@"
EOF

    chmod 755 "${DESTDIR}/lib/unlock/plymouth"

    echo To unlock root-partition run "unlock" >> ${DESTDIR}/etc/motd
fi

Make the script executable:

# chmod +x /etc/initramfs-tools/hooks/crypt_unlock.sh

Apply the configuration

Apply the changes in the initial ramdisk:

# update-initramfs -u

Reboot the system:

# reboot

Remotely unlock the system

From your client, SSH into the initial ramdisk:

ssh root@encrypted-system 

If everything is correct you will be greeted by this MOTD:

To unlock root-partition run unlock


BusyBox v1.22.1 (Ubuntu 1:1.22.0-15ubuntu1) built-in shell (ash)
Enter 'help' for a list of built-in commands.

Unlock the system and boot into it:

# unlock
Please unlock disk sda3_crypt: 

You will get the following message and you will exit the remote shell if successful:

cryptsetup: sda3_crypt set up successfully
Connection to 10.0.0.67 closed.

You can now login to the active Linux system using the alternative port 4422:

ssh -p 4422 root@encrypted-system

If you can login successfully to your system you can remove the keyboard and monitor and hide your system somewhere where the Sun does not shine :).

Thanks to Stinky Parkia for the excellent guide and the brilliant unlock script.

References

  • https://stinkyparkia.wordpress.com/2014/10/14/remote-unlocking-luks-encrypted-lvm-using-dropbear-ssh-in-ubuntu-server-14-04-1-with-static-ipst/
Categories
Linux

Setting up a Postfix/Dovecot mail system with an LDAP/Fusiondirectory backend

This guide is about setting up a Postfix/Dovecot system using LDAP/Fusiondirectoory as a backend.

Prerequisites

  • Install an LDAP/Fusiondirectory infrastructure
  • A DNS A Record:
    mail.example.com. 300 IN A 4.5.6.7
  • A DNS PTR Record:
    7.6.5.4.in-addr.arpa. 300 IN PTR mail.example.com.
  • A DNS MX Record (Actually more than one):
    example.com. 300 IN MX 5 mail.example.com.

Install FusionDirectory Plugins

  • Install the Mail plugin:
    apt -y install fusiondirectory-plugin-mail fusiondirectory-plugin-mail-schema
    fusiondirectory-insert-schema -i /etc/ldap/schema/fusiondirectory/mail-fd.schema
    fusiondirectory-insert-schema -i /etc/ldap/schema/fusiondirectory/mail-fd-conf.schema
    
  • Install the Alias plugin:
    apt -y install fusiondirectory-plugin-alias fusiondirectory-plugin-alias-schema
    fusiondirectory-insert-schema -i /etc/ldap/schema/fusiondirectory/alias-fd-conf.schema
    fusiondirectory-insert-schema -i /etc/ldap/schema/fusiondirectory/alias-fd.schema
    
  • Install the Postfix plugin:
    apt -y install fusiondirectory-plugin-postfix fusiondirectory-plugin-postfix-schema
    fusiondirectory-insert-schema -i /etc/ldap/schema/fusiondirectory/postfix-fd.schema
    

Setup mail services:

  • Enter the mail.example.com server configuration (Systems plugin)
  • From the ‘Services’ tab create a ‘Postfix (SMTP)’ and an ‘IMAP/POP3 generic’ service

  • Add mail capability to all normal users:

    • Click the ‘Mail’ tab of a user and then press ‘Add Mail settings’
  • Fill in the ‘Primary Address. field and select mail.example.com as the server.

  • Add All necessary distribution lists and redirections from ‘Aliases’

  • Setup postfix

    • Create a service account for postfix using the ‘DSA’ plugin in *FusionDirectory’. It should look like this:

      dn: cn=postfix,ou=dsa,dc=example,dc=com
      cn: postfix
      userPassword:: yeduyt2732tet87eoiewoi32t4873t4387f7gf47gf49i6=
      structuralObjectClass: organizationalRole
      entryUUID: 280427ce-9a54-1035-8e48-bf1fd814366b
      creatorsName: cn=admin,dc=example,dc=com
      createTimestamp: 20160419082627Z
      objectClass: organizationalRole
      objectClass: top
      objectClass: simpleSecurityObject
      entryCSN: 20160419082628.006263Z#000000#000#000000
      modifiersName: cn=admin,dc=example,dc=com
      modifyTimestamp: 20160419082628Z
      

    • Install postfix:
      apt -y install postfix postfix-pcre postfix-ldap
      

      When you are prompted about "General type of mail configuration:" select "No configuration"

    • Prepare the /etc/postfix/main.cf file:

    smtpd_banner = $myhostname ESMTP $mail_name
    biff = no
    append_dot_mydomain = no
    readme_directory = no
    smtpd_tls_cert_file=/etc/ssl/certs/mail.example.com.crt
    smtpd_tls_key_file=/etc/ssl/private/mail.example.com.key
    smtpd_use_tls=yes
    smtpd_tls_security_level = may
    smtpd_tls_auth_only = yes
    smtpd_tls_session_cache_database = btree:${data_directory}/smtpd_scache
    smtp_tls_session_cache_database = btree:${data_directory}/smtp_scache
    smtpd_tls_dh512_param_file = ${config_directory}/certs/dh_512.pem
    smtpd_tls_dh1024_param_file = ${config_directory}/certs/dh_1024.pem
    tls_random_source = dev:/dev/urandom
    smtpd_tls_loglevel = 0
    smtpd_client_new_tls_session_rate_limit = 10
    smtpd_tls_exclude_ciphers =
        EXP
        EDH-RSA-DES-CBC-SHA
        ADH-DES-CBC-SHA
        DES-CBC-SHA
        SEED-SHA
        aNULL
        eNULL
        EXPORT
        DES
        RC4
        MD5
        PSK
        aECDH
        EDH-DSS-DES-CBC3-SHA
        KRB5-DES-CBC3-SHA
    myhostname = mail.example.com
    alias_maps = hash:/etc/aliases
    alias_database = hash:/etc/aliases
    myorigin = /etc/mailname
    mydestination = $myhostname, mail.example.com, localhost.localdomain, localhost
    relayhost =
    mynetworks = 127.0.0.0/8 [::ffff:127.0.0.0]/104 [::1]/128 10.10.10.0/24
    mailbox_size_limit = 0
    recipient_delimiter = +
    inet_interfaces = all
    inet_protocols = all
    local_transport = local
    postscreen_greet_action = enforce
    smtpd_recipient_restrictions =
        reject
        permit_mynetworks
        permit_sasl_authenticated
        warn_if_reject reject_non_fqdn_hostname
        warn_if_reject reject_non_fqdn_sender
        reject_invalid_hostname
        reject_unknown_sender_domain
        reject_unverified_recipient
        reject_unauth_destination
        reject_non_fqdn_sender
        reject_non_fqdn_recipient
        reject_non_fqdn_helo_hostname
        check_sender_ns_access cidr:/etc/postfix/drop.cidr
        check_sender_mx_access cidr:/etc/postfix/drop.cidr
        reject_rbl_client bl.spamcop.net,
        reject_rbl_client cbl.abuseat.org
        reject
    smtpd_data_restrictions = reject_multi_recipient_bounce
    smtpd_sender_restrictions =
        reject_non_fqdn_sender
        reject_unknown_sender_domain
    smtpd_helo_restrictions =
        permit_mynetworks
        check_helo_access pcre:/etc/postfix/identitycheck.pcre
        reject_invalid_helo_hostname
    disable_vrfy_command = yes
    smtpd_helo_required = yes
    smtpd_delay_reject = no
    smtpd_client_restrictions = check_client_access cidr:/etc/postfix/drop.cidr
    message_size_limit = 51200000
    
    • Prepare the rest of the configuration files:

      • Prepare the virtual domains file:
        cat > /etc/postfix/virtual_domains &lt; &lt; EOF
         # Domain                Anything
        
        example.com            OK
        EOF
        
      • Prepare the virtual recipients file:
        cat > /etc/postfix/ldap_virtual_recipients.cf &lt; &lt; EOF
        bind = yes
        bind_dn = cn=postfix,ou=dsa,dc=example,dc=com
        bind_pw = NotTheRealPassword
        server_host = ldap://ldap.example.com:389
        search_base = ou=people,dc=example,dc=com
        domain = example.com
        query_filter = (mail=%s)
        result_attribute = mail
        start_tls = yes
        version = 3
        EOF
        
      • Prepare the virtual aliases file:
        cat > /etc/postfix/ldap_virtual_aliases.cf < < EOF
        bind = yes
        bind_dn = cn=postfix,ou=dsa,dc=example,dc=com
        bind_pw = NotTheRealPass
        server_host = ldap://ldap.example.com:389
        search_base = ou=alias,dc=example,dc=com
        domain = example.com
        query_filter = (mail=%s)
        result_attribute = gosaMailAlternateAddress, gosaMailForwardingAddress
        start_tls = yes
        version = 3
        EOF
        
      • Prepare the identity check file:
        cat > /etc/postfix/identitycheck.pcre &lt; &lt; EOF
        # Identity (RegEx)              Action
        
        /^(mail\.example\.com)$/       REJECT Hostname Abuse: $1
        /^(1\.2\.3\.4)$/                REJECT Hostname Abuse: $1
        /^(\[1\.2\.3\.4\])$/            REJECT Hostname Abuse: $1
        EOF
        
      • Prepare the blacklist file:
        cat > /etc/postfix/drop.cidr &lt; &lt; EOF
        # IP/CIDR                       Action
        
        1.2.3.0/24                      REJECT Blacklisted
        EOF
        
    • Generate the virtual domains hashmap:
      postmap hash:/etc/postfix/virtual_domains
      
    • Start postfix:
      systemctl start postfix
      

      Verify:

      ss -lnptu | grep master
      tcp    LISTEN     0      100    *:25      *:*      users (("master",pid=15539,fd=12))
      
    • Enable support for smtps (port 465) and submission (port 587):

      Uncomment the following lines from /etc/postfix/master.cf:

      submission inet n       -       -       -       -       smtpd
      smtps     inet  n       -       -       -       -       smtpd
      

      Restart postfix:

      systemctl restart postfix
      

      Verify:

      ss -lnptu | grep master
      tcp    LISTEN     0      100    *:587     *:*      users:(("master",pid=15854,fd=16))
      tcp    LISTEN     0      100    *:465     *:*      users:(("master",pid=15854,fd=19))
      tcp    LISTEN     0      100    *:25      *:*      users:(("master",pid=15854,fd=12))
      
    • Take precautions for perfect forward secrecy:
      mkdir /etc/postfix/certs
      cd /etc/postfix/certs
      openssl dhparam -2 -out dh_512.pem 512
      openssl dhparam -2 -out dh_1024.pem 1024
      chmod 600 dh_*
      
    • Lookup test:
      postmap -q theo@example.com ldap:/etc/postfix/ldap_virtual_recipients.cf
      theo@example.com
      
    • Open SMTP, SMTPS ans Submission ports:
      ufw allow 25/tcp
      ufw allow 465/tcp
      ufw allow 587/tcp
      

    Install and configure dovecot

    • Create a service account for dovecot using the ‘DSA’ plugin in *FusionDirectory’. It should look like this:
      dn: cn=dovecot,ou=dsa,dc=example,dc=com
      cn: dovecot
      userPassword:: ljsdewd98dej932j98dxjud8x3jx9843xj8943j438439e3=
      structuralObjectClass: organizationalRole
      entryUUID: 4d0d7174-9a54-1035-8e49-bf1fd814366b
      creatorsName: cn=admin,dc=example,dc=com
      createTimestamp: 20160419082730Z
      objectClass: organizationalRole
      objectClass: top
      objectClass: simpleSecurityObject
      entryCSN: 20160419082730.138012Z#000000#000#000000
      modifiersName: cn=admin,dc=example,dc=com
      modifyTimestamp: 20160419082730Z
      
    • Install dovecot:
      apt -y install dovecot-core dovecot-imapd dovecot-pop3d dovecot-lmtpd dovecot-ldap
      
    • Make the following changes in /etc/dovecot/conf.d/10-ssl.conf:
    ssl = required
    ssl_cert = 
    
    service imap-login {
      inet_listener imap {
        port = 143
      }
      inet_listener imaps {
        port = 993
        ssl = yes
      }
    }
    
    service pop3-login {
      inet_listener pop3 {
        port = 110
      }
      inet_listener pop3s {
        port = 995
        ssl = yes
      }
    }
    
    service auth {
      unix_listener auth-userdb {
        mode = 0777
        user = dovecot
        group = dovecot
      }
    }
    
    • Add the vmail user in the system:

      addgroup --system --gid 5000 vmail
      adduser --system --home /srv/vmail --uid 5000 --gid 5000 --disabled-password --disabled-login vmail
      

    • Restart dovecot:
      systemctl restart dovecot
      

      Verify:

      netstat -lnptu | grep dovecot
      tcp        0      0 0.0.0.0:993             0.0.0.0:*               LISTEN      20894/dovecot   
      tcp        0      0 0.0.0.0:995             0.0.0.0:*               LISTEN      20894/dovecot   
      tcp        0      0 0.0.0.0:110             0.0.0.0:*               LISTEN      20894/dovecot   
      tcp        0      0 0.0.0.0:143             0.0.0.0:*               LISTEN      20894/dovecot   
      tcp6       0      0 :::993                  :::*                    LISTEN      20894/dovecot   
      tcp6       0      0 :::995                  :::*                    LISTEN      20894/dovecot   
      tcp6       0      0 :::110                  :::*                    LISTEN      20894/dovecot   
      tcp6       0      0 :::143                  :::*                    LISTEN      20894/dovecot  
      
    • Check if you can login:
    openssl s_client -connect localhost:993
    <output ommitted...>
    * OK [CAPABILITY IMAP4rev1 LITERAL+ SASL-IR LOGIN-REFERRALS ID ENABLE IDLE AUTH=PLAIN AUTH=LOGIN] Dovecot ready.
    a1 LOGIN theo MyNotSoSecretPass
    a1 OK [CAPABILITY IMAP4rev1 LITERAL+ SASL-IR LOGIN-REFERRALS ID ENABLE IDLE SORT SORT=DISPLAY THREAD=REFERENCES THREAD=REFS THREAD=ORDEREDSUBJECT MULTIAPPEND URL-PARTIAL CATENATE UNSELECT CHILDREN NAMESPACE UIDPLUS LIST-EXTENDED I18NLEVEL=1 CONDSTORE QRESYNC ESEARCH ESORT SEARCHRES WITHIN CONTEXT=SEARCH LIST-STATUS SPECIAL-USE BINARY MOVE] Logged in
    a3 LOGOUT
    * BYE Logging out
    a2 OK Logout completed.
    closed
    
    • Enable IMAP, IMAPS, POP3 and POP3S ports:

      ufw allow 110/tcp
      ufw allow 143/tcp
      ufw allow 993/tcp
      ufw allow 995/tcp
      

    • Tell postfix to deliver mail using dovecot:
      • Add the following lines at the end of /etc/postfix/master.cf:
        dovecot   unix  -       n       n       -       -       pipe
          flags=ODRhu user=vmail:vmail argv=/usr/lib/dovecot/deliver -e -f ${sender} -d ${recipient}
        
      • Add these attributes in /etc/postfix/main.cf:
        virtual_transport = dovecot
        dovecot_destination_recipient_limit = 1
        
    • Restart postfix and dovecot:
      systemctl restart postfix dovecot
      

    Install SASL for SMTP AUTH

    • Create a service account for saslauthd using the ‘DSA’ plugin in *FusionDirectory’. It should look like this:
      dn: cn=saslauthd,ou=dsa,dc=example,dc=com
      cn: saslauthd
      userPassword:: ejdoedoifj9ewufd9843e9ejfd98je938jcr9843843=
      structuralObjectClass: organizationalRole
      entryUUID: 61143234-9a54-1035-8e4a-bf1fd814366b
      creatorsName: cn=admin,dc=example,dc=com
      createTimestamp: 20160419082803Z
      objectClass: organizationalRole
      objectClass: top
      objectClass: simpleSecurityObject
      entryCSN: 20160419082803.738357Z#000000#000#000000
      modifiersName: cn=admin,dc=example,dc=com
      modifyTimestamp: 20160419082803Z
      
    • Install SASL:
      apt -y install libsasl2-2 sasl2-bin
      
    • Create the /etc/postfix/sasl/smtpd.conf file:
      cat > /etc/postfix/sasl/smtpd.conf < < EOF
      log_level: 3
      pwcheck_method: saslauthd
      mech_list: PLAIN LOGIN
      EOF
      
    • Make the following changes in /etc/default/saslauthd:
      START=yes
      MECHANISMS="ldap"
      OPTIONS="-c -m /var/spool/postfix/var/run/saslauthd"
      
    • Create the /etc/saslauthd.conf file:
      cat > /etc/saslauthd.conf < < EOF
      ldap_servers: ldap://ldap.example.com/
      ldap_bind_dn: cn=saslauthd,ou=dsa,dc=example,dc=com
      ldap_bind_pw: MySecretPass
      ldap_timeout: 10
      ldap_time_limit: 10
      ldap_scope: sub
      ldap_search_base: ou=people,dc=example,dc=com
      ldap_auth_method: bind
      ldap_filter: (&(uid=%u)(mail=*))
      ldap_debug: 0
      ldap_verbose: off
      ldap_ssl: yes
      ldap_starttls: no
      ldap_referrals: yes
      EOF
      
    • Add the postfix user in the sasl group:
      usermod -aG sasl postfix
      
    • Add these attributes in /etc/postfix/main.cf:
      smtpd_sasl_auth_enable = yes
      broken_sasl_auth_clients = yes
      
    • Restart saslauthd and postfix:
      systemctl restart saslauthd postfix
      
    • Test message delivery using SMTP AUTH:

      First you need to install swaks:

      apt -y install swaks
      

      Then use swaks to test message delivery:

      swaks --from noreply@example.com --to theo@example.com --server 127.0.0.1:25 --tls --auth plain --auth-user=theo
      
    • Test if the message has been delivered to inbox:

      First you need to install mutt:

      apt -y install mutt
      

      Then use mutt to test if the message has been delivered to inbox:

      mutt -f /srv/vmail/theo@example.com/Maildir/
      

      NOTE: When you are asked to create a ‘mail’ folder just say ‘no’.

    References

    • https://documentation.fusiondirectory.org/en/documentation/plugin/mail_plugin
    • https://documentation.fusiondirectory.org/en/documentation/plugin/alias_plugin
    • https://documentation.fusiondirectory.org/en/documentation/plugin/dovecot_plugin</output>
    Categories
    Linux

    Setting up an LDAP directory with a Fusiondirectory frontend

    LDAP/Fusiondirectory setup

    In this guide we will be setting up LDAP (openldap) along with the FusionDirectory web management tool.

    Preparations

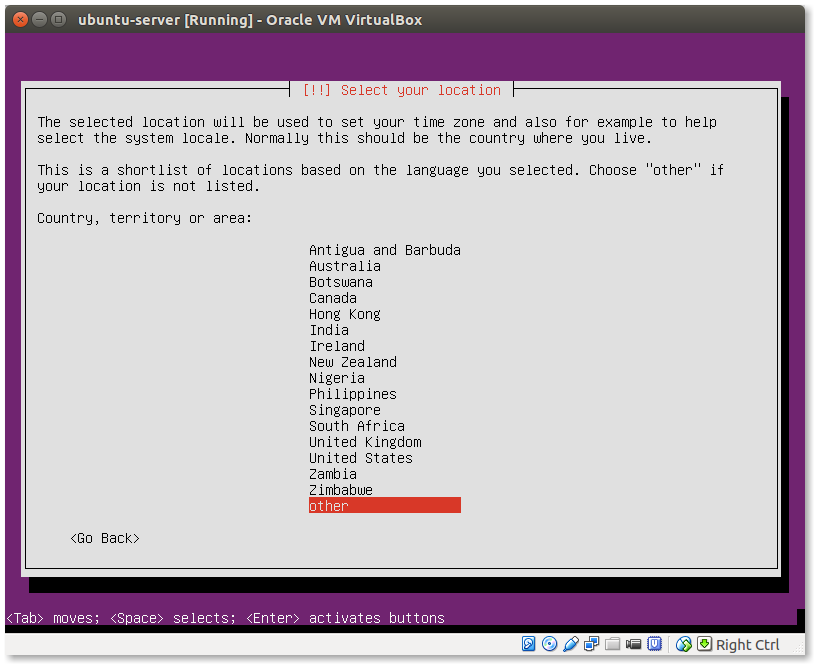
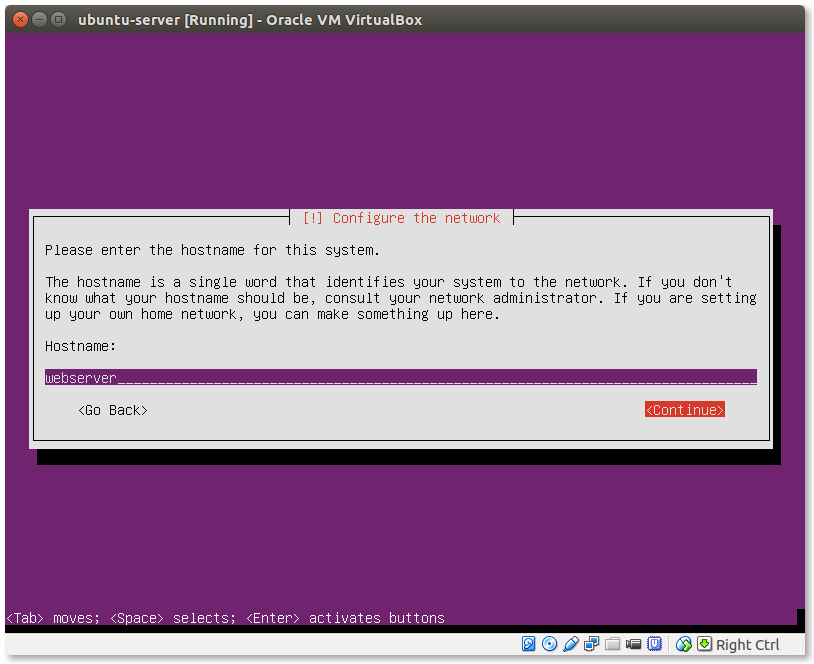
    • Install Debian jessie (Ubuntu 16.04 should work too) on your server or VM
    • Setup the DNS records in your DNS servers:

      ldap.example.com.           3599    IN      A       1.1.1.1
      

      NOTE: replace 1.1.1.1 with you actual internal or external IP

    • Allow ssh and web services on firewall:

      apt -y install ufw
      ufw allow 22/tcp
      ufw allow 80/tcp
      ufw allow 443/tcp
      ufw enable
      

      NOTE: It may be a good idea to change the default ssh port from 22 to something less predictable

    Setup LDAP

    • Setup ldap.example.com in /etc/hosts:
    127.0.2.1 ldap.example.com ldap
    
    • Install OpenLDAP and FusionDirectory

      apt -y install slapd
      

      Enter and verify the administrator password for slapd.

    • Create An Internal Certificate Authority for Example LTD:

      • First install gnutls-bin:
        apt -y install gnutls-bin
        
      • Create the key for the internal CA for example.com:
        certtool --generate-privkey --outfile example.com-rootCA.key
        
      • Create a certificate for our internal CA:
    certtool --generate-self-signed --load-privkey example.com-rootCA.key --outfile example.com-rootCA.crt
    Generating a self signed certificate...
    Please enter the details of the certificate's distinguished name. Just press enter to ignore a field.
    Common name: Example LTD Internal ROOT CA
    UID: 
    Organizational unit name: IT
    Organization name: Example LTD
    Locality name: Limassol
    State or province name: Limassol
    Country name (2 chars): CY
    Enter the subject's domain component (DC): 
    This field should not be used in new certificates.
    E-mail: admins@example.com
    Enter the certificate's serial number in decimal (default: 6295758616856773074): 
    The certificate will expire in (days): 7300
    
    Activation/Expiration time.
    The certificate will expire in (days): 7300
    
    Extensions.
    Does the certificate belong to an authority? (y/N): y
    Path length constraint (decimal, -1 for no constraint): -1
    Is this a TLS web client certificate? (y/N):
    Will the certificate be used for IPsec IKE operations? (y/N): 
    Is this a TLS web server certificate? (y/N): 
    Enter a dnsName of the subject of the certificate: 
    Enter a URI of the subject of the certificate: 
    Enter the IP address of the subject of the certificate: 
    Enter the e-mail of the subject of the certificate: 
    Will the certificate be used to sign other certificates? (y/N): y
    Will the certificate be used to sign CRLs? (y/N): 
    Will the certificate be used to sign code? (y/N): 
    Will the certificate be used to sign OCSP requests? (y/N): 
    Will the certificate be used for time stamping? (y/N):
    Enter the URI of the CRL distribution point: 
    X.509 Certificate Information:
            Version: 3
            Serial Number (hex): 575f071b0d5a41d2
            Validity:
                    Not Before: Mon Jun 13 19:19:27 UTC 2016
                    Not After: Sun Jun 08 19:20:00 UTC 2036
            Subject: CN=Example LTD Internal ROOT CA,OU=IT,O=Example LTD,L=Limassol,ST=Limassol,C=CY,EMAIL=admins@example.com
            Subject Public Key Algorithm: RSA
            Algorithm Security Level: Medium (2048 bits)
                    Modulus (bits 2048):
                            00:c0:75:c8:02:05:d0:0c:67:af:ac:0c:80:53:bf:cd
                            a3:80:76:cf:3e:14:19:99:5c:24:b4:fc:b0:42:8d:5a
                            03:5d:04:a5:85:c7:fe:e3:d4:30:6c:4c:26:90:76:c5
                            3e:a0:dc:a7:53:a7:eb:13:60:78:44:b3:0a:b2:77:0c
                            46:19:96:ea:d2:46:82:9c:11:2c:a5:e2:a1:57:38:f4
                            8e:4d:74:4f:f9:41:dd:11:f4:c2:f5:9f:b7:9a:93:7d
                            a7:f8:f3:dd:2e:08:6a:25:75:79:f3:63:e5:09:1f:bd
                            6a:38:45:85:f0:63:54:c0:08:68:41:15:66:a4:e3:84
                            49:7e:e5:c5:c7:6c:d3:c7:be:d5:5a:df:1a:1d:55:f8
                            35:73:bb:e3:ea:f7:66:af:d9:09:72:ca:17:5f:80:09
                            99:6a:49:e3:8b:f2:72:56:ac:f8:ba:60:49:d5:80:2a
                            07:e6:17:88:86:e4:3c:89:cd:af:2b:66:a1:af:53:f4
                            66:21:30:a3:22:af:a9:11:6e:98:e0:f7:6d:ef:8a:32
                            e9:0b:a4:82:7b:7b:db:2d:90:8e:bd:e4:54:04:a4:52
                            e8:cf:f6:2e:9b:97:46:ab:cb:38:06:23:33:db:42:0c
                            25:41:5a:d7:02:15:07:c6:e8:86:0b:a6:d7:7d:81:16
                            bd
                    Exponent (bits 24):
                            01:00:01
            Extensions:
                    Basic Constraints (critical):
                            Certificate Authority (CA): TRUE
                    Key Purpose (not critical):
                            Time stamping.
                    Key Usage (critical):
                            Certificate signing.
                    Subject Key Identifier (not critical):
                            7a596f6dea4080e89c9e78a698d7126cd63dafa7
    Other Information:
            Public Key ID:
                    7a596f6dea4080e89c9e78a698d7126cd63dafa7
            Public key's random art:
                    +--[ RSA 2048]----+
                    |                 |
                    |     . .         |
                    |    . . .        |
                    |   o .   .       |
                    | . .+.  S o      |
                    |  =o..o. + . .   |
                    | o.o= .oo . o o  |
                    | oo+.  .o  o o   |
                    |o...  E+   .o    |
                    +-----------------+
    
    Is the above information ok? (y/N): y
    
    
    Signing certificate...
    
    • Add the Example LTD Internal ROOT CA as trusted in ca-certificates:

      mkdir /usr/share/ca-certificates/extra
      cp example.com-rootCA.crt /usr/share/ca-certificates/extra
      dpkg-reconfigure ca-certificates
      

      Add the extra/example.com-rootCA.crt CA as a trusted CA.

      • Configure slapd:
      dpkg-reconfigure slapd
      
      • Omit OpenLDAP server configuration? No
      • DNS domain name: example.com
      • Organization name: Example LTD
      • Administrator password: ***************
      • Verify password: *************
      • Database backend to use: MDB
      • Do you want the database to be removed when slapd is purged? No
      • Move old database? Yes
      • Allow LDAPv2 protocol? No
    • Configure TLS on LDAP:

    • Create a key for ldap.example.com:

      certtool --generate-privkey --outfile ldap.example.com.key
      Generating a 2048 bit RSA private key...
      

    • Create a certificate for ldap.example.com:
    certtool --generate-certificate --load-privkey ldap.example.com.key --outfile ldap.example.com.crt --load-ca-certificate example.com-rootCA.crt --load-ca-privkey example.com-rootCA.key
    Generating a signed certificate...
    Please enter the details of the certificate's distinguished name. Just press enter to ignore a field.
    Common name: ldap.example.com
    UID: 
    Organizational unit name: IT
    Organization name: Example LTD
    Locality name: Limassol
    State or province name: Limassol
    Country name (2 chars): CY
    Enter the subject's domain component (DC): 
    This field should not be used in new certificates.
    E-mail: admins@example.com
    Enter the certificate's serial number in decimal (default: 6295762607454361711):
    
    Activation/Expiration time.
    The certificate will expire in (days): 3650
    
    Extensions.
    Does the certificate belong to an authority? (y/N): 
    Is this a TLS web client certificate? (y/N): 
    Will the certificate be used for IPsec IKE operations? (y/N): 
    Is this a TLS web server certificate? (y/N): 
    Enter a dnsName of the subject of the certificate: 
    Enter a URI of the subject of the certificate: 
    Enter the IP address of the subject of the certificate: 
    Enter the e-mail of the subject of the certificate: 
    Will the certificate be used for signing (required for TLS)? (Y/n): 
    Will the certificate be used for encryption (not required for TLS)? (Y/n):
    X.509 Certificate Information:
            Version: 3
            Serial Number (hex): 575f0abc2f81186f
            Validity:
                    Not Before: Mon Jun 13 19:35:45 UTC 2016
                    Not After: Thu Jun 11 19:36:29 UTC 2026
            Subject: CN=ldap.example.com,OU=IT,O=Example LTD,L=Limassol,ST=Limassol,C=CY,EMAIL=admins@example.com
            Subject Public Key Algorithm: RSA
            Algorithm Security Level: Medium (2048 bits)
                    Modulus (bits 2048):
                            00:d0:15:8e:02:90:5f:4a:9f:90:ea:1e:35:e6:4b:eb
                            a9:8c:e5:bf:68:ec:83:0e:49:5b:d1:f0:08:4b:ac:b0
                            31:d2:e0:a7:eb:18:d3:ee:b8:38:b7:c4:0a:cc:97:cc
                            b6:ac:2d:29:c8:a8:c4:7c:cc:f1:36:5a:e9:6b:52:f5
                            1e:e5:4f:90:67:34:1f:8c:a8:17:72:ee:40:87:ba:ae
                            8b:f8:4f:f8:be:51:ee:ea:d5:e4:17:63:79:22:41:c0
                            19:43:33:55:bb:46:80:5c:b8:16:18:fa:fb:17:58:c2
                            ed:d2:14:10:3b:57:5d:de:7f:29:ab:66:c2:81:87:05
                            f7:b7:27:78:a9:c0:8e:4f:1c:3f:66:6f:dd:43:26:9f
                            84:59:fb:c7:21:3c:62:4f:8d:4a:25:ab:7e:f0:5f:7e
                            df:97:f7:79:f8:c7:2d:c8:5a:7a:de:ea:5b:c7:bd:e9
                            12:17:56:d3:47:ff:eb:fa:b5:6f:d9:56:8f:c7:e8:7a
                            46:92:75:cc:ff:de:0e:88:49:7d:d7:dd:6e:8d:3f:57
                            fa:0a:7a:3b:80:ec:0e:10:dd:70:d5:9a:8d:91:ce:72
                            44:06:21:d2:9d:e9:b8:91:13:68:4c:fc:e2:bb:4d:a8
                            97:ed:e9:a4:98:5d:e7:c0:ef:3e:9d:30:28:de:bd:10
                            01
                    Exponent (bits 24):
                            01:00:01
            Extensions:
                    Basic Constraints (critical):
                            Certificate Authority (CA): FALSE
                    Key Usage (critical):
                            Digital signature.
                            Key encipherment.
                    Subject Key Identifier (not critical):
                            6d8a173de01efa11a892dda76ccd7abc609a2707
                    Authority Key Identifier (not critical):
                            7a596f6dea408aa89c9e78a698d7126cd63dafa7
    Other Information:
            Public Key ID:
                    6d8a173de01efa00a892dda67ccd7abc609a2707
            Public key's random art:
                    +--[ RSA 2048]----+
                    |                 |
                    |                 |
                    |        .        |
                    |       . +       |
                    |        A =      |
                    |       +Y= .     |
                    |      oo+kk+     |
                    |      iii==o*    |
                    |       .=B**o.   |
                    +-----------------+
    
    
    Is the above information ok? (y/N): y
    
    Signing certificate...
    
    • Enable LDAPS in /etc/default/slapd:

      SLAPD_SERVICES="ldap:/// ldapi:/// ldaps:///"
      
      • Copy the ldap.example.com certficate and apply permissions
        mkdir /etc/ldap/ssl
        cp ldap.example.com.crt /etc/ldap/ssl
        cp ldap.example.com.key /etc/ldap/ssl
        chown -R openldap:openldap /etc/ldap/ssl    /
        
      • Create an olcSSL.ldif file:
    mkdir /etc/ldap/custom_ldifs/
    cd /etc/ldap/custom_ldifs/<br />
    cat > olcSSL.ldif < < EOF
    dn: cn=config
    changetype: modify
    add: olcTLSCACertificateFile
    olcTLSCACertificateFile: /etc/ssl/certs/ca-certificates.crt
    -
    add: olcTLSCertificateKeyFile
    olcTLSCertificateKeyFile: /etc/ldap/ssl/ldap.example.com.key
    -
    add: olcTLSCertificateFile
    olcTLSCertificateFile: /etc/ldap/ssl/ldap.example.com.crt
    EOF
    
    • Import the TLS configuration:
    ldapmodify -Y EXTERNAL -H ldapi:/// -f olcSSL.ldif
    

    Verify with:

    slapcat -n0 | grep -i tls
    olcTLSCACertificateFile: /etc/ssl/certs/ca-certificates.crt
    olcTLSCertificateFile: /etc/ldap/ssl/ldap.example.com.crt
    olcTLSCertificateKeyFile: /etc/ldap/ssl/ldap.example.com.key
    
    • Restart and verify slapd:
      systemctl restart slapd
      netstat -lnptu | grep slapd
      tcp        0      0 0.0.0.0:636             0.0.0.0:*               LISTEN      27665/slapd     
      tcp        0      0 0.0.0.0:389             0.0.0.0:*               LISTEN      27665/slapd     
      tcp6       0      0 :::636                  :::*                    LISTEN      27665/slapd     
      tcp6       0      0 :::389                  :::*                    LISTEN      27665/slapd 
      

    Setup Apache

    • Install Apache with PHP:
      apt -y install apache2 libapache2-mod-php5 php5-ldap php5-mcrypt php5-intl php-pear
      

    Setup Let’s Encrypt:

    NOTE: this step is only necessary if you have a public facing ldap.example.com service

    • Setup Debian jessie backports:
    cat >> /etc/apt/sources.list < < EOF
    # jessie backports
    deb http://ftp.debian.org/debian jessie-backports main
    deb-src http://ftp.debian.org/debian jessie-backports main
    EOF
    
    • Run apt update
    • Install Let’s Encrypt utility, certbot:
      apt -y install python-certbot-apache -t jessie-backports
      
    • Generate a certificate for all the domain ldap.example.com:
      certbot run -d ldap.example.com
      

      In the TUI add the admins@example.com email and agree to the ToS. Use 000-default.conf for now.

  • Download and trust all Let’s Encrypt Root and Intermediate CA certificates:

    wget https://letsencrypt.org/certs/isrgrootx1.pem
    for i in {1..4}; do wget https://letsencrypt.org/certs/lets-encrypt-x$i-cross-signed.pem; done
    cp *.pem /usr/share/ca-certificates/extra/
    for f in *.pem; do cp -- "$f" "/usr/share/ca-certificates/extra/${f%.pem}.crt"; done
    dpkg-reconfigure ca-certificates # Select all the newlly added CA certs
    

  • Setup FusionDirectory

    • Setup Fusiondirectory Repo:
      gpg --keyserver keys.gnupg.net --recv-key 62B4981F 
      gpg --export -a "Fusiondirectory Archive Manager <contact @fusiondirectory.org>" > FD-archive-key
      apt-key add FD-archive-key
      echo '# fusiondirectory repository' > /etc/apt/sources.list.d/fusiondirectory.list
      echo 'deb http://repos.fusiondirectory.org/debian-jessie jessie main' >> /etc/apt/sources.list.d/fusiondirectory.list
      echo 'deb-src http://repos.fusiondirectory.org/debian-jessie jessie main' >> /etc/apt/sources.list.d/fusiondirectory.list
      apt update
      
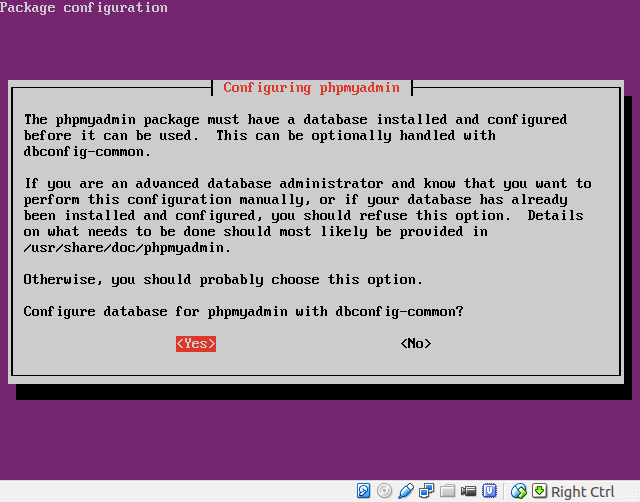
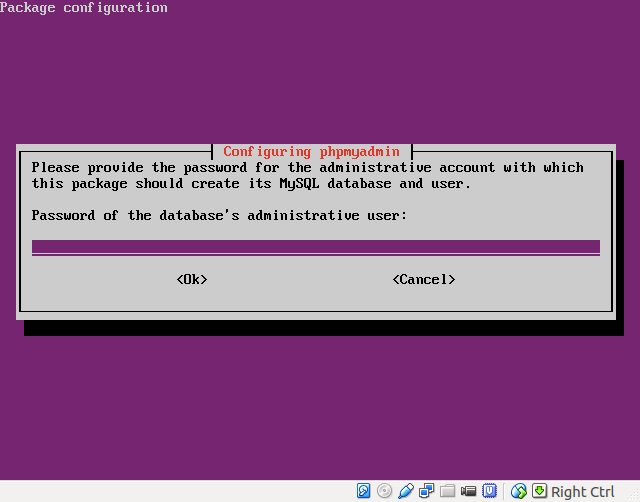
    • Install FusionDirectory:
      apt -y install fusiondirectory fusiondirectory-schema
      
    • Insert core FusionDirectory schemas into *slapd
      fusiondirectory-insert-schema
      

      Verify:

      fusiondirectory-insert-schema -l
      core
      cosine
      nis
      inetorgperson
      samba
      core-fd
      core-fd-conf
      ldapns
      recovery-fd
      
    • Create a Fusiondirectory Apache vhost (/etc/apache2/sites-available/ldap.example.com.conf):
      <virtualhost *:80>
          ServerName ldap.example.com
          Redirect "/" "https://ldap.example.com/"
          ErrorLog ${APACHE_LOG_DIR}/ldap-error.log
          CustomLog ${APACHE_LOG_DIR}/ldap-access.log combined
      </virtualhost>
      <ifmodule mod_ssl.c>
          <virtualhost *:443>
                  ServerName ldap.example.com
                  ServerAdmin webmaster@example.com
                  DocumentRoot /usr/share/fusiondirectory/html
                  ErrorLog ${APACHE_LOG_DIR}/ldap-error.log
                  CustomLog ${APACHE_LOG_DIR}/ldap-access.log combined
                  SSLEngine on
                  SSLCertificateFile      /etc/letsencrypt/live/ldap.example.com/cert.pem
                  SSLCertificateKeyFile   /etc/letsencrypt/live/ldap.example.com/privkey.pem
                  <filesmatch "\.(cgi|shtml|phtml|php)$">
                                  SSLOptions +StdEnvVars
                  </filesmatch>
                  <directory /usr/lib/cgi-bin>
                                  SSLOptions +StdEnvVars
                  </directory>
                  BrowserMatch "MSIE [2-6]" \
                                  nokeepalive ssl-unclean-shutdown \
                                  downgrade-1.0 force-response-1.0
                  BrowserMatch "MSIE [17-9]" ssl-unclean-shutdown
                  <ifmodule mod_php5.c>
                  <location></location>
                      php_admin_flag engine on
                      php_admin_flag register_globals off
                      php_admin_flag allow_call_time_pass_reference off
                      php_admin_flag expose_php off
                      php_admin_flag zend.ze1_compatibility_mode off
                      php_admin_flag register_long_arrays off
                      php_admin_value upload_tmp_dir /var/spool/fusiondirectory/
                      php_admin_value session.cookie_lifetime 0
                      #Include /etc/fusiondirectory/fusiondirectory.secrets
      
                  </ifmodule>
                  <directory /usr/share/fusiondirectory/html></directory>
                      Order Allow,Deny
                      # Insert your public IPs here
                      Allow from 2.2.2.2
                      Allow from 2.2.2.3
      
          </virtualhost>
      </ifmodule>
      
    • Enable mod_ssl, ldap.example.com and disable 000-default and default-ssl:
      a2enmod ssl
      a2ensite ldap.example.com
      a2dissite default-ssl
      a2dissite 000-default
      systemctl restart apache2
      
    • Setup FusionDirectory:
      • Install optional prerequisities:
        apt -y install php-mdb2
        
      • Point your Browser to:
        https://ldap.example.com/
        
      • Create a temporary token for the setup (taken from the first setup webpage):
        echo -n r9l1srnu0rvdeca4k826nq4e05 > /var/cache/fusiondirectory/fusiondirectory.auth 
        

        Click ‘Next’

      • In the ‘Language setup’ select ‘English’ and press ‘Next’.

      • If everything is ‘OK'(Green) on the ‘Installation check’ click ‘Next’

      • On the ‘LDAP connection setup’:

        • Location name: default
        • Connection URI: ldap://ldap.example.com:389
        • TLS connection: Yes
        • Admin DN: cn=admin(,dc=example,dc=com)
        • Admin password: *************************
        • LDAP schema check:
          • Enable schema validation when logging in: Yes
      • Keep defaults in ‘Look and feel’ except ‘Timezone’:
        • Timezone: America/Los_Angeles
      • Keep all the defaults in ‘Password settings’ except this:
        • Password minimum length: 8
      • In the ‘SSL’ field use these:
        • Key path: /etc/ldap/ssl/ldap.example.com.key
        • Certificate path: /etc/ldap/ssl/ldap.example.com.crt
        • CA certificate path: /etc/ssl/certs/ca-certificates.crt

        Click ‘Next’ when done.

      • In the ‘LDAP inspection’ page:

        • Press ‘Migrate’ (twice) in the ‘Inspecting object classes in root object’ option
      • Press ‘Create’ in the ‘Checking for super administrator’ option’, fill the fields, and ‘Apply’ when done:

        • User ID: ldapadmin
        • Password: ***************
        • Password (again): ***************
      • In the ‘Checking for default ACL roles and groups’ field, press ‘Migrate’
    • From the ‘Finish – write the configuration file’, download the configuration file on your PC

    • Copy the configuration file from your PC to ldap.example.com:

      scp fusiondirectory.conf root@ldap.example.com:/etc/fusiondirectory
      

    • Apply the correct permissions to the /etc/fusiondirectory/fusiondirectory.conf file:
    fusiondirectory-setup --check-config
    Checking FusionDirectory's config file
    /etc/fusiondirectory/fusiondirectory.conf exists…
    /etc/fusiondirectory/fusiondirectory.conf is not set properly, do you want to fix it ?:  [Yes/No]?
    y
    
    • Click ‘Next’ when done.
  • Use encrypted passwords in fusiondirectory.conf:

    • Enable the headers module in Apache:
      a2enmod headers
      systemctl restart apache2
      
    • Encrypt passwords in fusiondirectory.conf:
      fusiondirectory-setup --encrypt-passwords
      
    • Uncomment the following line in /etc/apache2/sites-available/ldap.example.com.conf:
      Include /etc/fusiondirectory/fusiondirectory.secrets
      
    • Restart Apache:
      systemctl restart apache2
      
    • If everything works as expected remove /etc/fusiondirectory/fusiondirectory.conf.orig
      rm /etc/fusiondirectory/fusiondirectory.conf.orig
      
  • Allow ‘.’ (dot) in usernames:
    • After everything is set, login as ldapadmin
    • Go to ‘Configuration’
    • Press the ‘Edit’ button at the bottom of the page
    • Un-tick the ‘Strict naming policy’ option and save.
  • Installing essential FusionDirectory plugins

    • Setup LDAP related plugins:
      apt -y install fusiondirectory-plugin-ldapdump fusiondirectory-plugin-ldapmanager
      
    • Setup the DSA plugin for managing service accounts:
      apt -y install fusiondirectory-plugin-dsa fusiondirectory-plugin-dsa-schema
      fusiondirectory-insert-schema -i /etc/ldap/schema/fusiondirectory/dsa-fd-conf.schema
      
      • Allow the service accounts to read and write the password. First create the ACL definition:
    cat > /etc/ldap/custom_ldifs/service_accounts_acl.ldif < < EOF
    dn: olcDatabase={1}mdb,cn=config
    changetype: modify
    delete: olcAccess
    -
    add: olcAccess
    olcAccess: {0}to dn.subtree="dc=example,dc=com" attrs=userPassword
      by self write
      by dn.base="cn=admin,dc=example,dc=com" write
      by dn.children="ou=dsa,dc=example,dc=com" write
      by anonymous auth
      by * none
    -
    add: olcAccess
    olcAccess: {1}to dn.subtree="ou=people,dc=example,dc=com"
      by self read
      by dn.base="uid=test.user,ou=people,dc=example,dc=com" write
      by dn.base="cn=admin,dc=example,dc=com" write
      by dn.children="ou=dsa,dc=example,dc=com" read
      by anonymous auth
      by * none
    -
    add: olcAccess
    olcAccess: {2}to attrs=userPassword,shadowLastChange
      by self write
      by anonymous auth
      by dn="cn=admin,dc=example,dc=com" write
      by * none
    -
    add: olcAccess
    olcAccess: {3}to dn.subtree="dc=example,dc=com"
      by self read
      by dn.base="cn=admin,dc=example,dc=com" write
      by dn.children="ou=dsa,dc=example,dc=com" write
      by * none
    -
    add: olcAccess
    olcAccess: {4}to dn.base=""
      by * none
    EOF
    

    NOTE: Add two spaces before each ‘by‘ in the ldif above or you will spend endless hours in troubleshooting!

    • Apply the ACL
      ldapadd -c -Y EXTERNAL -H ldapi:/// -f /etc/ldap/custom_ldifs/service_accounts_acl.ldif
      
      • Setup the Systems plugin:
      apt -y install fusiondirectory-plugin-systems fusiondirectory-plugin-systems-schema
      fusiondirectory-insert-schema -i /etc/ldap/schema/fusiondirectory/service-fd.schema
      fusiondirectory-insert-schema -i /etc/ldap/schema/fusiondirectory/systems-fd-conf.schema
      fusiondirectory-insert-schema -i /etc/ldap/schema/fusiondirectory/systems-fd.schema
      
      • Setup a new server:
        • Name: ldap.example.com
        • Description: Communications Server
        • Location: My Datacenter
        • Base: /
        • IP-address: 10.134.31.94

        • MAC-address: 04:01:05:d6:63:02
      • From the ‘Services’ tab setup an LDAP service on the ldap.example.com server

    You are finished. You can now start connecting services to your LDAP setup like mail or asterisk.

    References

    • https://documentation.fusiondirectory.org/en/start</contact>
    Categories
    Uncategorized

    Installing a Simple ORCID Authentication Node

    These are the instructions for installing an ORCID1 authentication node. We will be using the simple-orcid-auth-node2 developed by the ORCID organization.

    Assumptions

    • An Ubuntu 16.04 server machine but works on 14.04x with some minor changes.
    • A FQDN, let’s say orcid.example.com.
    • Server IP is 10.2.2.2 in our case.
    • Create an orcid user: sudo useradd -r -m -d /var/www/html/orcid orcid.
    • For Ubuntu 14.04 it is better to use /var/www/orcid instead of /var/www/html/orcid.
    • Also use service servicename restart on 14.04.x instead of systemctl restart service.

    Installing simple-orcid-auth-node

    • Install necessary packages (as a privileged user):
      $ sudo apt -y install nginx nodejs npm
      

      NOTE: If you are using Ubuntu 14.04.x do not install the node package. This package is completely unrelated with nodejs.__3

    • Download and extract simple-orcid-auth-node (as the orcid user):

      sudo su - orcid
      wget https://github.com/rcpeters/simple-orcid-auth-node/archive/master.tar.gz
      tar xvzf master.tar.gz
      

    • Install the application:
      $ cd simple-orcid-auth-node-master/
      $ npm install
      
    • Test run the application (as the orcid user):
      $ nodejs client-app.js
      server started on 8000
      

      Looks OK. Now point your Hit CTRL^C and move on.

      NOTE: If you prefer using the legacy node client-app.js invocation, you need to install the nodejs-legacy package as well.

    Setting ORCID as an autostart service

    • Autostart using systemd4 (Ubuntu 16.04):

      • Create the /etc/systemd/system/orcid.service service definition (as the root user):
        $ cat > /etc/systemd/system/orcid.service < < EOF
        [Service]
        ExecStart=/usr/bin/nodejs /var/www/html/orcid/simple-orcid-auth-node-master/client-app.js
        WorkingDirectory=/var/www/html/orcid/simple-orcid-auth-node-master
        Restart=always
        StandardOutput=syslog
        StandardError=syslog
        SyslogIdentifier=orcid
        User=orcid
        Group=orcid
        Environment=NODE_ENV=production
        [Install]
        WantedBy=multi-user.target
        EOF
        
      • Reload systemd and start the service:
        $ sudo systemctl daemon-reload
        $ sudo systemctl start orcid.service
        
      • Verify that the service is started:
        $ sudo systemctl status orcid.service
        ● orcid.service
        Loaded: loaded (/etc/systemd/system/orcid.service; disabled; vendor preset: enabled)
        Active: active (running) since Wed 2016-04-27 09:00:16 UTC; 37s ago
        Main PID: 11141 (nodejs)
        Tasks: 5 (limit: 512)
        Memory: 24.1M
        CPU: 268ms
        CGroup: /system.slice/orcid.service
           └─11141 /usr/bin/nodejs /var/www/html/orcid/simple-orcid-auth-node-master/client-app.js
        Apr 27 09:00:16 orcid systemd[1]: Started orcid.service.
        Apr 27 09:00:16 orcid orcid[11141]: server started on 8000
        
    • Autostart using sysv-init (Ubuntu 14.04.x):
      • Prepare a sysv-init startup script or use mine for convinience:
        $ cd /etc/init.d
        $ wget https://raw.githubusercontent.com/theodotos/arena/master/orcid
        $ chmod +x orcid
        $ update-rc.d orcid enable
        $ update-rc.d orcid defaults
        

      Now orcid should be able to autostart after a reboot.

    Setting up nginx

    • Prepare this configuration:

      $ cat > /etc/nginx/sites-available/orcid < < EOF
      server {
          listen 80;
          listen [::]:80 ipv6only=on;
          server_name orcid.example.com;
          access_log  /var/log/nginx/orcid.access.log;
          error_log /var/log/nginx/orcid.error.log;
          location / {
              proxy_pass http://localhost:8000/;
              proxy_set_header Host \$host;
              proxy_set_header X-Forwarded-For \$proxy_add_x_forwarded_for;
          }
      }
      EOF
      

    • Enable the orcid site:
      $ cd /etc/nginx/sites-enabled/
      $ sudo ln -s /etc/nginx/sites-available/orcid
      
    • Uncomment the following line in /etc/nginx/nginx.conf5:
          server_names_hash_bucket_size 64;
      
    • Restart nginx:
      $ sudo systemctl restart nginx.service
      
    • Verify nginx with sudo systemctl status nginx.service

    Now you can visit the http://orcid.example.com site and test your setup

    Going to production

    The default simple-orcid-auth-node is using the sandbox ORCID service which is ideal for testing. This is how the configuration file (helpers/config.js) looks like:

    module.exports = config = {
      // Config for OAuth2 
      CLIENT_ID: 'APP-O9TUKAPVLALU1SOJ',
      CLIENT_SECRET: '0eafb938-020e-45a6-a148-3c222171d9d8',
      AUTHORIZE_URI: 'https://sandbox.orcid.org/oauth/authorize',
      TOKEN_EXCHANGE_URI: 'https://api.sandbox.orcid.org/oauth/token',
      CODE_CALLBACK_URI: 'http://localhost:8000/authorization-code-callback',
      // General server config
      PORT: '8000',
      SERVER_IP: '127.0.0.1',
    }
    ...
    

    This setup will not work in production. You have to modify the CLIENT_ID and CLIENT_SECRET variables with your own credentials and change the AUTHORIZE_URI and TOKEN_EXCHANGE_URI to point to the production ORCID services:

    module.exports = config = {
      // Config for OAuth2 
      CLIENT_ID: 'APP-HSGSHJS335353GSGSG',
      CLIENT_SECRET: '56d4eb21-6622-8483-3422-f53f3fs53sfs35f',
      AUTHORIZE_URI: 'https://orcid.org/oauth/authorize',
      TOKEN_EXCHANGE_URI: 'https://api.orcid.org/oauth/token',
      CODE_CALLBACK_URI: 'http://localhost:8000/authorization-code-callback',
      // General server config
      PORT: '8000',
      SERVER_IP: '127.0.0.1',
    }
    ...
    

    Restart nginx and orcid when done:

    $ sudo systemctl restart nginx.service orcid.service
    

    References


    1. https://en.wikipedia.org/wiki/ORCID ↩︎
    2. https://github.com/ORCID/simple-orcid-auth-node ↩︎
    3. https://github.com/ORCID/simple-orcid-auth-node/issues/3 ↩︎
    4. https://www.digitalocean.com/community/tutorials/how-to-deploy-node-js-applications-using-systemd-and-nginx ↩︎
    5. http://charles.lescampeurs.org/2008/11/14/fix-nginx-increase-server_names_hash_bucket_size</service> ↩︎
    Categories
    Linux

    Setting up your own ebook library

    This article is about setting up you own ebook library with support for the OPDS catalog format . The COPS ebook catalog can read a Calibre library and expose it as a website. It is developed on PHP.

    Prerequisites

    • Prepare a Linux system. In this guide we are using Ubuntu 14.04.4.
    • Have a cops.example.com DNS A record pointing to the IP of your server.

    Install necessary packages

    $ sudo apt-get -y samba nginx php5-fpm php5-gd php5-sqlite php5-json php5-intl git
    

    Setup a SAMBA share

    Samba is needed for sharing the Calibre library directory with the library administrator. Alternatively you could use NFS or even OwnCloud.

    Note

    It is a security risk to expose Samba on a public server. Restrict it through firewall or use OwnCloud instead.

    • Tweak the Samba configuration file (/etc/samba/smb.conf):
      #  unix password sync = yes
         unix password sync = no
      
      #  pam password change = yes
         pam password change = no
      
    • Add a Samba share for calibre (/etc/samba/smb.conf):
      [calibre$]
      path = /srv/calibre
      valid users = calibre
      write list = calibre
      read only = no
      
    • Restart Samba services:
      $ sudo service smbd restart ; sudo service nmbd restart
      
    • Add the calibre user:
      $ useradd -m -d /srv/calibre -s /usr/sbin/nologin calibre
      $ smbpasswd -a calibre
      

    Setup Calibre

    • Now you should setup Calibre on your PC. On Debian/Ubuntu:
      $ sudo apt-get -y install calibre
      

      Windows users can download it from here:

      http://calibre-ebook.com/download_windows

    • Configure Calibre to use the calibre share as its catalog:

      • You can "mount" the calibre share on Linux or "map" the share on Windows.
      • Create an ebook Directory under the calibre share.
      • Create a new Calibre library inside the ebook directory. From the Calibre menu:
        • Callibre Library –> Switch/create library -> Create an empty Library at the new location and fill the path in the "New Location" text field.
      • If you get an error about "Corrupted database" just click ‘Yes" to rebuilt it.
      • Start adding books

    Setup COPS OPDS

    • Download the software:
      $ mkdir /var/www
      $ cd /var/www
      $ git clone https://github.com/seblucas/cops.git
      
    • Setup COPS:

      Under the /var/www/cops/ directory, copy the config_default.php.example to config_default.php:

      $ cp config_local.php.example config_local.php
      

      Make the following changes in config_default.php:

      < ?php
          if (!isset($config))
              $config = array();
      
          /*
           * The directory containing calibre's metadata.db file, with sub-directories
           * containing all the formats.
           * BEWARE : it has to end with a /
           */
          $config['calibre_directory'] = '/srv/calibre/ebooks/';
      
          /*
           * Catalog's title
           */
          $config['cops_title_default'] = 'My Ebook Portal';
      
          $config['calibre_internal_directory'] = '/ebooks/';
      
          $config['cops_full_url'] = 'cops.example.com';
      
          $config['cops_x_accel_redirect'] = 'X-Accel-Redirect';
      
          /*
           * use URL rewriting for downloading of ebook in HTML catalog
           * See README for more information
           *  1 : enable
           *  0 : disable
           */
          $config['cops_use_url_rewriting'] = '1';
      

    Setup nginx

    • Create an /etc/nginx/sites-available/cops.example.com
      server {
      
          listen 80 default_server;
          listen [::]:80 default_server ipv6only=on;
      
          server_name cops.example.com;
      
          access_log  /var/log/nginx/cops.access.log;
          error_log /var/log/nginx/cops.error.log;
          root   /var/www/cops;
          #index feed.php;
          index index.php;
      
          #Useful only for Kobo reader
          location /download/ {
                rewrite ^/download/(\d+)/(\d+)/.*\.(.*)$ /fetch.php?data=$1&db=$2&type=$3 last;
                rewrite ^/download/(\d+)/.*\.(.*)$ /fetch.php?data=$1&type=$2 last;
                break;
              }
      
              #Can break loading the images - if you don't see anything, comment
              location ~ ^/images.*\.(gif|png|ico|jpg)$ {
                      expires 31d;
              }
              #Can also break loading the images, comment if it happens
              location ~ .(js|css|eot|svg|woff|ttf)$ {
                      expires 31d;
              }
      
          #Not necessarily correct, it depends on distro.
          location ~ \.php$ {
             try_files $uri =404;
             include /etc/nginx/fastcgi_params;
             fastcgi_param   SCRIPT_FILENAME  $document_root$fastcgi_script_name;
             fastcgi_pass    unix:/run/php5-fpm.sock;
          }
      
          location /ebooks {
              root /srv/calibre;
              internal;
          }
      }
      

      Note:

      The feed.php setting was redirecting me to an XML site with this error: This XML file does not appear to have any style information associated with it. The document tree is shown below. So I am using index.php instead, as the index file.

    • Enable the cops.example.com site and disable the default:
      $ cd /etc/nginx/sites-enabled/
      $ sudo ln -s /etc/nginx/sites-available/cops.example.com
      $ sudo unlink default
      
    • Restart nginx and php5-fpm:
      $ sudo service php5-fpm restart ; sudo service nginx restart
      
    • Change permissions to let nginx write to the library:
      $ usermod -a -G calibre www-data
      $ chmod -R g+w /srv/calibre/ebooks/
      

    Now you can navigate to http://cops.example.com and enjoy your newly created ebook library!

    References

    • https://github.com/seblucas/cops
    • http://blog.slucas.fr/en/oss/calibre-opds-php-server
    • https://github.com/seblucas/cops/wiki/Full-example-with-Nginx
    Categories
    Linux

    Introduction to the KVM Hypervisor (for Ubuntu)

    The KVM hypervisor is a virtualization system included with the Linux kernel. Along with XEN is one of the most attractive virtualization platforms based on Linux.

    KVM offers several advantages over the more user-friendly, VirtualBox. Since it is integrated into the mainstream Linux kernel, it boasts significant performance benefits [1]. Furthermore it is better suited as a virtualization platform solution while VirtualBox is better suited for short-term tests and casual, user owned, VMs. KVM supports many guest operating systems so you can use Linux, Unix, Windows or something more exotic.

    Install KVM on your system

    1. Make sure your system supports KVM.

      KVM is only supported on systems with Hardware-Assisted Virtualization. If your system does not support HAV you can revert to QEMU, a system which KVM is based on.

    • First install CPU checker:

      $ sudo apt-get -y install cpu-checker
      

    • Check if KVM is supported:
      $ kvm-ok
      INFO: /dev/kvm exists
      KVM acceleration can be used
      

      Looks OK. Still you may need to check your BIOS/EFI whether this feature is enabled.

    1. Install KVM:

      $ sudo apt-get -y install qemu-kvm
      

    KVM Basic Usage

    You can use KVM directly. This method is suitable for testing or troubleshooting but not appropriate for production VMs.

    1. Create a disk image:
      $ qemu-img create -f qcow2 testvm.qcow2 20G
      Formatting 'testvm.qcow2', fmt=qcow2 size=21474836480 encryption=off cluster_size=65536 lazy_refcounts=off
      

      The qcow2 format grows dynamically so it does not really occupy 20GB:

      $ ls -lh testvm.qcow2 
      -rw-r--r-- 1 theo theo   193K Μάι  14 18:43 testvm.qcow2
      
    2. Start a VM instance, to setup your system:
      $ kvm -m 1024 -hda testvm.qcow2 -cdrom ~/Downloads/ubuntu-15.04-desktop-amd64.iso -boot d -smp 2
      

      The options are explained below:

      • -m: memory in MB
      • -hda: first disk image to use
      • -cdrom: you can use an .iso file (ubuntu-15.04-desktop-amd64.iso) or a physical CD-ROM (/dev/sr0).
      • -boot: choose where to boot from. A parameter of d tells KVM to use the cdrom for booting.
      • -smp: Stands for Symmetric Multiprocessing. 2 is the number of CPUs available to the VM.

      After you run the command above you will get a window with your VM running in it:

      KVM VM

      This window will capture your mouse and keyboard when you work in it. If you want to return to your host OS just press Ctrl-Alt together and they will both be released.

    3. Run your VM.

      After the installation is finished you can run your VM from the disk image.

      • First let’s check the size of your disk:
        $ ls -lh testvm.qcow2
        -rw-r--r-- 1 theodotos theodotos 5,9G Μάι  14 19:33 testvm.qcow2
        

      So after the installation of Ubuntu Desktop 15.04 (Vivid Vervet) the disk image has grown to 5.9GB.

      • Run the VM from the disk image:
        $ kvm -m 1024 -hda testvm.qcow2 -smp 2
        

      A new window will pop up with the freshly installed OS.

    Running KVM under libvirt

    The libvirt system, is a platform for running VMs under many different hypervisors using a common API and toolset. It supports KVM, XEN, QEMU, VirtualBox and many others. This is the preferred method of using KVM because the VMs are globally available to privileged (local and remote) users, it facilitates VM management and you can configure autostart and many other features.

    1. Setting up libvirt:
      $ sudo apt-get -y install libvirt-bin
      
    2. Give appropriate permissions to the users expected to manage your VMs:
      $ sudo usermod -a -G libvirtd theo
      

      The theo user will be added as a member in the libvirtd group. After that you will need to log-out, for the permission to be activated.

    Creating a libvirt ready VM

    There are many tools to create VMs for libvirt. In this section we are going to examine two of them: virt-install and uvtool.

    1. Using virt-install.

      The advantage of virt-install is being distro agnostic. That means you can use it to install Debian, Ubuntu, RHEL, CentOS, Fedora, SUSE and many other distros as well.

      • Install virt-install:
        $ sudo apt-get -y install virtinst
        
      • Create a machine:
        $ sudo virt-install -n testvm -r 512 --disk path=/var/lib/libvirt/images/testvm.img,bus=virtio,size=4 -c ~/Downloads/ubuntu-14.04.2-server-amd64.iso --network network=default,model=virtio --graphics vnc,listen=127.0.0.1 --noautoconsole -v
        
        Starting install...
        Allocating 'testvm.img'                     | 4.0 GB     00:00     
        Creating domain...                          |    0 B     00:01     
        Domain installation still in progress.  You can reconnect to 
        the console to complete the installation process.
        
        • -n: VM name
        • -r: RAM in MB
        • –disk: Path for the virtual disk.
        • -c: defive the .iso file or CDROM device to use for the OS installation.
        • –network: Select your preferred networking mode.
        • –graphics: Select the graphics protocol. We are using VNC here that allows connections only from localhost. You can use the 0.0.0.0 (any) instead if 127.0.0.1 IP to allow connections from elsewhere.
        • –noautoconsole: do not run the guest console.
    • Connect to the VM and setup the guest OS:
      $ xtightvncviewer 127.0.0.1
      

      The VNC client will connect to the default VNC port which is 5900. You can append ::<port> to the hostname or IP address if you want to use a different port, e.g. xtightvncviewer 127.0.0.1::5901

      NOTE: If xtightvncviewer is not installed you can install it with sudo apt-get install xtightvncviewer. You can also use a graphical VNC client like Remmina.

  • Verify that the machine is created:

     $ virsh list --all
      Id    Name                           State
       ----------------------------------------------------
       -     testvm                         shut off
    

    The machine will appear as shut off after the OS setup finishes.

  • Start the VM:

    $ virsh start testvm
      Domain testvm started
    

  • Verify that the VM is started:
    $ virsh list
    Id    Name                         State
    ----------------------------------------
    3     testvm                     running
    
    1. Install a VM using uvtool:

      The uvtool is a tool to create minimal VMs. Unlike virt-install you can create only Ubuntu VMs but the overall setup is taken care by uvtool.

      • Install uvtool:
        $ sudo apt-get -y install uvtool uvtool-libvirt
        
      • Create a local repository of ubuntu-cloud images:
        $ uvt-simplestreams-libvirt sync release=trusty arch=amd64
        

      This command will download the trusty (14.04) release locally.

      • Query for local repository
        $ uvt-simplestreams-libvirt query
        release=trusty arch=amd64 label=release (20150506)
        
      • Generate an ssh key pair (unless you already have one):
        $ ssh-keygen -b 4096
        
      • Create a uvt based VM:
        $ uvt-kvm create --cpu 2 --memory=1024 --disk=10 testuvt
        

      This will create a trusty VM with 2 CPUs, 1GB RAM and 10 GB disk.

    • Verify the machine creation:

      $ virsh list
       Id    Name                           State
        ----------------------------------------------------
         5     testuvt                        running
      

    • Connect to your VM:

      $ uvt-kvm ssh testuvt --insecure

      You can get root access, on the VM, with sudo -i.

    Managing libvirt using the graphical Virtual Machine Manager

    Virtual Machine Manager is a front-end to libvirt. It help system administrators managing their VMs using a convenient graphical interface.

    1. Installing Virtual Machine Manager:
      $ sudo apt-get -y install virt-manager
      
    2. Running Virtual Machine Manager:
    • You can find it in the application menu or run virt-manager from the command line.
      virt-manager-1.png

      As you can see the two VMs we created earlier, are already there.

    1. Creating a new machine.

      • Press the Create a new machine icon:
        virt-manager-2.png
    2. New VM options.
    • Select one of the following option to continue:
      virt-manager-3.png
      Each option provides different steps. You may need to read the documentation for all the details. The first option is the most straight forward.

    Managing your VMs with virsh

    1. Listing machines.
    • List only running machines:

      $ virsh list
       Id    Name                           State
        ----------------------------------------------------
         5     testuvt                        running
      

    • List all machines:
      $ virsh list --all
       Id    Name                           State
        ----------------------------------------------------
         5     testuvt                        running
         -     testvm                         shut off
      
    1. Starting machines:
      $ virsh start testvm
      Domain testvm started
      
    2. Shutdown machines:
      $ virsh shutdown testvm
      Domain testvm is being shutdown
      
    3. Restart machines:
      $ virsh reboot testuvt
      Domain testuvt is being rebooted
      
    4. Set machines to autostart:
      • Enable autostart:
        $ virsh autostart testuvt
        Domain testuvt marked as autostarted
        
      • Disable autostart
        $ virsh autostart --disable testuvt
        Domain testuvt unmarked as autostarted
        
    5. Other useful virsh commands:
      • console: get console access to a VM.
      • destroy: destroy (delete) a machine.
      • dominfo: get the machine details.
      • migrate: migrate a machine to another libvirt host.
      • save: save the machine state.
      • snapshot-create: create a snapshot of the machine.

      To see all the supported commands you can run virsh --help.

    Learning to use libvirt is of great value to a Linux sysadmin because the same commands apply for KVM, XEN, VirtualBox, even container systems like OpenVZ and LXC.

    References

    • [1] http://www.phoronix.com/scan.php?page=article&item=ubuntu_1404_kvmbox&num=5
    • [2] https://help.ubuntu.com/14.04/serverguide/virtualization.html
    • [3] https://help.ubuntu.com/community/KVM</port>
    Categories
    Linux

    Adding a new disk in an existing Volume Group (LVM)

    This is a guide about adding a new disk to an existing [LVM](http://en.wikipedia.org/wiki/Logical_Volume_Manager_%28Linux%29 "Logical Volume Manager") VG

    Check current setup

    1. First let’s check and document the current setup.
    • Checking the /proc filesystem:
      # cat /proc/partitions 
       major minor  #blocks  name
          8        0    7880544 sda
          8        1     248832 sda1
          8        2          1 sda2
          8        5    7628800 sda5
        252        0    6574080 dm-0
        252        1    1036288 dm-1
      
    • Using lsblk:
      # lsblk
      NAME                   MAJ:MIN RM  SIZE RO TYPE MOUNTPOINT
      sda                      8:0    0  7,5G  0 disk 
      ├─sda1                   8:1    0  243M  0 part /boot
      ├─sda2                   8:2    0    1K  0 part 
      └─sda5                   8:5    0  7,3G  0 part 
        ├─ubuntu--vg-root   252:0    0  6,3G  0 lvm  /
        └─ubuntu--vg-swap_1 252:1    0 1012M  0 lvm  [SWAP]
      
    1. Check and document the LVM layout.
    • Volume Group info:
      # vgs
        VG         #PV #LV #SN Attr   VSize VFree 
        ubuntu-vg    1   2   0 wz--n- 7,27g 16,00m
      
    • Physical Volume info:
      # pvs
        PV         VG         Fmt  Attr PSize PFree 
        /dev/sda5  ubuntu-vg  lvm2 a--  7,27g 16,00m
      
    • Logical Volume info:
      # lvs
        LV     VG         Attr       LSize    Pool Origin Data%  Meta%  Move Log Cpy%Sync Convert
        root   ubuntu-vg  -wi-ao----    6,27g
        swap_1 ubuntu-vg  -wi-ao---- 1012,00m
      

    Add a new physical or virtual disk

    Now add the new disk on your server. On VMs it is possible to add a new disk without powering off. On physical servers this can be possible too if the server comes with hot-swap functionality. Check your server specs first!

    1. Check if the new disk is detected.
    • You can use this command if you want your system to detect the new disk without rebooting:
      # for SCSI_HOST in /sys/class/scsi_host/* ; do echo "- - -" > $SCSI_HOST/scan ; done
      

      The above command simply loops through the SCSI hosts under the /sys/class/scsi_host directory and sends the "– – –" string to them. This forces the SCSI hosts to detect the new disk that has been attached.

    • Using the /proc filesystem:

      # cat /proc/partitions
      major minor  #blocks  name<br />
         8        0    7880544 sda
         8        1     248832 sda1
         8        2          1 sda2
         8        5    7628800 sda5
         8       16   31522680 sdb
       252        0    6574080 dm-0
       252        1    1036288 dm-1
      

      The size of the disk in GB, is 30GB:

      # echo '31522680/1024/1024' | bc -l
      30.06237030029296875000
      

    • Using lsblk:
      # lsblk
      NAME                   MAJ:MIN RM  SIZE RO TYPE MOUNTPOINT
      sda                      8:0    0  7,5G  0 disk 
      ├─sda1                   8:1    0  243M  0 part /boot
      ├─sda2                   8:2    0    1K  0 part 
      └─sda5                   8:5    0  7,3G  0 part 
         ├─ubuntu--vg-root   252:0    0  6,3G  0 lvm  /
         └─ubuntu--vg-swap_1 252:1    0 1012M  0 lvm  [SWAP]
      sdb                      8:16   0 30,1G  0 disk
      

    Add the new disk to LVM Volume Group

    1. Create a new partition on the new disk:
      # fdisk /dev/sdb
      
      Welcome to fdisk (util-linux 2.25.2).
      Changes will remain in memory only, until you decide to write them.
      Be careful before using the write command.
      
      Device does not contain a recognized partition table.
      Created a new DOS disklabel with disk identifier 0xaea3ab78.
      
      Command (m for help): n
      Partition type
        p   primary (0 primary, 0 extended, 4 free)
        e   extended (container for logical partitions)
      Select (default p):< Using default response p.
      Partition number (1-4, default 1): 
      First sector (2048-63045359, default 2048): 
      Last sector, +sectors or +size{K,M,G,T,P} (2048-63045359, default 63045359):
      
      Created a new partition 1 of type 'Linux' and of size 30,1 GiB.
      
      Command (m for help): t
      Selected partition 1
      Hex code (type L to list all codes): <strong>8e
      Changed type of partition 'Linux' to 'Linux LVM'.
      
      Command (m for help): <strong>w</strong>
      The partition table has been altered.
      Calling ioctl() to re-read partition table.
      Syncing disks.
      
    2. Verify the creation of a new partition:
      # fdisk -l /dev/sdb
      
      Disk /dev/sdb: 30,1 GiB, 32279224320 bytes, 63045360 sectors
      Units: sectors of 1 * 512 = 512 bytes
      Sector size (logical/physical): 512 bytes / 512 bytes
      I/O size (minimum/optimal): 512 bytes / 512 bytes
      Disklabel type: dos
      Disk identifier: 0xaea3ab78
      
      Device     Boot Start      End  Sectors  Size Id Type
      /dev/sdb1        2048 63045359 63043312 30,1G 8e Linux LVM
      

    Add the new partition to the Volume Group

    1. Extend the Volume Group by adding a new disk:
      # vgextend ubuntu-vg /dev/sdb1
       Physical volume "/dev/sdb1" successfully created
       Volume group "ubuntu-vg" successfully extended
      
    2. Check the current free space of the Volume Group:
      # vgs
       VG        #PV #LV #SN Attr   VSize  VFree 
       ubuntu-vg   2   2   0 wz--n- 37,33g 30,07g
      
    3. Verify the new Physical Volume:
      # pvs
       PV         VG        Fmt  Attr PSize  PFree 
       /dev/sda5  ubuntu-vg lvm2 a--   7,27g 16,00m
       /dev/sdb1  ubuntu-vg lvm2 a--  30,06g 30,06g
      
    4. Check the state of the Logical Volumes:
      # lvs
       LV     VG        Attr       LSize    Pool Origin Data%  Meta%  Move Log Cpy%Sync Convert
       root   ubuntu-vg -wi-ao---- 6,27g     
       swap_1 ubuntu-vg -wi-ao---- 1012,00m
      

      Nothing changed yet, of course.

    Resize the logical volume

    1. Use the lvresize command to resize the root volume:

      # lvresize -L 30,07g /dev/ubuntu-vg/root
       Rounding size to boundary between physical extents: 30,07 GiB
       Size of logical volume ubuntu-vg/root changed from 6,27 GiB (1605 extents) to 30,07 GiB (7698 extents).
       Logical volume root successfully resized
      

    2. Verify the volume resize:
      # lvs
       LV     VG        Attr       LSize    Pool Origin Data%  Meta%  Move Log Cpy%Sync Convert
       root   ubuntu-vg -wi-ao----   30,07g
       swap_1 ubuntu-vg -wi-ao---- 1012,00m
      

      The root volume is now at 30,07GB. Good.

    Resize the filesystem

    1. Check the current filesystem size:

      # df -hT
      Filesystem                   Type      Size  Used Avail Use% Mounted on
      udev                         devtmpfs  485M     0  485M   0% /dev
      tmpfs                        tmpfs     100M  5,1M   95M   6% /run
      /dev/mapper/ubuntu--vg-root  ext4      <strong>6,1G</strong>  2,4G  3,4G  41% /
      tmpfs                        tmpfs     496M     0  496M   0% /dev/shm
      tmpfs                        tmpfs     5,0M  4,0K  5,0M   1% /run/lock
      tmpfs                        tmpfs     496M     0  496M   0% /sys/fs/cgroup
      /dev/sda1                    ext2      236M   40M  184M  18% /boot
      tmpfs                        tmpfs     100M   16K  100M   1% /run/user/1000
      

      Still using the old size, as expected.

    2. Resize the root filesystem:

      # resize2fs /dev/mapper/ubuntu--vg-root
      resize2fs 1.42.12 (29-Aug-2014)
      Filesystem at /dev/mapper/ubuntu--vg-root is mounted on /; on-line resizing required
      old_desc_blocks = 1, new_desc_blocks = 2
      The filesystem on /dev/mapper/ubuntu--vg-root is now 7882752 (4k) blocks long.
      

    3. Verify the new size of the root filesystem:
      # df -hT
      Filesystem                   Type      Size  Used Avail Use% Mounted on
      udev                         devtmpfs  485M     0  485M   0% /dev
      tmpfs                        tmpfs     100M  5,1M   95M   6% /run
      /dev/mapper/ubuntu--vg-root  ext4       30G  2,4G   26G   9% /
      tmpfs                        tmpfs     496M     0  496M   0% /dev/shm
      tmpfs                        tmpfs     5,0M  4,0K  5,0M   1% /run/lock
      tmpfs                        tmpfs     496M     0  496M   0% /sys/fs/cgroup
      /dev/sda1                    ext2      236M   40M  184M  18% /boot
      tmpfs                        tmpfs     100M   16K  100M   1% /run/user/1000
      

    So now we have a logical root volume that expands across multiple physical disks. Notice, however, that this is not a very solid setup, since the loss of one of the physical volumes can bring down the whole system along with your data. Thus make sure that you have a solid and tested backup procedure in place. The restore procedure should also be documented in every detail in your disaster recovery practices.

    References

    • http://tldp.org/HOWTO/LVM-HOWTO/index.html
    • http://wingloon.com/2013/05/07/how-to-detect-a-new-hard-disk-without-rebooting-vmware-linux-guest/
    Categories
    Linux

    Increasing the disk size of a Linux VM

    In this guide we examine how to increase the disk size of a linux VM, when the need arises.

    Note
    Make sure you backup everything you have on your system, before trying this guide. This is an advanced HOWTO and it can break your system, irrecoverably, if you make a critical mistake!

    This guide assumes that you are using the Linux Logical Volume Manager (LVM) to manage your storage. If you are new to the concept of LVM you can study the excellent LVM HOWTO from The Linux Documentation Project website.

    Even though it may be possible to resize a Linux system without using LVM, an LVM setup is highly recommended. No matter if you are working on a physical or virtual machine, LVM is the preferred method of storage management in Linux, since it simplifies tasks related to storage, including volume resizing.

    Another assumption is that the disk is using the legacy MBR partition table format. But the guide can easily be adapted to disks using a GPT format.

    Increasing the size of the virtual disk

    In this guide we are using VMware but this section can be easily adapted to different virtualization systems.

    1. Before increasing the disk size, it is a good idea to consolidate the snapshots of your VM. Right click and go to: <br />Snapshots -> Consolidate:

      Consolidate Snapshots

    • Press ‘OK’ when asked to do so. When the confirmation dialog appears, press ‘Yes’:

      Confirm Consolidate
      When the operation is completed (Check the ‘Recent Tasks’ pane) move to the next step.

    1. Right click on the VM again and go to Edit Settings. From here, choose the disk you wish to enlarge:

      Enlarge Disk
      Change the size to your desired size and press OK. In my case I will change a 10G size hard disk to 65G. Press ‘OK’ when done.

    Now we should move to our linux system.

    Force Linux to detect the changes in the disk size

    1. Check the detected disk size:
      # cat /proc/partitions
      major minor  #blocks  name
      
        8        0   10485760 sda
        8        1     248832 sda1
        8        2          1 sda2
        8        5   10233856 sda5
       11        0    1048575 sr0
      254        0    9760768 dm-0
      254        1     471040 dm-1
      

      As you can see the primary disk (sda) has a size of 10485760KB, which translates to 10GB:

      # echo '10485760/1024/1024' | bc -l
      10.00000000000000000000
      
    2. Find the SCSI subsystem buses:
      # ls /sys/class/scsi_device/
      0:0:0:0  2:0:0:0
      

      0:0:0:0 is the primary bus.

  • Rescan for disk changes:

    # echo 1 > /sys/class/scsi_device/0\:0\:0\:0/device/rescan
    

  • Check the new size:
    # cat /proc/partitions
    major minor  #blocks  name
    
      8        0   68157440 sda
      8        1     248832 sda1
      8        2          1 sda2
      8        5   10233856 sda5
     11        0    1048575 sr0
    254        0    9760768 dm-0
    254        1     471040 dm-1
    

    The size is now 65G:

    # echo '68157440/1024/1024' | bc -l
    65.00000000000000000000
    
  • Resize the partition used by the LVM Physical Volume (PV)

    1. Check which partition is used by the PV:
      # pvs
       PV         VG         Fmt  Attr PSize PFree
       /dev/sda5  myvgroup   lvm2 a--  9,76g    0
      

      So only the /dev/sda5 partition is used by LVM.

    2. Backup the partition table:

      # sfdisk -d /dev/sda > sda-part.mbr
      

      Now you need to save that file elsewhere because when if partition table goes down the drain, you will have no way to access the partition table backup file. You could use scp to transfer the file on another system:

      # scp sda-part.mbr user@another-server:
      

      If you need to restore the partition table you can use a recovery/live cd or usb like this:

      # scp user@another-server:sda-part.mbr
      # sfdisk /dev/sda < sda-part.mbr
      

      Note
      You can use sgdisk for disks with GPT tables.
      Backup:
      sgfdisk -b sda-part.gpt /dev/sda.
      Restore: sgfdisk -l sda-part.gpt /dev/sda

    3. Resize the partition used by the PV.
    • Check the size of the partition:

      # sfdisk -d /dev/sda
      Warning: extended partition does not start at a cylinder boundary.
      DOS and Linux will interpret the contents differently.
      # partition table of /dev/sda
      unit: sectors
      
      /dev/sda1 : start=     2048, size=   497664, Id=83, bootable
      /dev/sda2 : start=   501758, size= 20467714, Id= 5
      /dev/sda3 : start=        0, size=        0, Id= 0
      /dev/sda4 : start=        0, size=        0, Id= 0
      /dev/sda5 : start=   501760, size= 20467712, Id=8e
      

    • Mark down the details of the sda2 and sda5 partitions in the following table:
      Partition Start Sector size in KB size in Sectors
      sda2 501758 10233857 20467714
      sda5 501760 10233856 20467712

      Note
      Each Sector is 512 bytes. So the number of Sectors is double the number of KBytes (1024 Bytes). The logical sda5 partition is 1KB (or 2 Sectors) smaller than the extended sda2 partition.*

    • Calculate the sizes of the new partitions:

      The total size of the sda disk is 68157440KB which translates to 136314880 Sectors. So the new size (in Sectors) of sda2 would be:

      # echo 136314880-501758 | bc -l
      135813122
      

      The size, in sectors, of sda5 would be:

      # echo 136314880-501760 | bc -l
      135813120
      

      According to the calculations above, the new table with the partition details would be:

      Partition Start Sector size in KB size in Sectors
      sda2 501758 67906561 135813122
      sda5 501760 67906560 135813120
    • Resize the sda2 (extended) and sda5 partitions.

      Copy the sda-part.mbr file to sda-part-new.mbr and make the following changes to sda-part-new.mbr:

      # partition table of /dev/sda
      unit: sectors
      /dev/sda1 : start=     2048, size=    497664, Id=83, bootable
      /dev/sda2 : start=   501758, size= 135813122, Id= 5
      /dev/sda3 : start=        0, size=         0, Id= 0
      /dev/sda4 : start=        0, size=         0, Id= 0
      /dev/sda5 : start=   501760, size= 135813120, Id=8e
      

      Now apply these changes to the MBR using sfdisk:

      # sfdisk --no-reread /dev/sda < sda-part-new.mbr
      

      Ignore any warnings for now.

    • Verify the new partition table:

      # sfdisk -d /dev/sda
      Warning: extended partition does not start at a cylinder boundary.
      DOS and Linux will interpret the contents differently.
      # partition table of /dev/sda
      unit: sectors
      
      /dev/sda1 : start=     2048, size=   497664, Id=83, bootable
      /dev/sda2 : start=   501758, size=135813122, Id= 5
      /dev/sda3 : start=        0, size=        0, Id= 0
      /dev/sda4 : start=        0, size=        0, Id= 0
      /dev/sda5 : start=   501760, size=135813120, Id=8e
      

      It looks correct.

    • Verify that the linux kernel has been notified of the changes:

      # cat /proc/partitions 
      major minor  #blocks  name
      
         8        0   68157440 sda
         8        1     248832 sda1
         8        2          1 sda2
         8        5   10233856 sda5
        11        0    1048575 sr0
       254        0    9760768 dm-0
       254        1     471040 dm-1
      

      It looks like the system still sees the old partition size. You could use a utility like partprobre, kpartx or even sfdisk to force the kernel to re-read the new partition table:

      # sfdisk -R /dev/sda
      BLKRRPART: Device or resource busy
      This disk is currently in use.
      

      Alas if the partition is in use, the kernel will refuse to re-read the partition size. In that case just schedule a reboot and try again.

      After the system reboot:

      # cat /proc/partitions
      major minor  #blocks  name
      
         8        0   68157440 sda
         8        1     248832 sda1
         8        2          1 sda2
         8        5   67906560 sda5
        11        0    1048575 sr0
       254        0    9760768 dm-0
       254        1     471040 dm-1
      

      So the new size of the sda5 partition is 64,76GB:

      # echo '67906560/1024/1024' | bc -l
      64.76074218750000000000
      

      If the partition size has increased, we can move on to the next step.

    Resize the Physical Volume (PV).

    1. Check the size of the Physical Volume:

      # pvs
       PV         VG        Fmt  Attr PSize PFree
       /dev/sda5  ubuntu-vg lvm2 a--  9,76g    0 
      

      So the size of the PV is still 9,76GB.

    2. Resize the PV:

      # pvresize /dev/sda5
       Physical volume "/dev/sda5" changed
       1 physical volume(s) resized / 0 physical volume(s) not resized
      

    3. Verify that the size is resized:
      # pvs
       PV         VG        Fmt  Attr PSize  PFree 
       /dev/sda5  ubuntu-vg lvm2 a--  64,76g 55,00g
      

      So the new size of the PV is 64,8GB.

    Resize the logical volume.

    1. Check the current size of the logical volume (used for the root filesystem):

      # lvs
       LV     VG        Attr     LSize   Pool Origin Data%  Move Log Copy%  Convert
       root   ubuntu-vg -wi-ao--   9,31g
       swap_1 ubuntu-vg -wi-ao-- 460,00m
      

      The root volume is still at 9,3GB.

    2. Check the free space:

      # vgs
       VG        #PV #LV #SN Attr   VSize  VFree 
       ubuntu-vg   1   2   0 wz--n- 64,76g 55,00g
      

    3. Resize the root logical volume:
      # lvresize -L +55,00g /dev/mapper/ubuntu-vg-root
       Extending logical volume root to 64,31 GiB
       Logical volume root successfully resized
      
    4. Verify LV resize:
      # lvs
      LV     VG        Attr     LSize   Pool Origin Data%  Move Log Copy%  Convert
      root   ubuntu-vg -wi-ao--  64,31g
      swap_1 ubuntu-vg -wi-ao-- 460,00m
      

      The root logical volume size is now at 65,3GB

    Resize the root filesystem.

    1. Check the current size of the root filesystem:

      # df -hT
      Filesystem                  Type      Size  Used Avail Use% Mounted on
      rootfs                      rootfs    9,2G  2,2G  6,6G  25% /
      udev                        devtmpfs   10M     0   10M   0% /dev
      tmpfs                       tmpfs     101M  204K  101M   1% /run
      /dev/mapper/ubuntu-vg-root  ext4      9,2G  2,2G  6,6G  25% /
      tmpfs                       tmpfs     5,0M     0  5,0M   0% /run/lock
      tmpfs                       tmpfs     201M     0  201M   0% /run/shm
      /dev/sda1                   ext2      228M   18M  199M   9% /boot
      

      So the root filesystem is still at 9,2GB.

    2. Resize the file system:

      # resize2fs /dev/mapper/ubuntu-vg-root
      resize2fs 1.42.5 (29-Jul-2012)
      Filesystem at /dev/mapper/ubuntu-vg-root is mounted on /; on-line resizing required
      old_desc_blocks = 1, new_desc_blocks = 5
      Performing an on-line resize of /dev/mapper/ubuntu-vg-root to 16858112 (4k) blocks.
      The filesystem on /dev/mapper/ubuntu-vg-root is now 16858112 blocks long.
      

    3. Verify that the filesystem has been resized:
      # df -hT
      Filesystem                  Type      Size  Used Avail Use% Mounted on
      rootfs                      rootfs     64G  2,2G   58G   4% /
      udev                        devtmpfs   10M     0   10M   0% /dev
      tmpfs                       tmpfs     101M  204K  101M   1% /run
      /dev/mapper/ubuntu-vg-root  ext4       64G  2,2G   58G   4% /
      tmpfs                       tmpfs     5,0M     0  5,0M   0% /run/lock
      tmpfs                       tmpfs     201M     0  201M   0% /run/shm
      /dev/sda1                   ext2      228M   18M  199M   9% /boot
      

    So now you have 55GB of additional storage on your root partition, to satisfy your increasing storage needs.

    References

    • https://ma.ttias.be/increase-a-vmware-disk-size-vmdk-formatted-as-linux-lvm-without-rebooting/
    • http://gumptravels.blogspot.com/2009/05/using-sfdisk-to-backup-and-restore.html
    • http://askubuntu.com/questions/57908/how-can-i-quickly-copy-a-gpt-partition-scheme-from-one-hard-drive-to-another
    Categories
    Linux

    How to set up your own LAMP server on Ubuntu 14.04 (aka Trusty Tahr)

    You sail with no lights in the midnight dark.

    Afraid of betrayal by lights from the land,

    alone and thoughtful, you walk the deck,

    clutching Aladdin’s lamp in your hand.

    ~ Nikos Kavvadias ~

    In this guide we are setting up an Ubuntu/Linux based webserver with a database backend and using the PHP scripting language. The term LAMP is not related to lighting, nor Middle Eastern tales but refers to the combination of Linux, Apache, MySQL MariaDB and PHP.

    Traditionally we have been using MySQL for this task but since Ubuntu 14.04, MariaDB is available from the stock Ubuntu repos. It is recommended to  use MariaDB over the beloved MySQL, because the future of the latter is not so promising after the purchase from Oracle.

    We will also be using VirtualBox to install Ubuntu Server on a virtual machine but you can follow this guide on an actual computer or on your cloud/hosting provider.

    To complete this guide you will need to download a copy of the latest Ubuntu Server ISO image (current version 14.04.2)

    Setting up the Virtual Machine

    1. Install VirtualBox:
      Make sure you have VirtualBox installed. If not, you can download it from your package manager or from command line (works for Ubuntu and Debian based systems):

      $ sudo apt-get -y install virtualbox

      If you are using a Windows PC you will need to go to the
      VirtualBox website and download it.

    2. Start VirtualBox:VBox-1
      Click on the New icon to create a new virtual machine.
    3. Setup the VM name:
      VBox-2
      Type Ubuntu-server in the Name and click ‘Next’.
    4. Setup the memory size.
      VBox-3
      The default 512 MB is enough but you may use 1024 if you have memory to spare.
    5. Setup the Virtual Hard Drive:
      • Create the Virtual Hard Drive:
        VBox-4
      • Select the format of the Hard Drive:
        VBox-5
        VDI is the default for VirtualBox.
      • Select the type of the Hard Drive:
        VBox-6
        Fixed size is supposedly better for performance but it will occupy space equal to its size on your disk. For testing purposes choose Dynamically allocated.
      • Select the size of your disk:
        VBox-7
        If you have chosen Dynamically allocated before, then your Hard Drive can be as large as 2,00 TB without actually occupying that much space on the physical  disk. 40,00 GB is more than enough.
    6. Setup Networking:
      The default network mode for newly created VirtualBox machines is NAT.  This mode is not very convinient if you want to access your VM from the physical host so we are changing that to Bridged Adapter.
      Warning: in some enterprise environments this could trigger the security defences of your network and lock you out! Please consult with you network administrator before enabling this at work!

      You can find more information about the VirtualBox networking modes here:
      VirtualBox Networking Modes

      • To setup Bridged Networking press the Settings icon:VBox-Net-1
      • The default mode in the Attached to: field is NAT:
        VBox-Net-2
      • Change NAT to Bridged Adapter:
        VBox-Net-3
        If you have more than one ethernet interfaces you will need to choose the correct one in the Name field. Usually the correct value is eth0 but this is not always the case. Press OK and you are done with networking.
    7. Start your VM:
      • Press the Start icon:
        VBox-8
      • Boot the Ubuntu ISO:
        VBox-9
        Click on the little folder icon on the right side.
      • Select the Ubuntu ISO file you downloaded earlier:
        VBox-10
      • Press Start to begin the installation:
        VBox-11

    The above procedure is for those that do not have a spare computer for testing. Building a VM is the safest way to experiment with all kind of setups without breaking your working computer.

    Now if you do have a spare computer you can skip the steps above and go straight to the steps below. On a physical computer you will need to burn the ISO file on a CD/DVD or write it on a USB stick, using the usb-creator on Ubuntu or UNetbootin  for other systems. You will need to setup your BIOS/UEFI to boot from the CD or USB first. On Windows 8 systems you may need to disable the abomination called Secure Boot.

    Setting up Ubuntu Server 14.04 (Trusty Tahr)

    Now prepare your pain-killers as this will take some time.

    1. Select the Language for the setup process:
      Ubuntu-Server-1
      This is the language during the installation. Choose English or whatever language you feel comfortable with. If you haven’t figured it out already, the mouse will not work here. Use the arrow keys to select the language and press ‘Enter’ to go to the next step. In case Virtualbox captures your mouse you can press the right Ctrl button to release it.
    2. Start the installation:
      Ubuntu-Server-2

      Select Install Ubuntu Server and press ‘Enter’.
    3. Select the system Language:
      Ubuntu-Server-3 Again select whatever language you need. This is the language for the system, after the installation is finished.
    4. Select your location:
      Ubuntu-Server-4
      If your location is not listed here choose Other and press ‘Enter’.
    5. Select your location now:
      Ubuntu-Server-5
    6. Select your country:
      Ubuntu-Server-6
    7. Select your Locale:
      Ubuntu-Server-7
      If you selected English before you will get a list of English speaking countries to choose from.
    8. Detect keyboard layout:
      Ubuntu-Server-8
      Select Yes if you are unsure of your keyboard layout. No is usually safe unless you have a weird keyboard.
    9. Choose the basic keyboard layout:
      Ubuntu-Server-9
    10. Select specific keyboard layout:
      Ubuntu-Server-10
      Select the first if you are unsure.

      • Wait for the setup to load all necessary components for the installation. If you are not connected to a DHCP enabled network, you will be prompted to give your network settings. Ask your network administrator for assistance.
    11. Select the hostname of your server:
      Ubuntu-Server-11
      Press ‘Tab’, select Continue and then ‘Enter’.
    12. Enter your name:
      Ubuntu-Server-12
      Nobody forces you to enter your actual name :).
    13. Enter your username:
      Ubuntu-Server-13
    14. Select your password:
      Ubuntu-Server-14
      This is a privileged account (using the sudo command) so you better choose a hard to guess password.
    15. Verify your password again:
      Ubuntu-Server-15
    16. Encrypt your home directory:
      Ubuntu-Server-16
      This will protect your personal files if you are paranoid. For testing it’s OK to choose No.
    17. Confirm your timezone:
      Ubuntu-Server-17
      If the time zone is correct select Yes otherwise No.
    18. Select the partitioning method:
      Ubuntu-Server-18The first option is simpler and probably OK for testing. But on a production server you may need to resize the partitions, create new ones and add more disks, so the LVM method is the recommended.
    19. Select the hard drive for the installation:
      Ubuntu-Server-19
    20. Confirm if you want to write to this hard drive:
      Ubuntu-Server-20
      Select Yes and press ‘Enter’. Make sure you don’t have any data you need on this drive!
    21. Select Disk Size for the system:
      Ubuntu-Server-21
      It’s OK to give all available disk size on a test machine.
    22. Write changes to disk:
      Ubuntu-Server-22
      Select Yes and press ‘Enter’.

      • Wait for the Base system installation to complete
    23. Setup your proxy server:
      Ubuntu-Server-23
      If you do not use a proxy server leave this field blank.
    24. Method to manage upgrades:
      Ubuntu-Server-24
      This is a tricky dilemma. If you choose No automatic updates you may forgot to apply updates and render your system vulnerable to attacks. If you choose Install security features automatically your system could break after an update. Choose wisely!
    25. Choose additional software to install:
      Ubuntu-Server-25
      It is a good idea to enable the OpenSSH server so you can access your machine remotely. There is also a LAMP option here but this will install the MySQL server  instead of MariaDB and you may wish to avoid that.

      • Wait for the additional software to be installed.
    26. Install the boot loader:
      Ubuntu-Server-26
      Select Yes here.
    27. Restart your machine:
      Ubuntu-Server-27
      Press Continue to restart the system.
    28. Welcome to your newly created Ubuntu server:
      Ubuntu-Server-28
      Congratulations if you have reached so far! You have just installed a fresh Ubuntu server ready to rock!

    Installing the LAMP stack

    Installing a LAMP environment is easy.  We will need to install the Apache webserver, the MariaDB relational database, PHP and the Apache PHP module.

    1.  Before we proceed with the LAMP stack installation it is a good idea to update/upgrade our system.The command below will download the lists containing the most fresh version of available packages.
      $ sudo apt-get update
      

      The following command will download the packages to be upgraded, remove obsolete packages and download new ones:

      $ sudo apt-get -y dist-upgrade
      
    2. Installing necessary packages:
      $ sudo apt-get -y install apache2 libapache2-mod-php5 mariadb-server php5-mysql 
      
    3. Set the root password for MariaDB:
      MariaDB-1
    4. Verify root password:
      MariaDB-2
    5. Accept the warning:
      MariaDB-3

    After the packages installation is finished we should be ready to go!

    Testing your web server

    Before testing we need to determine the IP address of the server. Run this command on the terminal of your webserver:

    $ ip addr
    1: lo: <LOOPBACK,UP,LOWER_UP> mtu 65536 qdisc noqueue state UNKNOWN group default 
     link/loopback 00:00:00:00:00:00 brd 00:00:00:00:00:00
     inet 127.0.0.1/8 scope host lo
     valid_lft forever preferred_lft forever
     inet6 ::1/128 scope host 
     valid_lft forever preferred_lft forever
    2: eth0: <BROADCAST,MULTICAST,UP,LOWER_UP> mtu 1500 qdisc pfifo_fast state UP group default qlen 1000
     link/ether 08:00:27:5a:6e:a9 brd ff:ff:ff:ff:ff:ff
     inet 192.168.56.101/24 brd 192.168.56.255 scope global eth0
     valid_lft forever preferred_lft forever
     inet6 fe80::a00:27ff:fe5a:6ea9/64 scope link 
     valid_lft forever preferred_lft forever

    The IP of your server is 192.168.56.101

    1. Testing your ssh connection:
      First lets check if ssh works on your server. Type the following command from the terminal of your PC:

      me@PC:~$ ssh user@192.168.56.101
      The authenticity of host '192.168.56.101 (192.168.56.101)' can't be established.
      ECDSA key fingerprint is e4:e7:ac:6c:68:ea:71:90:29:03:bc:92:8e:23:f7:0e.
      Are you sure you want to continue connecting (yes/no)? yes
      Warning: Permanently added '192.168.56.101' (ECDSA) to the list of known hosts.
      user@192.168.56.101's password: 
      Welcome to Ubuntu 14.04.1 LTS (GNU/Linux 3.13.0-35-generic x86_64)
      
       * Documentation: https://help.ubuntu.com/
      
       System information as of Mon Sep 15 11:36:04 EEST 2014
      
       System load: 0.09 Processes: 84
       Usage of /: 4.5% of 38.02GB Users logged in: 0
       Memory usage: 13% IP address for eth0: 192.168.56.101
       Swap usage: 0%
      
       Graph this data and manage this system at:
       https://landscape.canonical.com/
      
      Last login: Mon Sep 15 11:36:04 2014
      user@webserver:~$

      The first time you connect to any ssh system you get the warning that The authenticity of host ‘<myhost(myip)>’ can’t be established. This happens only the first time and it is a safe-guard against MITM attacks. Type yes (not y!) here.

      Then it will ask for your password. You will see nothing as you type it! That’s normal.

      If you password is correct you will be greeted by the system information in the command prompt.

    2. Testing your Apache webserver:
      Fire up your browser and type this URL in the address bar:
      http://192.168.56.101
      Test-Apache
      If you can see the above page in your browser, it means that your Apache webserver is up and running.
    3. Testing PHP:
      You need to create the following file under the Apache
      DocumentRoot (/var/www/html):
      Type the following commands on your server terminal:

      $ sudo -i
      [sudo] password for user:
      # cat > /var/www/html/phpinfo.php << EOF
      > <?php phpinfo(); ?>
      > EOF
      # exit
      $

      The command sudo -i will give you access as the super-privileged root user. Notice how the prompt changes frpm $ to #.

      The command cat … will create a new file /var/www/html/phpinfo.php with the content <?php phpinfo(): ?>. This is a nice way to test your PHP setup and get some basic information about your LAMP setup.

      The command exit will take you back to your normal user account. It is not considered a good practice to be logged in as root for too long.

      Finally direct your browser to http://192.168.56.101/phpinfo.php and expect to see something like this:
      Test-php-1
      If you scroll further down you will see that mysql is enabled too:
      Test-php-2
      For security reasons it may be a good idea to delete the
      phpinfo.php file afterwards:

      $ sudo rm /var/www/html/phpinfo.php
    4. Install phpMyAdmin (optional):
      $ sudo apt-get -y install phpmyadmin
    5. Let the package management system handle phpMyAdmin configuration:
      phpMyAdmin-1
    6. Type the MariaDB root password:
      phpMyAdmin-2
    7. Set the phpMyAdmin database password:
      phpMyAdmin-3
    8. Verify the password:
      phpMyAdmin-4
    9. Choose the correct webserver (apache2):
      phpMyAdmin-5
    10. Visit the phpMyAdmin URL:
      (http://192.168.56.101/phpmyadmin):
      phpMyAdmin-6
      Use the username root and the MariaDB root password to login.
    11. Now you can manage MariaDB through phpMyAdmin:
      phpMyAdmin-7

    This was the final test that ensures everything works as expected. Now you can start developing your PHP website or install a PHP application like WordPress or ownCloud.